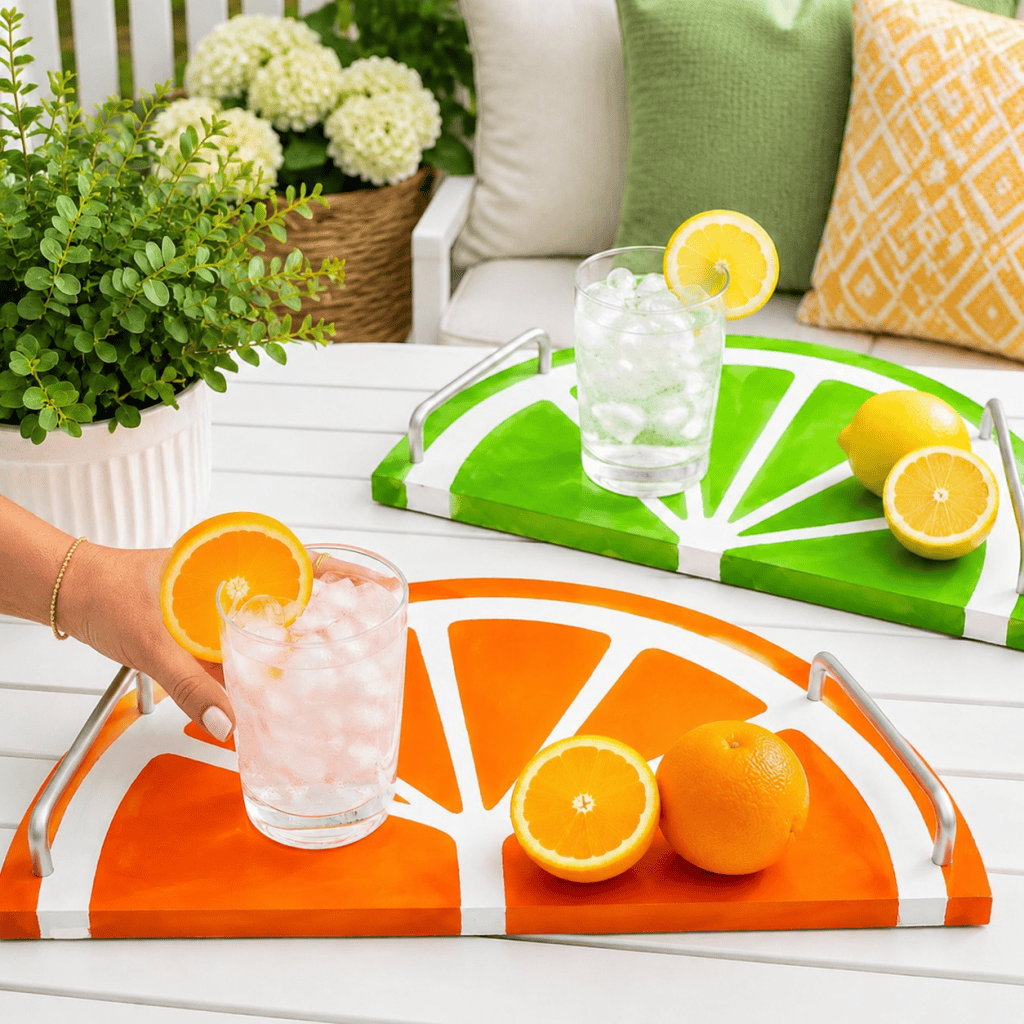
DIY Fruit Slice Serving Tray (Easy Painted Wood Slice Project with Handles)
Learn how to make a DIY fruit slice serving tray using a wooden slice, paint, and cabinet pulls. This easy handmade project is perfect for summer entertaining, gifting, or home décor.
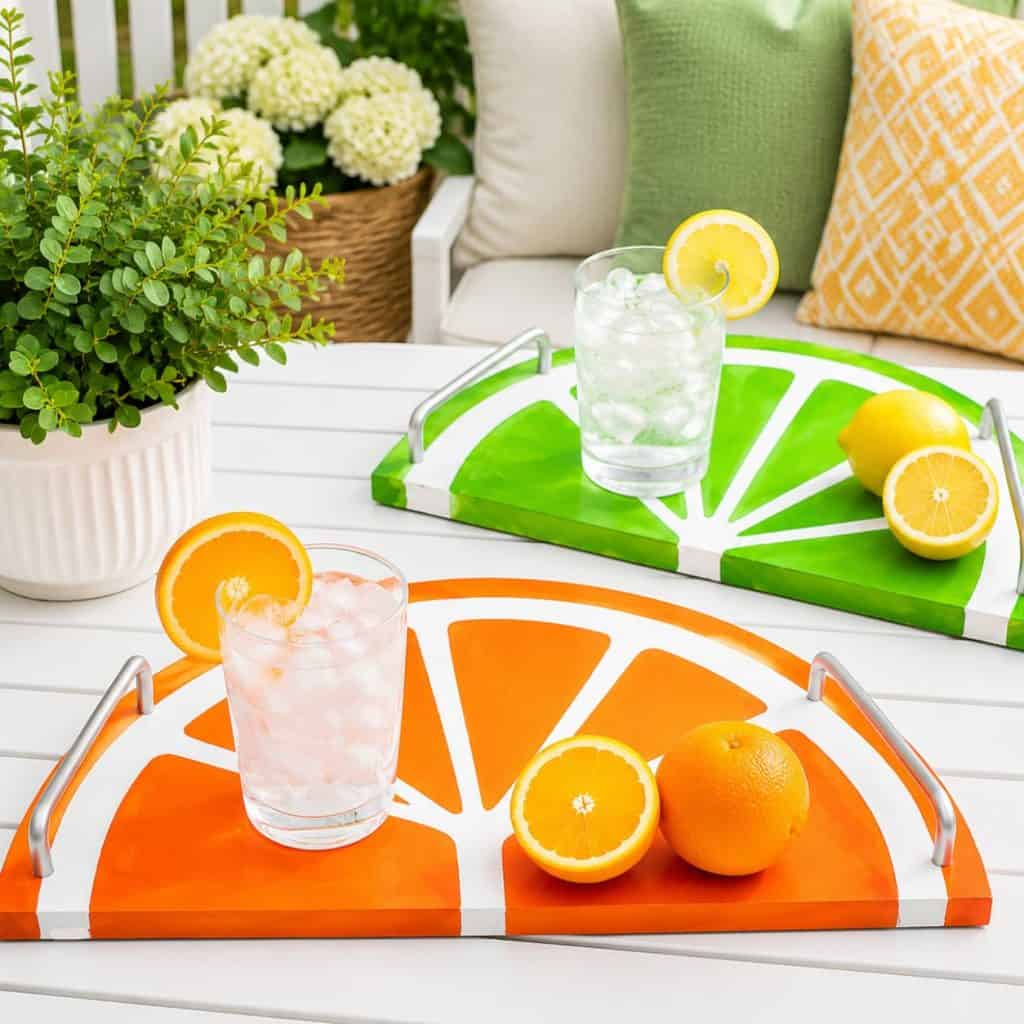
A DIY fruit slice serving tray is a simple but eye-catching project that turns an ordinary piece of wood into a functional piece of art. By cutting a wooden slice in half, painting a colorful fruit design on it, and attaching cabinet pulls as handles, you can create a charming serving tray that feels both playful and elevated.
This project is perfect for summer entertaining, casual gatherings, or even as a handmade gift. It has that same creative, seasonal feel as other easy DIY lifestyle projects featured on the blog, like cozy home accents and simple decorative crafts that bring personality into everyday spaces.
The best part? It looks custom and boutique-style, but it’s surprisingly easy to make with just a few basic supplies and no advanced woodworking skills.
Why You’ll Love This DIY Fruit Slice Tray
This project combines décor and function in the best way. It’s not just something pretty to look at—it’s something you can actually use.
Here’s why it’s so popular:
Budget-friendly DIY: Uses inexpensive materials
Customizable design: Choose any fruit or color palette
Functional décor: Works as a serving tray or display piece
Beginner-friendly: No advanced crafting skills needed
Perfect for gifting: Great handmade summer or housewarming gift
If you enjoy simple creative projects like seasonal knitting patterns or home décor ideas, this DIY fits perfectly into that same aesthetic lifestyle.
Looking for free knitting patterns? Browse this full collection of easy knitting patterns you can start today:
50 Free Knitting Patterns You’ll Actually Want to Make (Beginner-Friendly)
10 Easy Baby Knitting Patterns for Beginners
10 Quick Summer Knitting Patterns
15 Easiest Free Knitting Patterns
15 Easy Summer Knitting Patterns You Can Make This Weekend
10 Easy Baby Knitting Patterns That Look Impressive (But Are Actually Beginner-Friendly)
DIY Fruit Slice Serving Tray (Easy Painted Wood Slice Project with Handles)
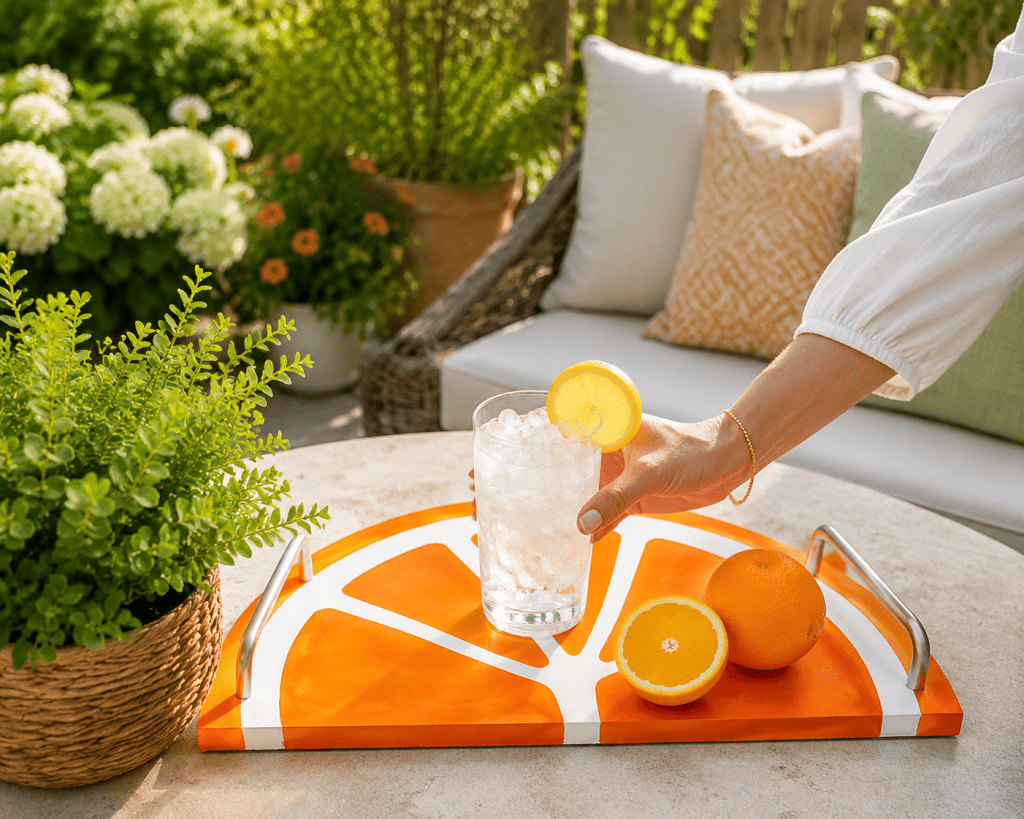
This Fruit Slice Tray is perfect for your next gathering, and what screams “summer” more than fresh, juicy fruit?
Supplies You’ll Need
Before you begin, gather all your materials so the process is smooth and easy.
Sandpaper (optional for smoothing edges)
One wooden slice (cut in half) or thick wood board (available at home improvement stores)
Acrylic paint (for fruit design)
Paint brushes (various sizes)
Pencil for sketching design
Clear sealant or varnish (food-safe if using for serving)
2 cabinet pulls (handles)
Drill and screws
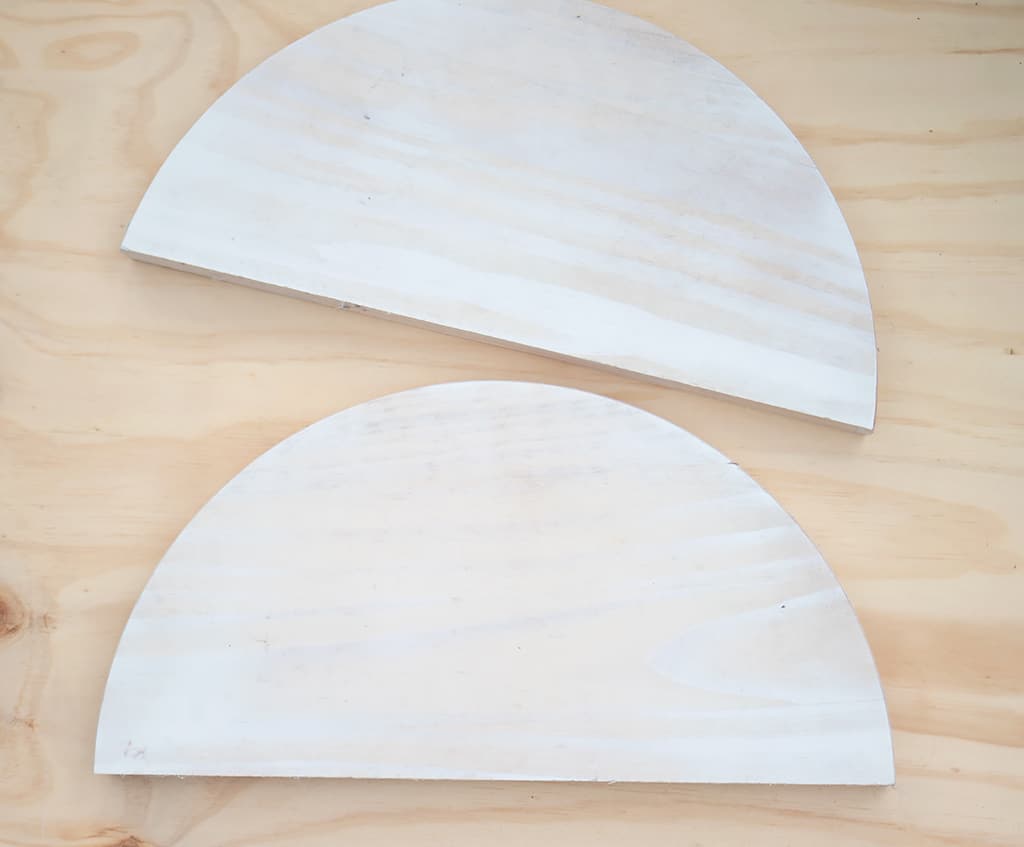
Start with a wooden slice and cut it cleanly in half. Sand the edges if needed so they are smooth and even. This will be your tray base.
Paint each side white- this really makes the colors pop!
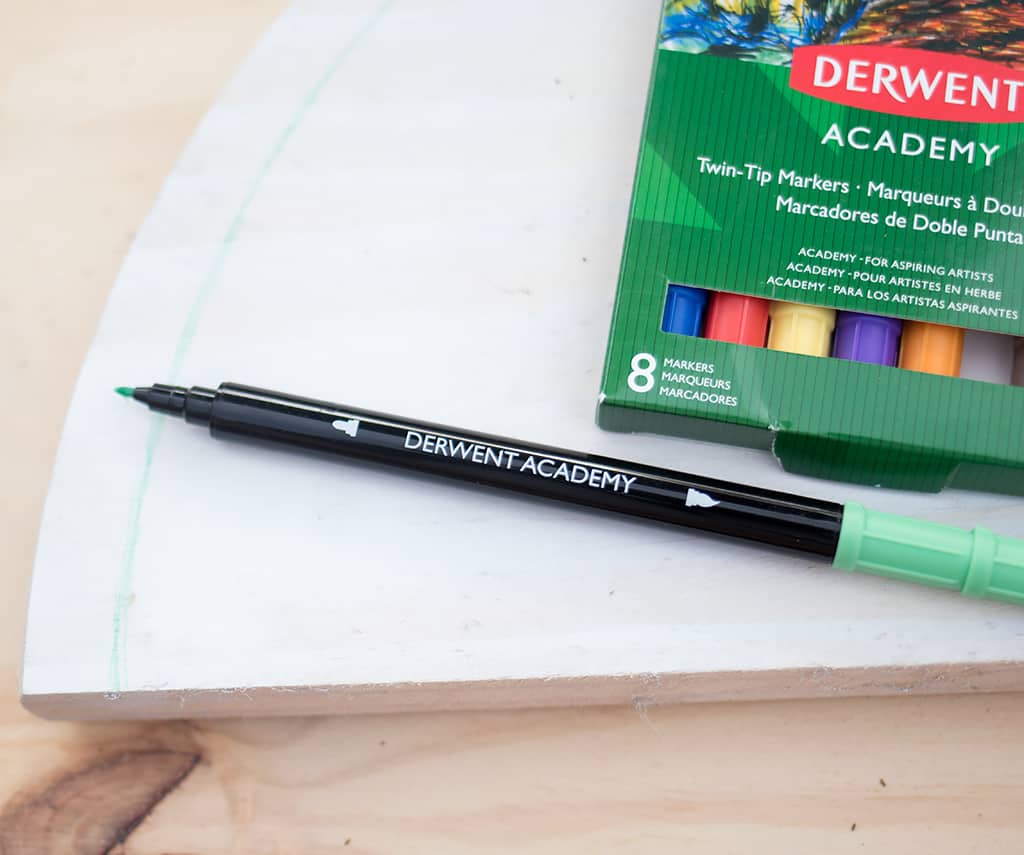
Lightly sketch your fruit slice design onto the wood using a pencil. Popular options include:
Watermelon
Orange slice
Kiwi cross-section
Lemon or lime slice
Choose bold, simple shapes that will stand out once painted.
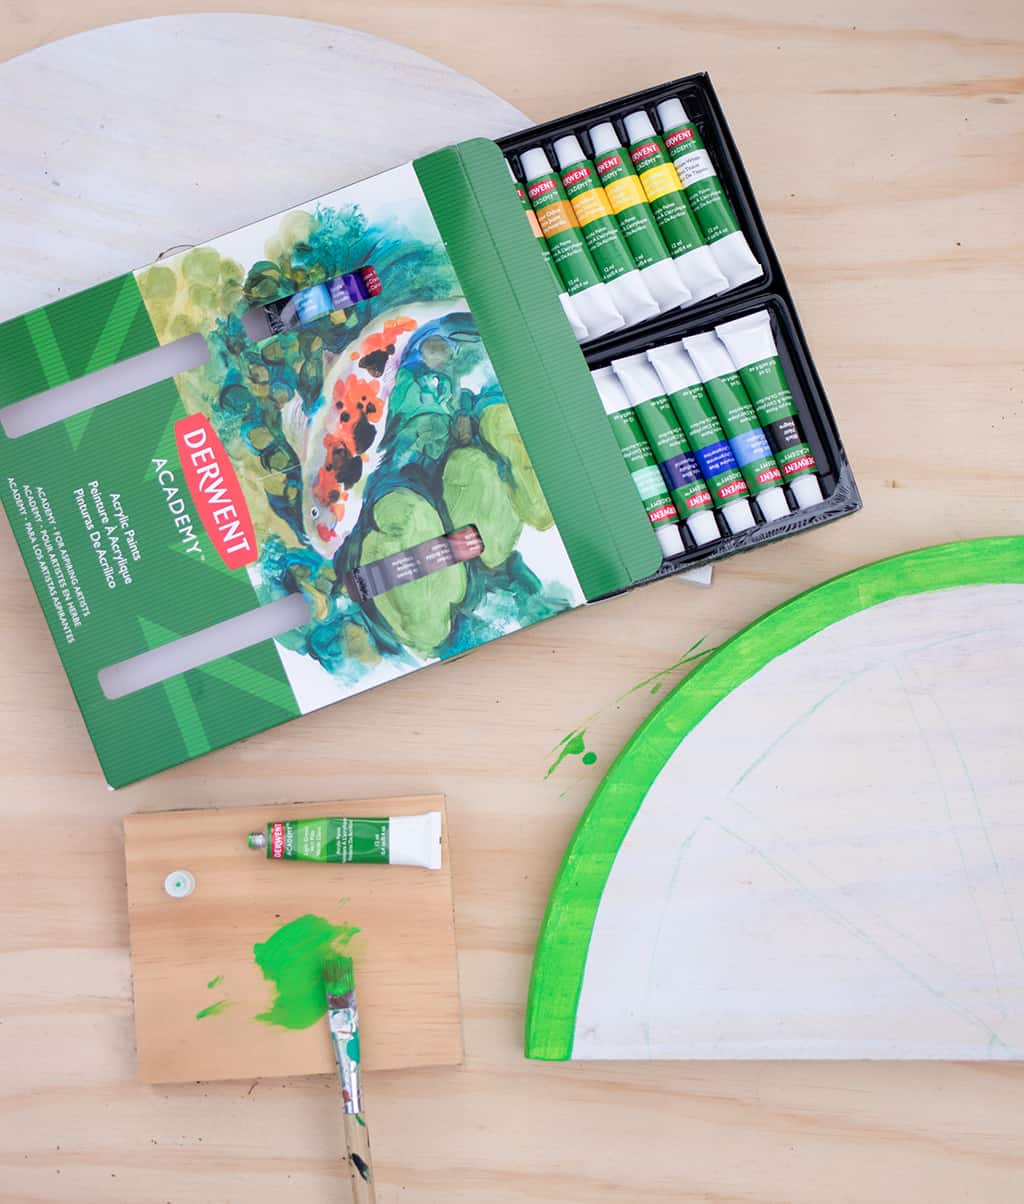
Using acrylic paints, begin filling in your design. Start with base colors first, then layer in details like seeds, rind, and shading.
Let each layer dry before adding the next to avoid smudging.
Once the paint is fully dry, apply a clear sealant or varnish. This protects your design and gives the tray a finished, polished look.
If you plan to use it for serving food, make sure to choose a non-toxic, food-safe sealant.
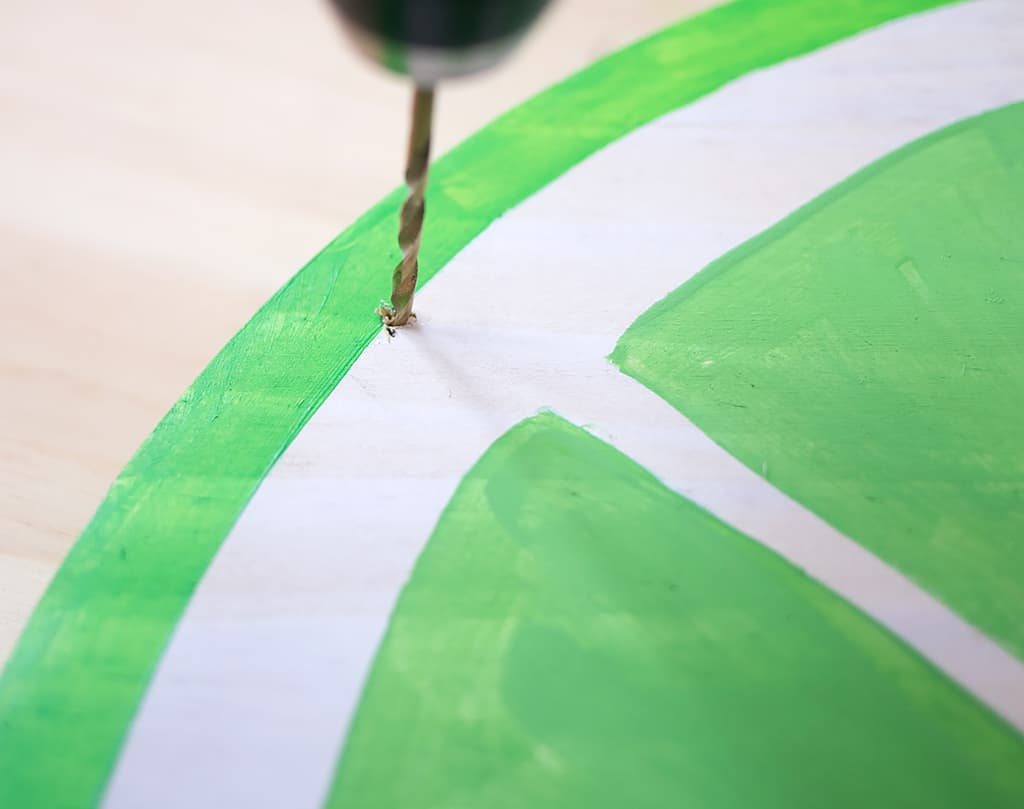
Flip the wooden slice over and mark where your cabinet pulls will go.
Drill small holes and securely attach the handles with screws. These will act as the tray’s functional grips.
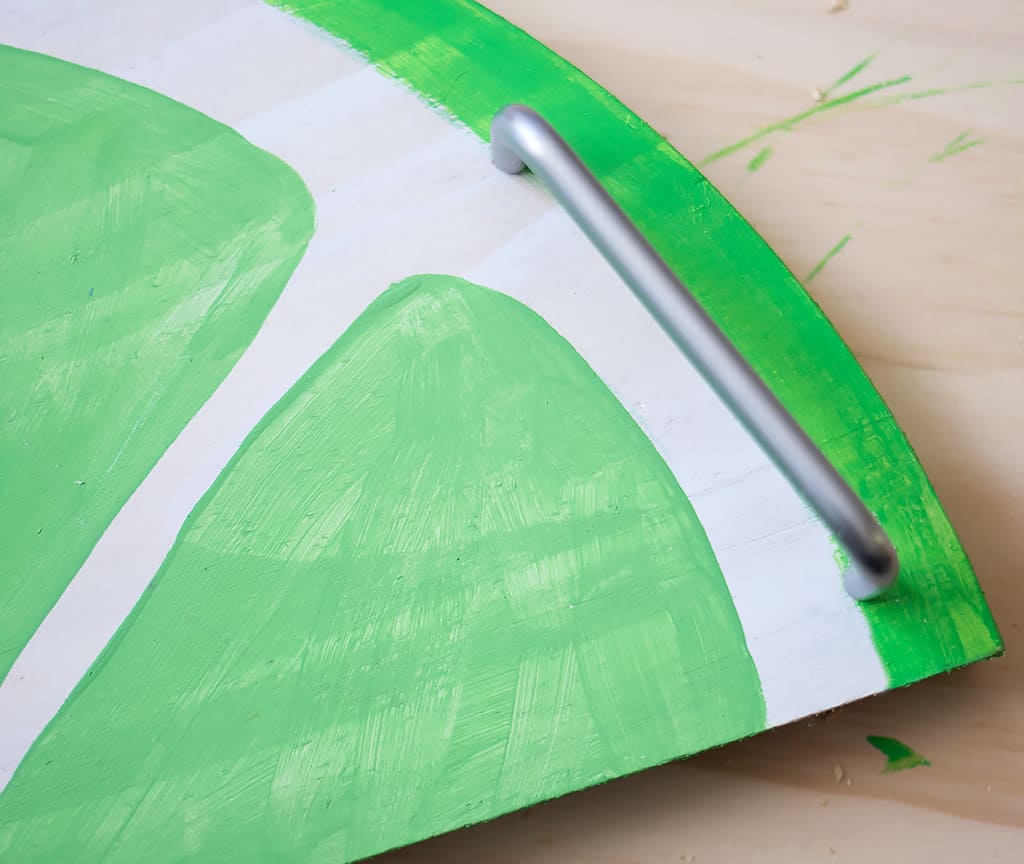
Check that everything is secure, smooth any rough edges, and let the tray fully cure before use.
Looking for More Home & Apparel DIYs?
How to Make Macrame Feathers (Easy DIY Macrame Feather Tutorial for Beginners)
How to Ice Dye Fabric: Easy DIY Ice Dyeing Tutorial for Beginners
DIY Marbled Flower Pot Tutorial (Easy + Budget-Friendly Painted Planters)
DIY Floral Party Backdrop for Under $15 (Easy Budget-Friendly Party Decor)
DIY Fabric Transfer Tea Towels (Easy Custom Kitchen Towel Tutorial)
DIY Macrame Plant Hanger (Easy Beginner-Friendly Hanging Planter You Can Make in an Afternoon)
How to Make Container Candles (Easy DIY Soy Candles for Beginners)
How to Make Custom Flower Pots With Cricut (Easy DIY Gift Idea for Beginners)
DIY Butterfly Wreath (Easy Spring Wreath That Looks Store-Bought)
Styling Ideas for Your Fruit Slice Tray
Once finished, this tray can be styled in so many ways depending on your space or occasion.
Summer Entertaining
Use it to serve drinks, pastries, or fruit during outdoor gatherings or brunches.
Kitchen Décor
Display it on open shelving as a colorful seasonal accent piece.
Coffee Table Styling
Stack it with candles, books, or small decorative objects for a curated look.
Gift Idea
Wrap it as a handmade housewarming or hostess gift with a personal touch.
Looking for More Easy Woodworking Projects?
How to Build an Easy Birdhouse Planter (DIY Garden Project for Beginners)
DIY Outdoor Planter Box (Easy Wooden Planter Tutorial)
How to Build a DIY Cornhole Board (Easy Backyard Game You Can Make in a Weekend)
DIY Cedar Window Boxes: Easy Custom Planters That Make Your House Look Instantly Prettier
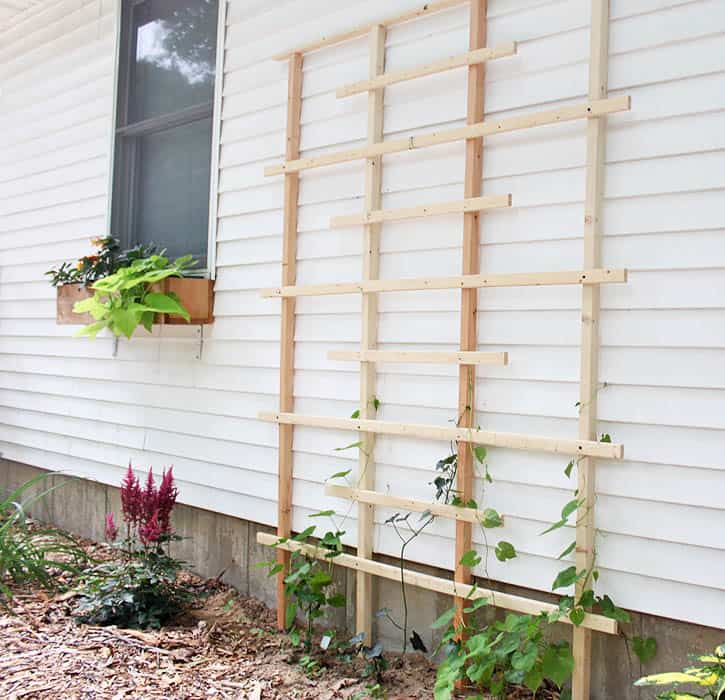
DIY Trellis (Easy, Budget-Friendly Garden Upgrade That Looks Expensive)
How to Build a Wood Doormat
Design Variations You Can Try
One of the best parts of this DIY is how customizable it is.
Watermelon theme: Bright pink, green rind, black seeds
Citrus set: Orange, lemon, and lime trio trays
Pastel fruit style: Soft, muted summer tones
Minimalist design: Clean white base with subtle fruit outline
Bold modern look: Oversized fruit graphic with high contrast colors
You can even create a full matching set for entertaining.
Tips for the Best Results
Use smooth, sanded wood for a cleaner paint finish
Sketch lightly so pencil lines don’t show through paint
Let each paint layer dry completely before moving on
Pre-measure handle placement for balance
Choose lightweight cabinet pulls for easier use
Common Mistakes to Avoid
Skipping wood sealing (can lead to damage over time)
Using thick, uneven paint layers
Misaligned handles (affects balance and usability)
Not sanding rough edges before painting
FAQ for DIY Fruit Slice Serving Tray
Can I actually use this tray for food?
Yes, but it depends on how you finish it. If you plan to serve food directly on the surface, make sure you use a food-safe, non-toxic sealant over the painted design. If you’re unsure, you can also line the tray with parchment paper when serving snacks, cheese, or baked goods. Many people also use it as a decorative serving tray for packaged items, drinks, or styled entertaining setups.
What kind of wood should I use for this DIY?
A solid wood slice or thick wood board works best. Hardwoods like pine, birch, or maple are ideal because they’re easier to sand, paint, and drill into for the cabinet pull handles. Avoid very soft or highly porous wood, since it can absorb paint unevenly and warp over time.
Do I need to be good at painting to make this?
Not at all. This is a beginner-friendly project. The fruit slice design is meant to be simple and graphic rather than realistic. Basic shapes like watermelon slices, oranges, lemons, or kiwis are very forgiving and actually look better with a slightly stylized, hand-painted finish.
What kind of paint works best?
Acrylic paint is the best choice for this project. It adheres well to wood, dries quickly, and comes in a wide range of vibrant colors that are perfect for fruit designs. If you want a smoother finish, you can lightly sand between coats or use a primer before painting.
How do I attach the cabinet pull handles securely?
Mark your placement carefully on the underside of the wood slice, then drill small pilot holes before attaching the cabinet pulls with screws. Make sure the handles are evenly spaced so the tray feels balanced when you lift it. If the wood is thick, standard cabinet hardware screws should hold securely.
Can I customize the fruit design?
Yes—this is one of the best parts of the DIY. You can choose any fruit or color palette you like. Watermelon is the most popular option, but citrus designs, tropical fruits, or even pastel abstract fruit-inspired shapes all work beautifully depending on your home aesthetic.
How should I clean the tray?
If sealed properly, you can wipe it down gently with a damp cloth. Avoid soaking it in water or placing it in the dishwasher, as that can damage both the wood and the painted finish.
A DIY fruit slice serving tray is the perfect blend of creativity and functionality. It transforms a simple wooden base into a cheerful, custom piece that feels both handmade and high-end.
Whether you use it for entertaining, decorating, or gifting, it’s a project that adds personality and color to any space. It’s also a great example of how small DIY details can make everyday home items feel special and thoughtfully designed.
✨ I’d love to see what you’re making! ✨
If you’ve tried one of my knitting patterns, crochet projects, DIYs, or recipes, share your finished project on Instagram and tag me so I can see it 💛
There’s nothing better than seeing your creations come to life—from cozy knits to delicious recipes and everything in between. It truly makes my day!
Tag me @ginamicheleny so I can share your work and cheer you on!
Happy making!