DIY Trellis (Easy, Budget-Friendly Garden Upgrade That Looks Expensive)
DIY trellis tutorial that’s easy, budget-friendly, and perfect for climbing plants like morning glories, clematis, and ivy. Step-by-step guide.
Transform a Blank Wall Into a Garden Feature
If you have an empty wall, fence, or side of your house that feels a little… unfinished, this DIY trellis is one of the easiest ways to completely transform your outdoor space.
It’s one of those projects that looks high-end—but is surprisingly simple to make.
And the best part? Once your plants start growing, it only gets better over time.
A trellis isn’t just decorative—it actually helps plants grow healthier by giving them support, improving airflow, and maximizing vertical space in your garden .
Whether you’re growing:
Morning glories
Clematis
Jasmine
Climbing roses
This project gives them the perfect structure to climb.
Why You’ll Love This DIY Trellis
Beginner-friendly (no advanced tools required)
Budget-friendly (you can build it for under $50)
Makes your yard look professionally designed
Works for flowers and vegetables
Gets more beautiful over time as plants grow
Trellises are one of the easiest ways to create a vertical garden, which helps maximize space and sunlight while keeping plants off the ground.
Looking for More Outdoor DIY Projects to Upgrade Your Space?
How to Paint Patio Cushions
DIY Kids Climbing Wall for a Treehouse (Easy Backyard Project in One Afternoon)
Easy DIY Fire Pit with Landscape Blocks (Step-by-Step Guide for a Cozy Backyard)
How to Build an Easy Modern Birdhouse
How to Build Tall Outdoor Planters
DIY Trellis (Easy, Budget-Friendly Garden Upgrade That Looks Expensive)
Supplies (finished trellis measures 5 1/2 feet wide X 7 1/2 feet high )
Materials You’ll Need
You can customize this based on your space, but here’s a simple version:
- (2) 1×2 or 1×3 wood boards (frame)
- (6–10) wood slats for the grid
- Wood screws or nails
- Drill
- Measuring tape
- Level
- Exterior wood stain or paint (optional)
👉 Tip: Wood is the most popular material because it’s easy to work with and affordable, while still looking high-end.
Lumber Cuts;
1)Cut 4 pieces to measure 7 1/2 feet long (these will be the vertical boards)
2) Cut 5 pieces to measure 5 1/2 feet long (these will be the longer horizontal boards)
3) Cut 4 pieces to measure 32 inches long (these will be the shorter horizontal boards)
Step 1: Measure Your Space
Start by deciding:
How tall you want your trellis (4–6 feet is typical)
How wide your space is
Where it will sit (wall, fence, or garden bed)
Most trellises are placed against:
The side of a house|
A fence
Behind a garden bed
Take measurements before cutting anything.
Step 2: Build the Frame
Create a simple rectangular frame using your wood boards.
Cut 2 vertical pieces (height)
Cut 2 horizontal pieces (width)
Attach using screws at the corners
This frame is the foundation of your trellis.
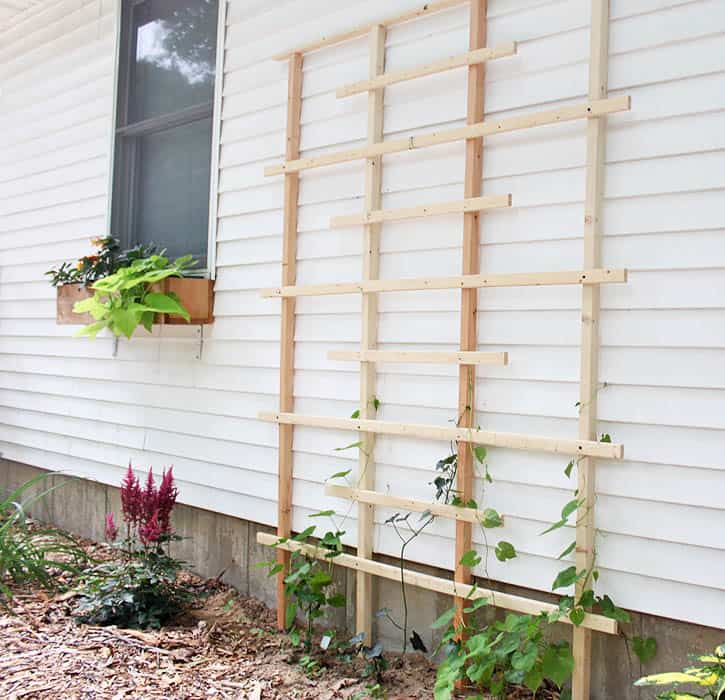
Lie the vertical pieces of wood flat on the ground, spaced 16 1/2 inches apart. Working from the bottom up, screw on the horizontal boards. The spacing between the horizontal boards is 7 1/2 inches.

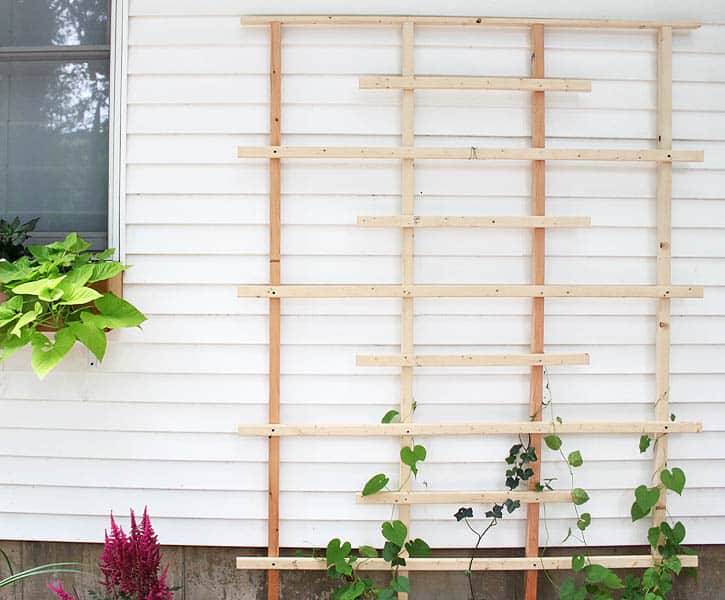
Step 3: Add the Grid Pattern
Now comes the part that gives your trellis that classic look.
Lay your slats diagonally or horizontally
Space them evenly (4–6 inches apart)
Attach each piece to the frame
You can create:
A diamond pattern (more decorative)
A square grid (simpler + modern)
This grid is what your plants will climb.
Step 4: Attach the Trellis
Once assembled, secure your trellis:
Mount it directly to the wall
Or anchor it into the ground
Make sure:
It’s level
It’s sturdy
It can handle plant weight over time
👉 A stable structure is key—especially once vines fully grow and add weight.
Step 5: Plant Your Climbing Vines
Now the fun part.
Plant your climbing plants at the base of the trellis.
Popular options:
Morning glories (fast-growing + colorful)
Clematis (classic + elegant)
Jasmine (fragrant + lush)
Ivy (low maintenance)
Gently guide the vines onto the trellis as they grow.
Within a few weeks, you’ll start to see them climbing naturally.
Step 6: Watch It Grow
This is the part that requires patience—but it’s so worth it.
Within weeks:
Vines begin attaching themselves
Growth becomes noticeable
Within months:
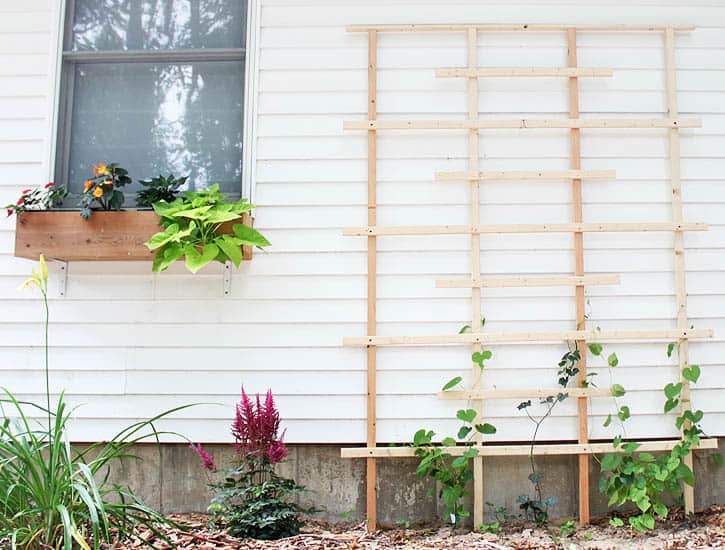
Your trellis becomes a full garden feature
Climbing plants naturally wrap and grow upward once they have support, turning a simple structure into a living wall.
When you are finished building the trellis, prime the bottom of the posts that will go in the ground. This will prevent the wood from rotting. Attach the top of the trellis to your house using a screw and some wire.
More Easy DIY & Garden Projects You’ll Love
Looking for more simple projects to upgrade your outdoor space? These ideas are just as beginner-friendly and make a big impact:
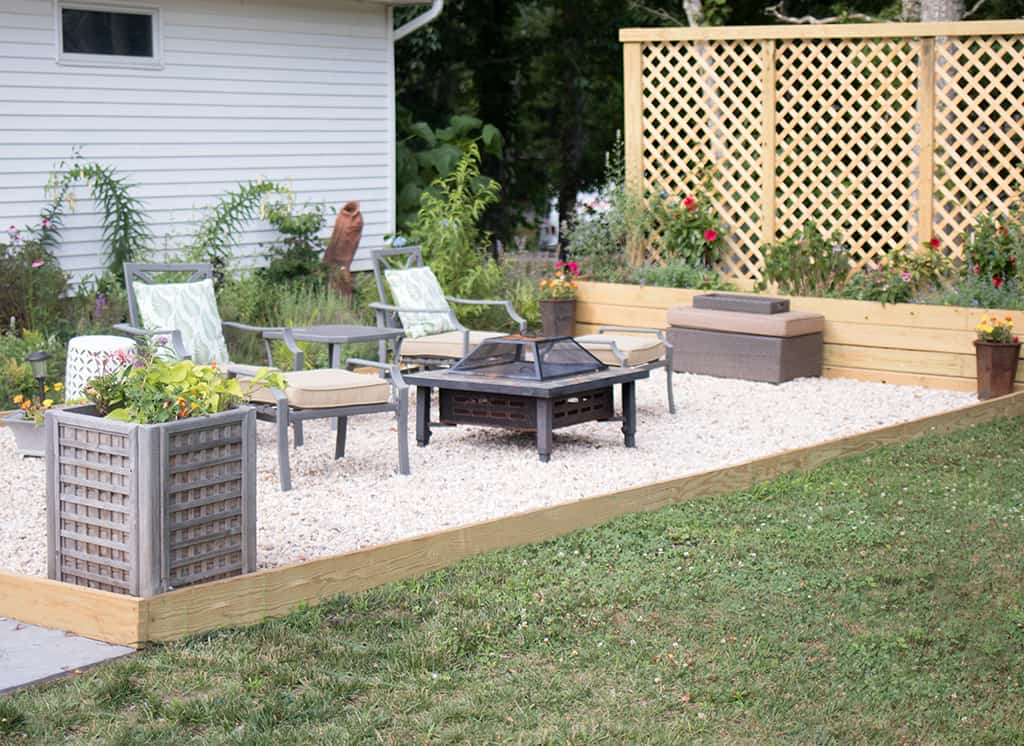
👉 DIY Privacy Screen Planter
Create a functional and stylish privacy wall that pairs perfectly with a trellis setup.
👉 How to Build a Porch Swing Stand & Hang a Porch Swing
Add a cozy seating area to your yard with this step-by-step guide.
👉 Outdoor DIY Projects That Look Expensive (But Aren’t)
A roundup of budget-friendly ideas that instantly elevate your space.
👉 DIY Raised Garden Bed Ideas
Perfect if you want to pair your trellis with a productive garden setup.
👉 Small Backyard Ideas That Make a Big Impact
Smart ways to transform even the smallest outdoor spaces.
👉 Tip: Combining a trellis with other DIY garden features—like planters or raised beds—can completely transform your yard into a cohesive, high-end looking space without a big budget.
Design Ideas to Try
Want to take it up a notch? Try:
✨ Painted Trellis
White for a clean, coastal look
Black for contrast
Natural wood for a classic garden feel
Privacy Screen Trellis
Make it taller + wider
Use dense vines like ivy
Flower Feature Wall
Use colorful blooms like morning glories or roses
More Easy DIY Projects You’ll Love
If you liked this, you might also love:
Rust-Oleum Outdoor Fabric Paint Review (Does It Actually Work?)
How to Whitewash Terra Cotta Pots
How to Build an Easy Kayak Rack (Cheap DIY That Holds Multiple Kayaks)
How to Build an Easy Birdhouse Planter
How to Build an Easy Stone Grill Surround
FAQ DIY Trellis
Is this DIY trellis beginner-friendly?
Yes! This is a great beginner project, even if you don’t have much experience with tools. The cuts are simple, the design is forgiving, and you don’t need anything beyond a drill, screws, and basic lumber. If you can measure, cut, and attach pieces together, you can build this trellis in an afternoon. It’s a perfect first outdoor DIY.
What is the best wood to use for a trellis?
Cedar and pressure-treated wood are the best choices for outdoor trellises. Cedar is naturally resistant to rot and insects, which makes it a popular (and beautiful) option. Pressure-treated wood is more budget-friendly and also holds up well outdoors. If you want a more finished look, you can stain or paint either option.
How long does it take to build?
Most DIY trellises can be built in a few hours, especially if your cuts are straightforward. If you’re staining or painting the wood, you may want to spread the project over a weekend to allow time for drying. Once installed, the structure is ready to use immediately.
Do I need to seal or protect the wood?
Sealing your trellis is highly recommended. An outdoor wood sealant or stain will help protect it from moisture, sun exposure, and general wear over time. This step can significantly extend the life of your trellis and keep it looking fresh season after season.
What plants grow best on a trellis?
Climbing plants like morning glories, clematis, jasmine, ivy, peas, and beans all do well on a trellis. These plants naturally grow upward and will quickly start wrapping around the structure, creating a lush, vertical garden effect.
This DIY trellis is one of those projects that completely transforms your space without a huge investment.
It’s simple.
It’s affordable.
And it keeps getting better over time.
What starts as a basic wood structure turns into a living, growing feature in your garden.
And honestly? It’s one of the easiest ways to make your outdoor space feel finished.
✨ I’d love to see what you’re making! ✨
If you’ve tried one of my knitting patterns, crochet projects, DIYs, or recipes, share your finished project on Instagram and tag me so I can see it 💛
There’s nothing better than seeing your creations come to life—from cozy knits to delicious recipes and everything in between. It truly makes my day!
Tag me @ginamicheleny so I can share your work and cheer you on!
Happy making!