Coastal Anchor Wall Decor DIY (Easy Beach House Decor You Can Make on a Budget)
Learn how to make DIY coastal anchor wall decor using plywood and a jigsaw. This easy beach house DIY adds coastal charm to your home on a budget.
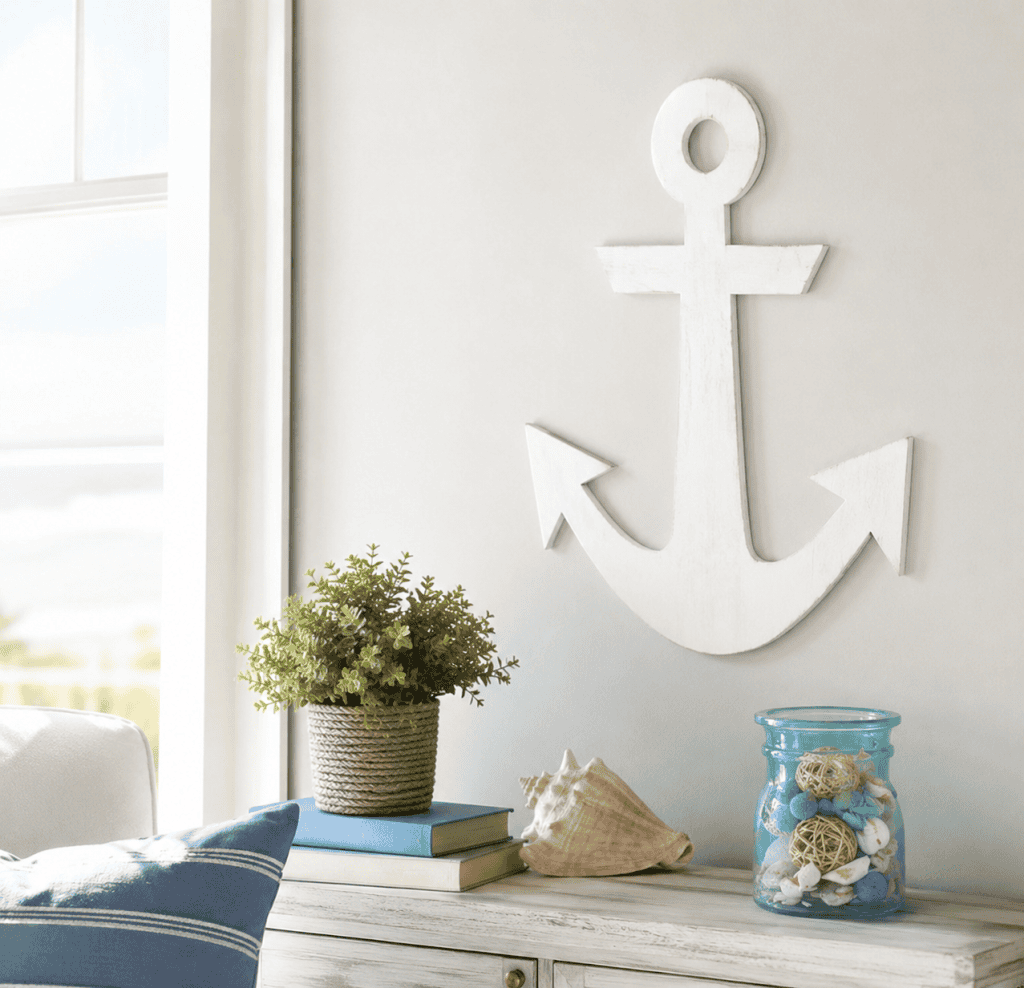
Bring relaxed beach house style into your home with this easy Coastal Anchor Wall Decor DIY. If you love coastal decorating, nautical accents, and budget-friendly home projects, this oversized wooden anchor is a fun weekend project that makes a big impact.
I’ve always loved the look of large cut-out wall decor in coastal home stores, but many of the pieces are surprisingly expensive. After seeing simple painted wood designs selling for well over $100, I decided to make my own DIY anchor wall art instead. The result was this distressed coastal anchor that fits perfectly with beachy, boho-inspired decor.
One of the best parts of this project is that it’s beginner friendly. If you’ve never used a jigsaw before, this is actually a great starter woodworking project because the shape is simple and forgiving. Once you learn the basics, you can create all kinds of custom wood wall decor for your home.
This DIY coastal anchor is perfect for:
Beach house decor
Nautical themed bedrooms
Coastal entryways
Cottage-style homes
Lake house decorating
Patio or porch wall decor
Budget-friendly home decorating
If you enjoy easy DIY home decor projects, you may also like my posts on DIY window trim, weathered plank walls, and outdoor patio makeovers.
More DIY Home Decor Projects You’ll Love
If you love easy coastal decorating ideas and handmade home décor, here are a few more DIY projects to try next
DIY Marbled Flower Pot Tutorial (Easy + Budget-Friendly Painted Planters)
DIY Floral Party Backdrop for Under $15 (Easy Budget-Friendly Party Decor)
10 Summer Crafts for Your Home and Closet (Easy DIY Projects You’ll Actually Use)
Raffia Pom Pom Sandals DIY (Easy Summer Sandals You Can Make in Under an Hour)
DIY Fabric Transfer Tea Towels (Easy Custom Kitchen Towel Tutorial)
DIY Macrame Plant Hanger (Easy Beginner-Friendly Hanging Planter You Can Make in an Afternoon)
How to Make Container Candles (Easy DIY Soy Candles for Beginners)
How to Make Custom Flower Pots With Cricut (Easy DIY Gift Idea for Beginners)
DIY Framed Macrame Wall Art (Easy Boho Wall Decor You Can Make in an Afternoon)
Why Coastal Decor Never Goes Out of Style
Coastal decor continues to be one of the most popular interior design styles because it creates a calm, relaxed atmosphere. Light colors, natural textures, weathered finishes, and nautical elements instantly make a home feel airy and welcoming.
An anchor is one of the most classic coastal decorating symbols because it adds a subtle nautical touch without feeling overly themed. When paired with distressed wood and soft neutral colors, it works beautifully in modern coastal homes, beach cottages, farmhouse interiors, and even boho spaces.
Oversized wall decor also helps create a focal point in a room. Large wood signs and cut-out designs can fill blank wall space without overwhelming the room with clutter.

Coastal Anchor Wall Decor DIY (Easy Beach House Decor You Can Make on a Budget)
Supplies Needed for Coastal Anchor Wall Decor DIY
Here’s what you’ll need for this project:
Materials
Anchor template printout
Sheet of plywood or project plywood
White paint
Sandpaper
Sawtooth hanger
Tools
Jigsaw
Pencil
Safety glasses
The original project used an engineering print from Staples to enlarge the anchor template affordably.

Step 1: Resize and Print the Anchor Template
Start by finding or creating an anchor template.
Resize the template using photo editing software until it reaches your desired size. I made mine approximately 30 inches tall to create a large statement piece.
Engineering prints are one of the cheapest ways to print oversized templates. Many office supply stores offer them for just a few dollars.
Cut out the template and tape it securely onto the plywood.

Step 2: Trace the Anchor Shape
Use a pencil to carefully trace around the anchor design.
Take your time around curves and rounded sections. This traced outline will guide your jigsaw cuts.
If you’re nervous about cutting, you can practice first on a scrap piece of wood.

Step 3: Cut Out the Anchor With a Jigsaw
Using a jigsaw may seem intimidating at first, but it’s actually one of the easiest woodworking tools for beginners.
A jigsaw is ideal for:
Curves
Rounded edges
Decorative shapes
Custom wall decor
Slowly cut along the traced outline.
A few helpful beginner tips:
Let the saw do the work
Don’t force the blade
Move slowly around curves
Keep both hands steady
Wear safety glasses
The beauty of distressed coastal decor is that it doesn’t need to look perfectly precise.

Step 4: Sand the Edges
After cutting the anchor shape, sand all edges thoroughly.
This helps:
Remove splinters
Smooth rough cuts
Create a cleaner finish
Help paint adhere better
You can leave some imperfections if you want a more weathered coastal look.
Step 5: Paint the Anchor
Spray paint the anchor white for a classic coastal finish.
Apply several light coats instead of one heavy coat to avoid drips.
You can also experiment with:
Soft blue
Driftwood gray
Cream
Matte black
Seafoam green
Weathered navy
A matte or chalky finish works especially well for beach house decor.
Step 6: Distress the Finish
Once the paint dries completely, lightly sand edges and raised areas to create a distressed look.
Focus on:
Corners
Curves
Edges
Raised sections
This gives the anchor a weathered, sea-worn appearance that looks perfect in coastal homes.

Step 7: Add Hanging Hardware
Attach a sawtooth hanger to the back of the anchor so it’s ready to hang.
Because plywood is lightweight, standard wall hooks usually work well for this project.
Coastal Decorating Ideas for Your DIY Anchor
There are so many ways to style this anchor wall decor throughout your home.
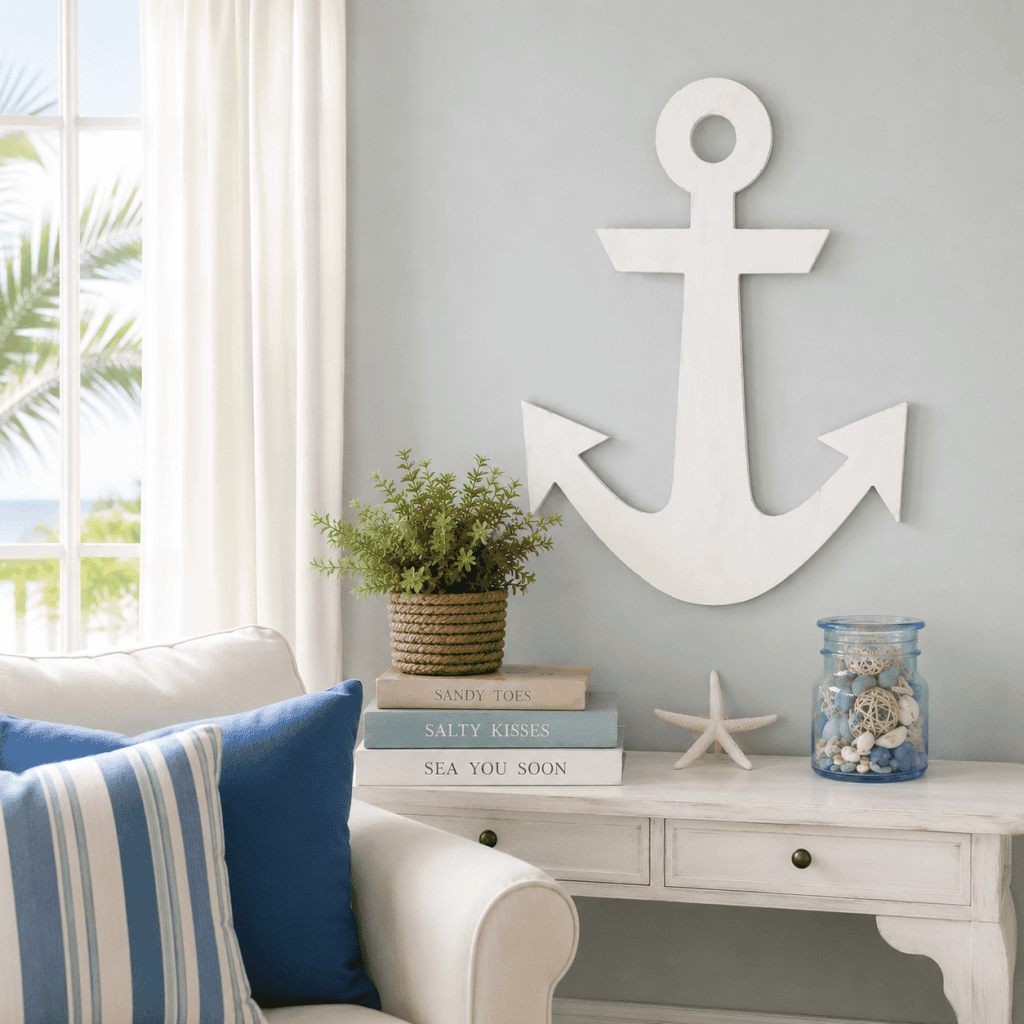
Entryway Decor
Hang it above a console table with:
Driftwood accents
Woven baskets
Rope details
Coastal candles
Bedroom Wall Decor
This anchor looks beautiful above:
A bed
Dresser
Reading nook
Pair it with:
White bedding
Linen textures
Soft blue accents
Covered Patio Decor
Outdoor living spaces benefit from large statement decor pieces.
Try pairing your anchor with:
Lanterns
String lights
Outdoor pillows
Coastal planters
If you enjoy outdoor projects, you may also like my:
DIY patio makeover
DIY cedar window boxes
DIY trellis ideas
Tips for Using a Jigsaw as a Beginner
This project is a great introduction to woodworking because the cuts are fairly simple.
Here are a few beginner-friendly jigsaw tips:
Use a Sharp Blade
Sharp blades create cleaner cuts and reduce splintering.
Clamp the Wood
Keeping the plywood stable makes cutting easier and safer.
Cut Slowly Around Curves
Sharp turns are easier when you move slowly.
Don’t Worry About Perfection
Distressed coastal decor actually looks better with a slightly handmade appearance.
Budget-Friendly Coastal Decorating
One reason I love DIY coastal decor is that it’s often much cheaper than buying designer pieces.
Large wall decor can easily cost over $100 in stores, especially oversized nautical pieces. Making your own allows you to customize:
Size
Color
Finish
Style
This anchor project can usually be completed for a fraction of retail prices.
More Outdoor DIY Projects to Try
Love outdoor decorating and backyard projects? Here are more easy DIY ideas perfect for patios, porches, gardens, and summer entertaining:
How to Paint Patio Cushions (An Easy Budget-Friendly Outdoor Makeover That Actually Lasts)
DIY Sandbox With Roof Plans (Easy Covered Sandbox for Kids + Budget-Friendly Backyard Build)
How to Build a DIY Cornhole Board (Easy Backyard Game You Can Make in a Weekend)
DIY Cedar Window Boxes: Easy Custom Planters That Make Your House Look Instantly Prettier
DIY Trellis (Easy, Budget-Friendly Garden Upgrade That Looks Expensive)
Rust-Oleum Outdoor Fabric Paint Review (Does It Actually Work?)
How to Build an Easy Kayak Rack (Cheap DIY That Holds Multiple Kayaks)
Why Handmade Decor Feels More Special
One of my favorite things about DIY home projects is that they make a home feel more personal and collected.
Instead of purchasing mass-produced decor, handmade projects allow you to create something unique that perfectly fits your style.
Even simple projects like this anchor wall decor can completely change the feeling of a room and make it feel warmer, more relaxed, and more inviting.
Frequently Asked Questions about Anchor Wall Decor DIY
What type of wood works best for DIY wall decor?
Project plywood is one of the best options because it’s lightweight, affordable, and easy to cut. For outdoor decor, use exterior-grade plywood or cedar.
Is a jigsaw beginner-friendly?
Yes! A jigsaw is one of the easiest power tools for beginners because it’s lightweight and designed for cutting curves and shapes.
How do you distress painted wood?
Lightly sand edges and corners after painting to reveal some of the wood underneath and create a weathered appearance.
Can this anchor be used outdoors?
Yes, but seal it with exterior paint or polyurethane if it will be exposed to moisture or direct weather.
What size should coastal wall decor be?
Oversized wall decor usually works best because it creates a stronger focal point. A 24–36 inch anchor works beautifully for most spaces.
What colors work best for coastal decor?
Popular coastal colors include:
White
Soft blue
Driftwood gray
Sandy beige
Seafoam green
Navy
This Coastal Anchor Wall Decor DIY is one of those simple projects that instantly adds personality and charm to a space. It’s affordable, beginner friendly, and completely customizable to fit your style.
Whether you’re decorating a beach house, cottage, lake home, or simply love coastal decor, this oversized wooden anchor creates the perfect relaxed nautical vibe.
Once you get comfortable using a jigsaw, you’ll realize there are endless possibilities for creating your own custom wall decor.
✨ I’d love to see what you’re making! ✨
If you’ve tried one of my knitting patterns, crochet projects, DIYs, or recipes, share your finished project on Instagram and tag me so I can see it 💛
There’s nothing better than seeing your creations come to life—from cozy knits to delicious recipes and everything in between. It truly makes my day!
Tag me @ginamicheleny so I can share your work and cheer you on!
Happy making!