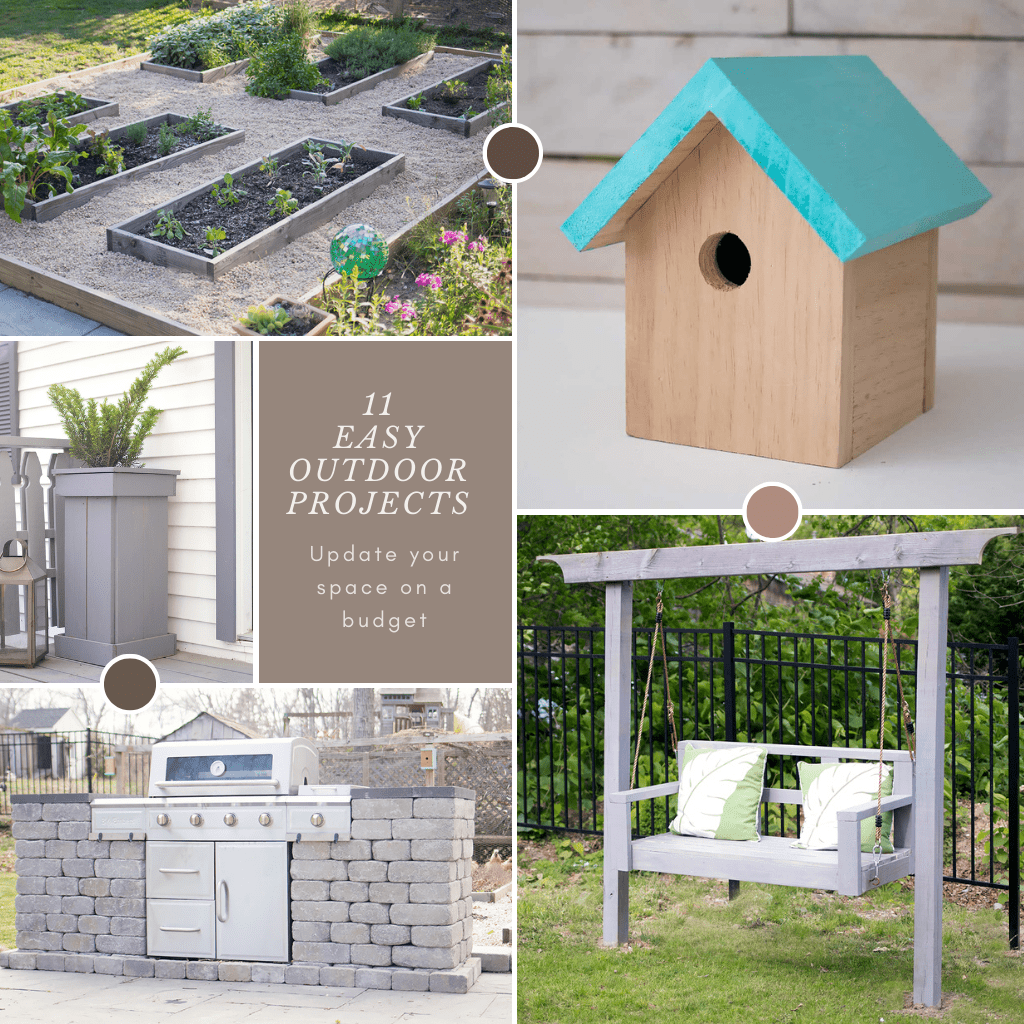
How to Build Tall Outdoor Planters
Learn how to build tall outdoor planters with this easy DIY tutorial. Create modern wooden planters for your porch or patio using simple tools and materials.
If you’ve ever wanted to instantly elevate your outdoor space, learning how to build tall outdoor planters is one of the most impactful DIY projects you can take on. Tall planters add height, structure, and visual interest to your porch, patio, or garden, making even a simple space feel styled and intentional.
The best part is that these planters are surprisingly easy to build. With basic materials and simple construction techniques, you can create custom outdoor planters that look high-end without the high price tag. Whether you’re decorating your front entry, creating a backyard oasis, or adding greenery to a deck, this DIY tall outdoor planter tutorial will help you create something both functional and beautiful.
If you love easy home and DIY projects like this, you can explore more here:
👉 DIY Outdoor Projects
Why Tall Outdoor Planters Make Such a Big Impact
Tall planters are one of the easiest ways to transform an outdoor space. They draw the eye upward, create symmetry around doorways, and add a polished, finished look to patios and decks. When placed in pairs, they instantly elevate curb appeal and make your home feel more welcoming.
One of the biggest advantages of building your own planters is customization. Instead of settling for expensive store-bought options, you can create the exact size, shape, and finish that works for your space. This flexibility allows you to design something that truly fits your style.
Planning Your Tall Planter Design
Before you start building, it’s important to decide on the size and style of your planters. Taller planters create a more dramatic look, while shorter ones feel more subtle and relaxed. Many people prefer a height that complements their front door or outdoor furniture for a balanced appearance.
You can also decide whether to fill the entire planter with soil or use an insert. Using an internal shelf or smaller container can make the planter lighter and easier to maintain while still achieving the same visual effect.
Materials and Construction
Most DIY tall outdoor planters are built using simple lumber and a basic frame structure. The process involves building a sturdy frame, attaching side panels, and creating a base for your plants.
Once assembled, sanding and finishing the wood helps create a polished, professional look. Choosing the right finish is important for outdoor durability, as it protects the wood from weather and wear.
KEEP IN TOUCH! FOR MORE INSPIRATIONS, PROJECTS, AND FREE KNITTING PATTERNS, SIGN UP FOR OUR WEEKLY NEWSLETTER:
How to Build Tall Outdoor Planters
Finished planters measure approximately 31 inches tall and 15 1/2 inches wide (at the top)
Wood needed (makes one):
I used pine but you can also use cedar.
2 X 4 x 8: 1 total
1 X 6 x 8: 3 total
1 x 4 x 12: 1 total
2 1/2 inch Exterior wood screws
Measuring tape
Finish nails (or use Brad nail gun)
Tools:
Miter Saw (or circular saw)
Drill
Hammer or Brad nailer
Tall Planter Box Instructions

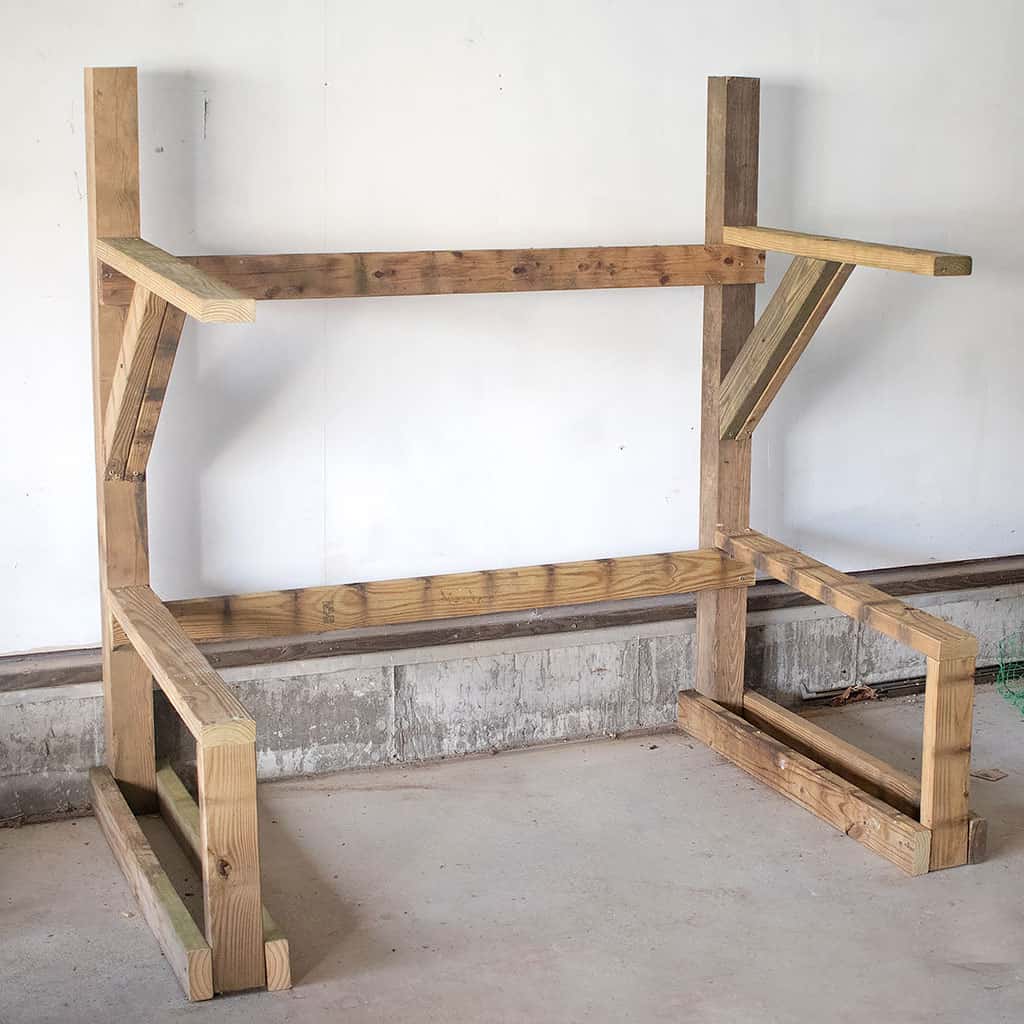
Cut the 2 x 4 into 8 sections measuring 12 inches long each. Attach corner clamps and secure them together at the sides to form a square.
These will make the base and top of the planter.

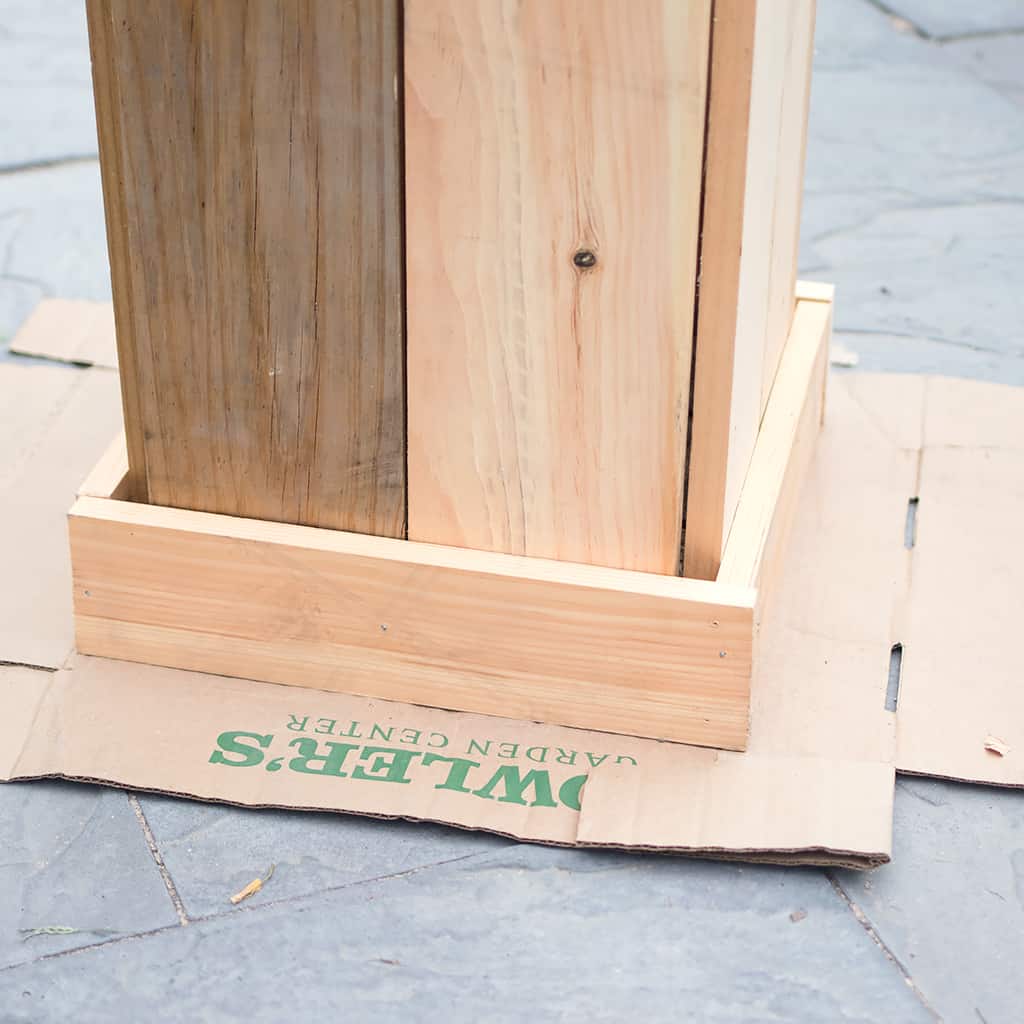
Cut the 1 x 6 into a total of 8, 30 inch boards.
Screw 2 1 x 6 boards to the top and the bottom of the squares on each side.
Here is the front view.

Screw the rest of the boards to the frame.
This is what the planter should look like when you’re finished screwing the 1 x 6 boards on the sides.
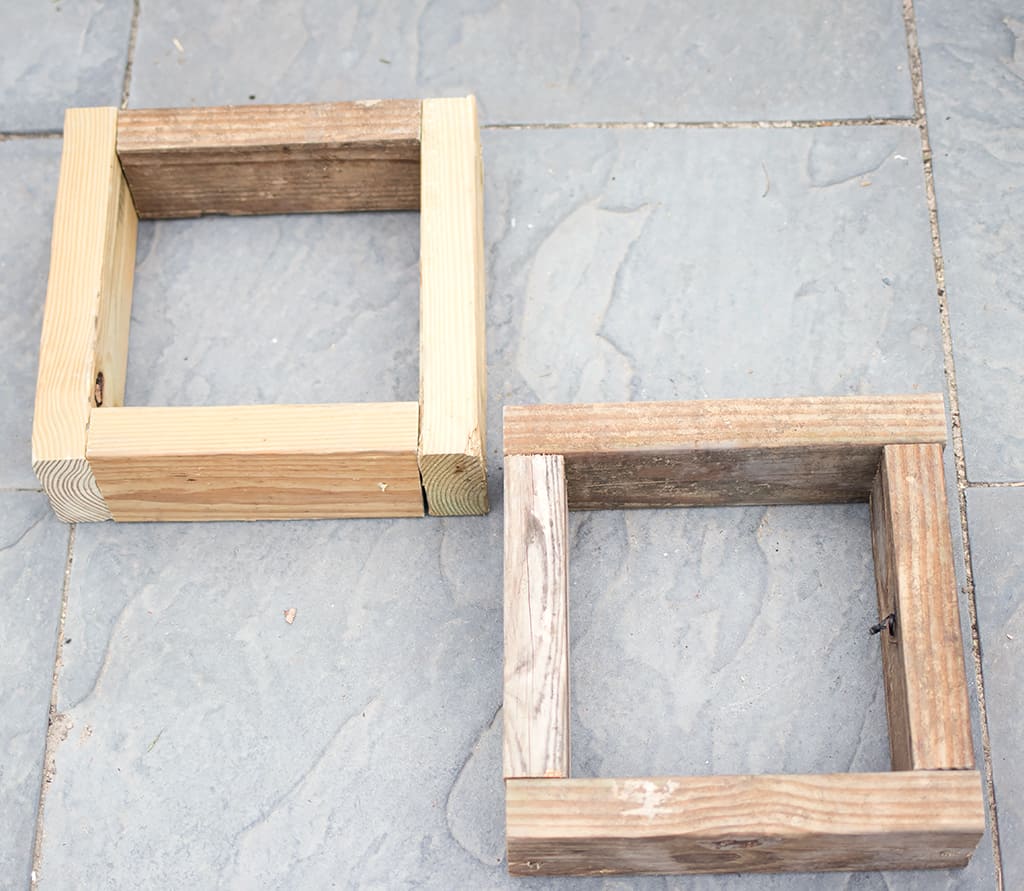
Cut the 1 x 6 into 8 sections that measure 14 1/2 inches (4 total) and 12 1/2 inches (4 total)
Glue and nail the pieces to the bottom of the planter, forming a square using 2, 14 1/2 inch boards and 2, 12 1/2 inch boards.
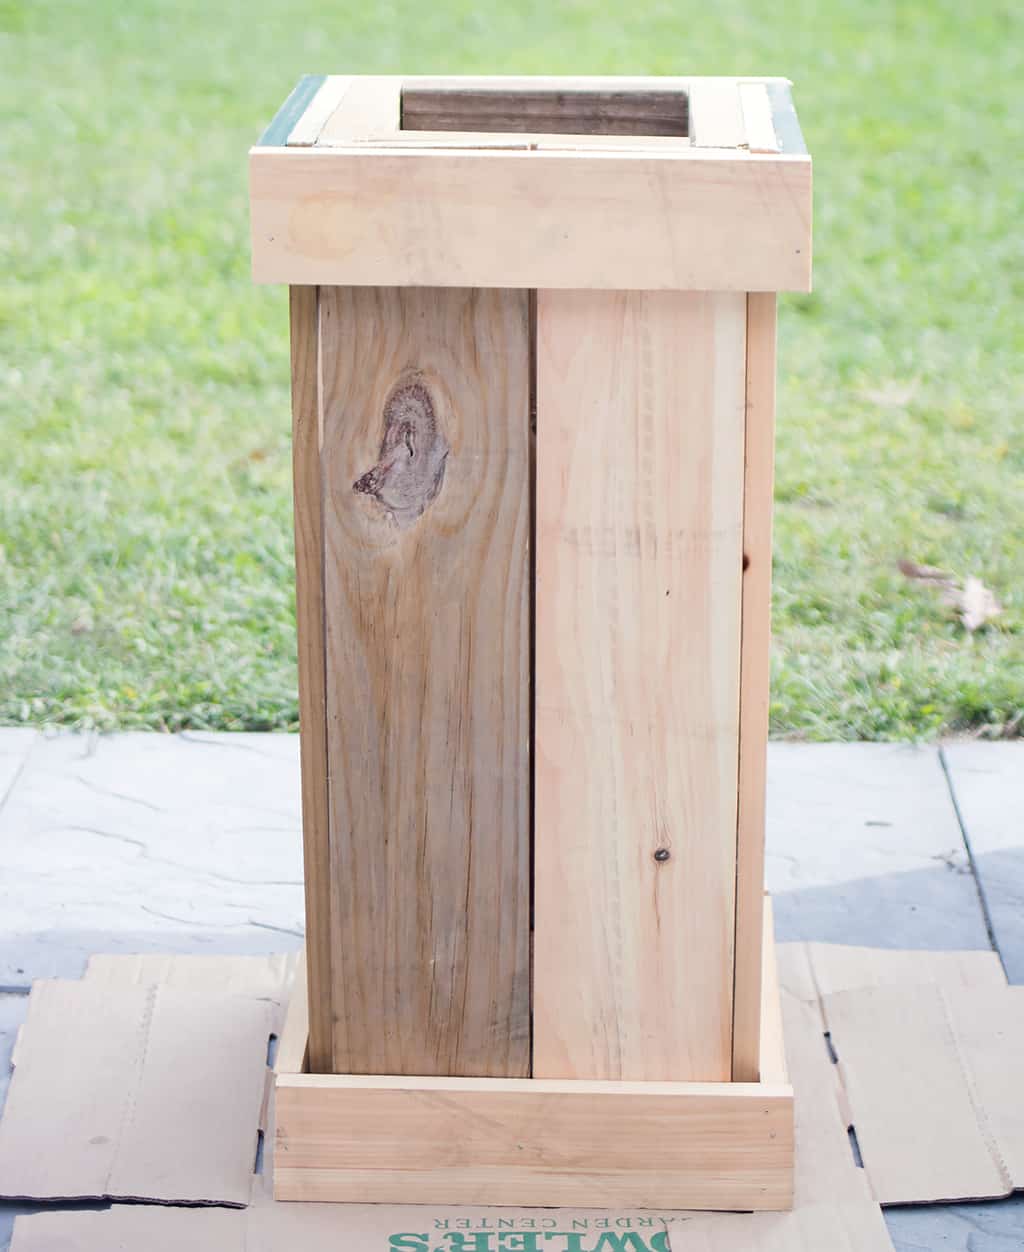
Repeat at the top of the planter.
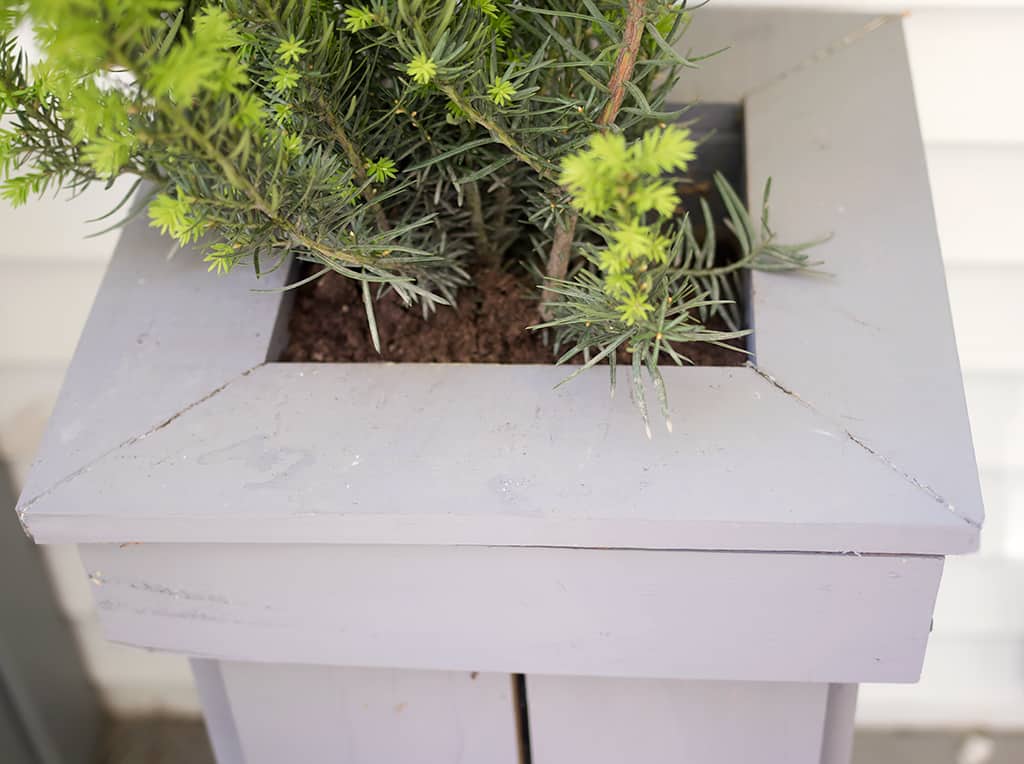
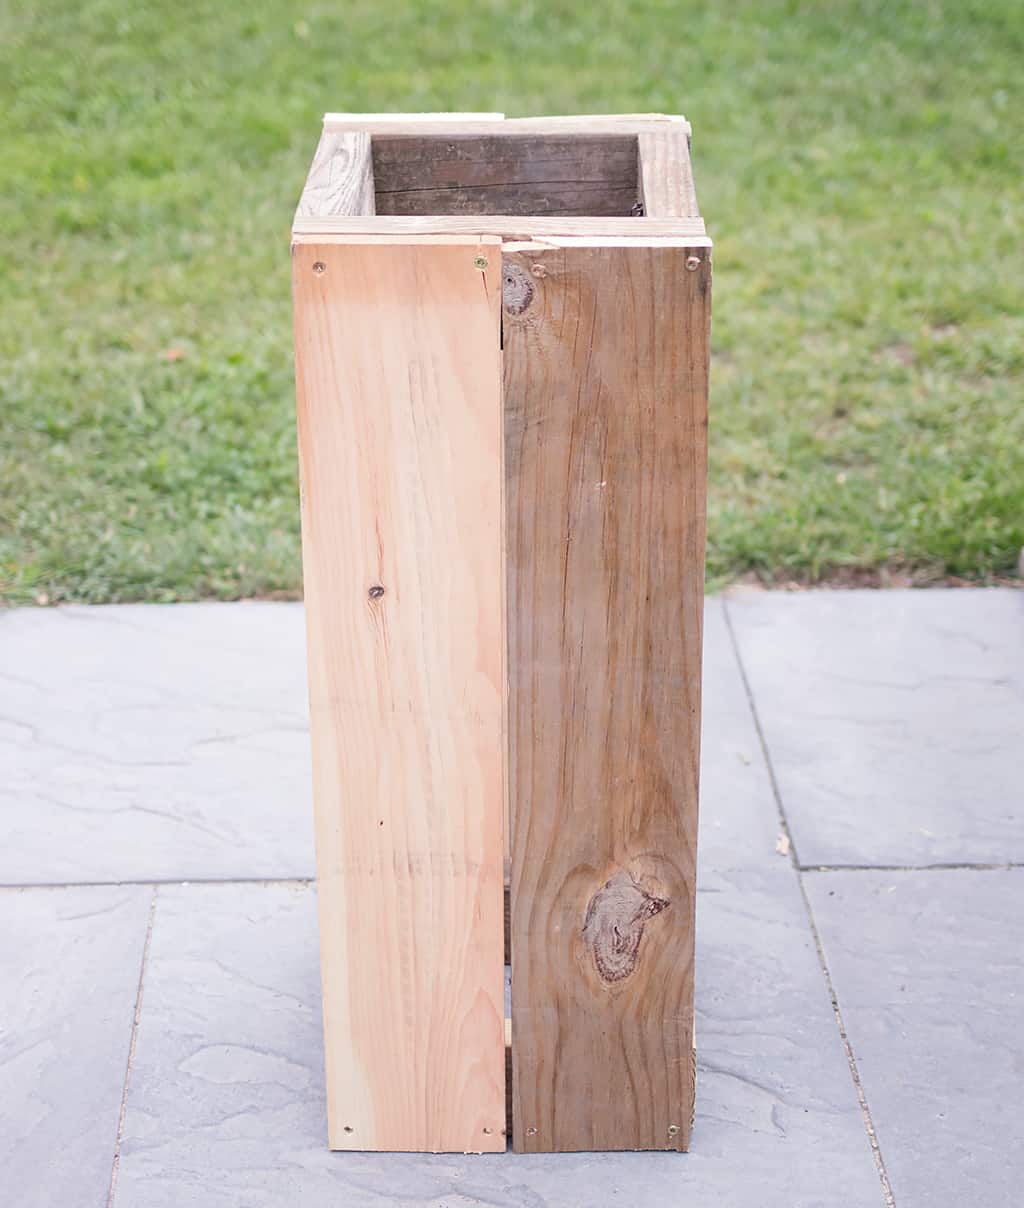
Next, create a mitered frame for the top using 1 x 4s. Glue in place and attach with finish nails.
Sand the planter and fill holes using wood filler.
Finally, prime and paint or stain.
Note- I stapled landscape fabric to the inside of the planter so the soil wouldn’t escape through the small gaps in the boards.
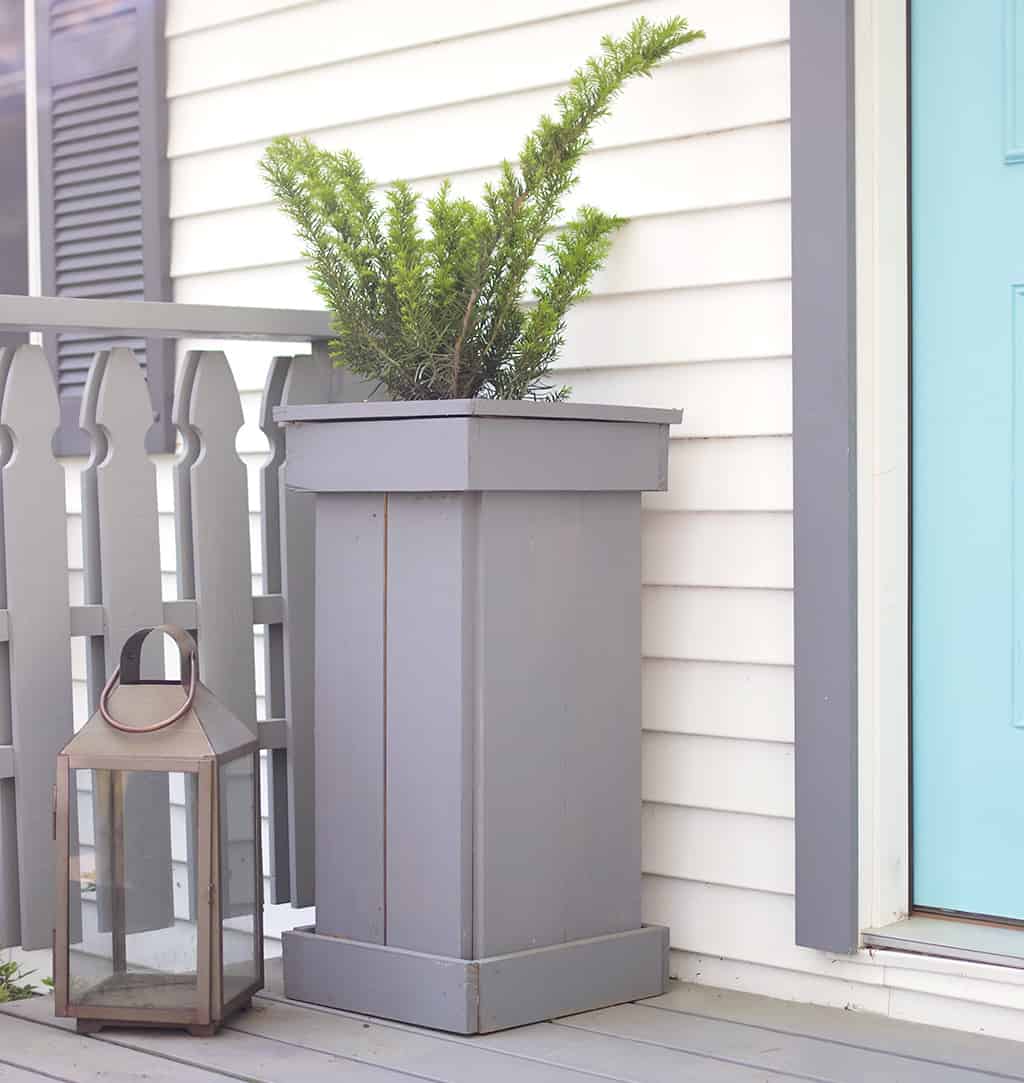
Styling Your Planters
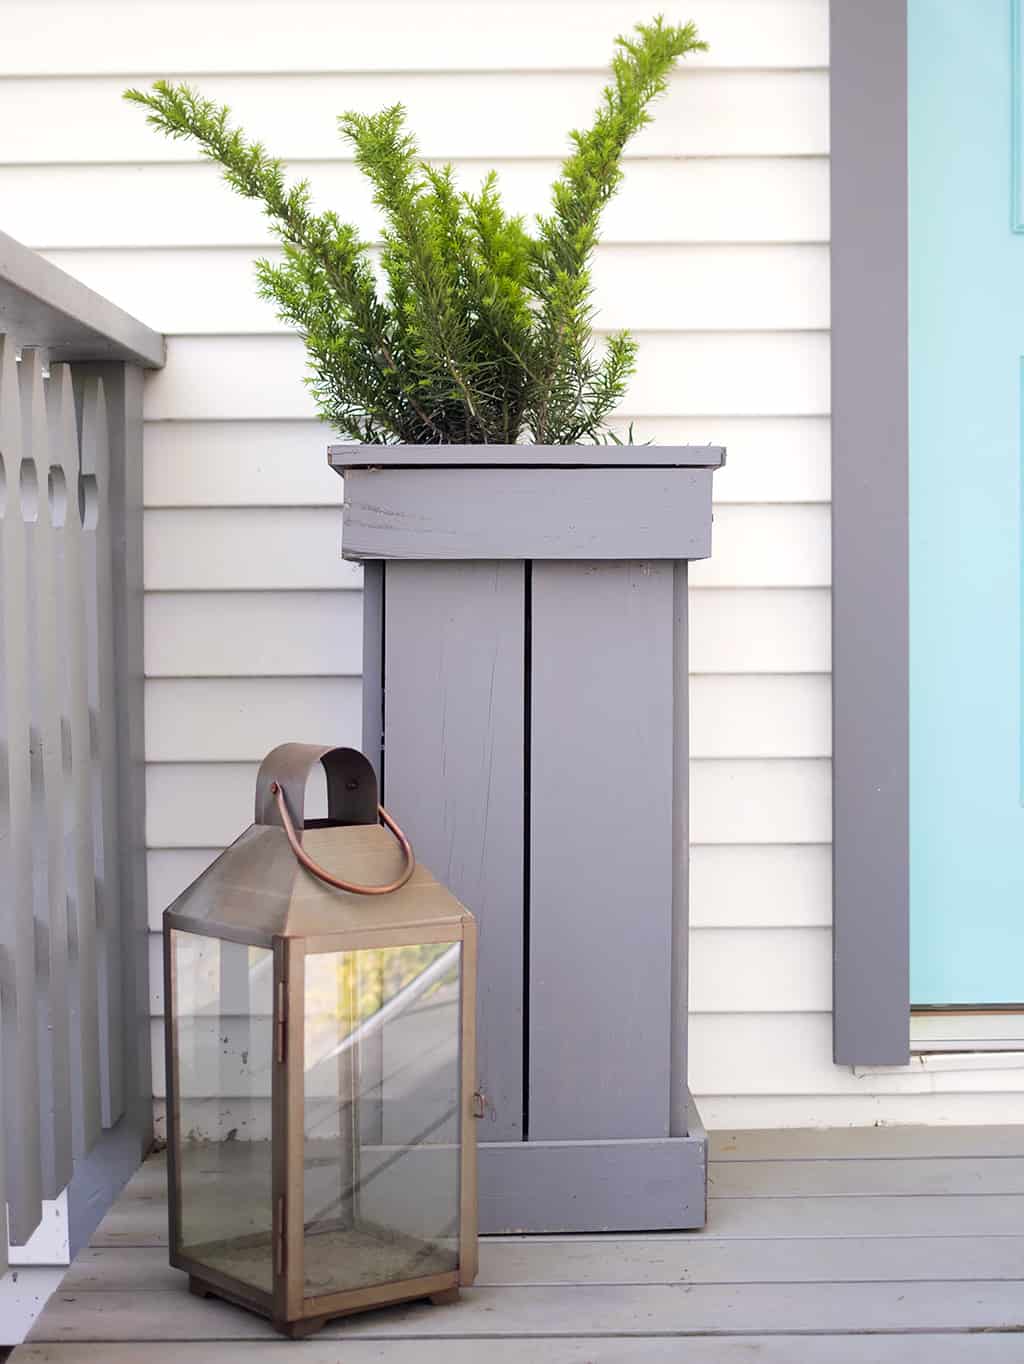
Once your planters are complete, adding greenery brings them to life. Tall plants like grasses or ferns create height, while trailing plants soften the edges. Mixing textures and colors can make your planters feel more dynamic and visually interesting.
You can also update your planters seasonally by swapping out plants or adding decorative elements.
Pairing with Other DIY Projects
Tall planters work beautifully with other DIY projects, helping you create a cohesive outdoor space. If you enjoy creative projects, you might also love
👉 How to Sew Baby Blocks with Tags
or cozy handmade ideas like
👉 Easy Cat Bed Crochet Pattern
Looking for more DIY Garden Projects like this wood planter?
How to Build a Wood Planter for $20
How to Build a Raised Garden Bed Cover
Outdoor Chalkboard DIY – Weatherproof and Durable
Raised Vegetable Garden with Pea Gravel DIY
Frequently Asked Questions
How tall should outdoor planters be?
Tall outdoor planters are typically between 20 and 36 inches high, but the ideal height depends on your space. For front porches or entryways, taller planters create a dramatic and balanced look, especially when placed on either side of a door. If you’re working with a smaller space, slightly shorter planters may feel more proportionate.
What is the best wood for outdoor planters?
Cedar and pressure-treated wood are the most popular choices because they are durable and resistant to moisture. Pine can also be used if it is properly sealed and maintained. Choosing the right wood will help extend the life of your planters and keep them looking great over time.
Do I need to line my planter?
Yes, lining your planter can help protect the wood and improve drainage. Many DIYers use landscape fabric or plastic liners to separate the soil from the wood. This helps prevent rot and keeps your planter in good condition for longer.
Can I put pots inside instead of filling with soil?
Absolutely. Using a smaller pot or container inside your planter is a great option. It reduces the amount of soil needed, makes the planter lighter, and makes it easier to switch out plants when needed.
How do I protect my planters from weather?
Applying an outdoor sealant, paint, or stain is the best way to protect your planters. Regular maintenance, such as resealing or repainting, will help keep them looking fresh and extend their lifespan.
Are DIY planters cheaper than store-bought?
In most cases, yes. Building your own planters allows you to control the materials and cost, often resulting in a much more affordable option compared to high-end store-bought planters.
One of the biggest advantages of learning how to build tall outdoor planters is how easily they can be adapted to different spaces and styles. Whether your home leans modern, coastal, farmhouse, or traditional, these planters can be customized to match your aesthetic perfectly. A simple change in paint color or stain can completely transform the look, allowing you to coordinate with your front door, outdoor furniture, or seasonal decor.
Tall planters are also incredibly versatile throughout the year. In the spring and summer, they can be filled with vibrant flowers, greenery, or herbs to bring life and color to your outdoor space. As the seasons change, you can swap in fall foliage, ornamental grasses, or even mini pumpkins for a cozy autumn look. During the winter months, they can be styled with evergreen branches, pinecones, or holiday lights to create a festive and welcoming entryway.
Because they are lightweight compared to larger garden beds, these planters can be moved around as needed. This makes them perfect for experimenting with different layouts on your porch, patio, or deck. You can reposition them to frame an entryway, define a seating area, or add height to an otherwise flat space.
Projects like this are not just about building something functional—they’re about creating a space that feels intentional, inviting, and uniquely yours.
More DIY Outdoor Projects
Raised Vegetable Garden with Pea Gravel DIY
How to make a Cedar Window Box Planter
Learning how to build tall outdoor planters is a simple yet powerful way to upgrade your outdoor space. With basic materials and a little time, you can create custom planters that look beautiful, function well, and reflect your personal style.
Whether you’re decorating your front porch, enhancing your backyard, or just trying a new DIY project, these planters are a perfect place to start.
For more creative inspiration, be sure to explore
👉 DIY Projects
I love seeing your finished projects! If you enjoyed making this post- How to Build a Wood Doormat or any of my other DIY tutorials, I’d love to see yours on Instagram, just tag me @ginamicheleblog. Happy DIYing!