DIY Privacy Screen Planter That Actually Works (Full Backyard Privacy on a Budget)
Create backyard privacy on a budget with this DIY privacy screen planter. Easy to build, looks high-end, and actually blocks the view.
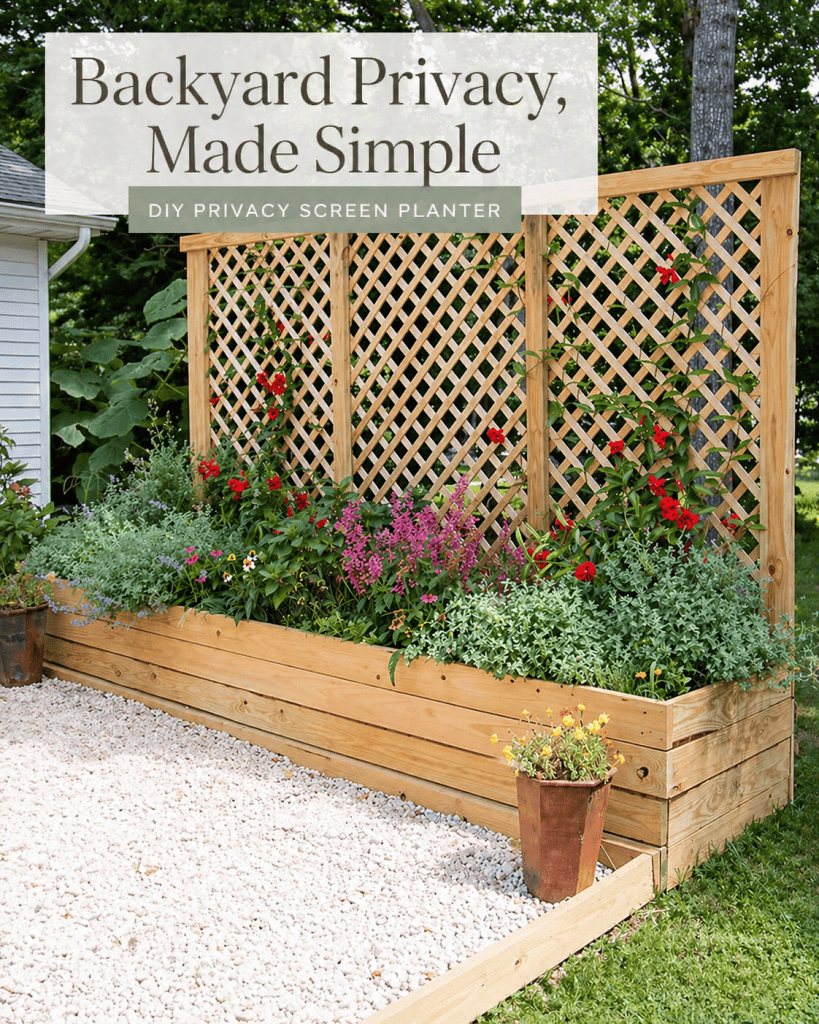
If you need real backyard privacy without spending hundreds, this DIY privacy screen planter actually works. It blocks views, looks high-end, and costs less than $150 to build.
Creating a little privacy in your outdoor space can completely transform how you enjoy your backyard, patio, or deck. If you’re looking for a simple and stylish solution, this DIY privacy screen planter is a beautiful and functional project that adds both greenery and privacy to your outdoor area.
This project combines two practical ideas into one: a large outdoor planter box and a wood privacy screen. The result is a decorative planter that supports climbing plants or tall greenery while creating a natural barrier between you and neighboring spaces.
Whether you have a small patio, a backyard deck, or a garden seating area, this privacy screen planter DIY project is an easy way to create a cozy and secluded outdoor retreat.
Best of all, this project can be completed with basic tools and materials, making it approachable even for beginner DIYers.
If you enjoy outdoor DIY projects like this one, you might also like some of the other creative home projects on the site, including simple decor ideas and handmade seasonal projects.
Looking for more DIY outdooor planters?
Why Build a Privacy Screen Planter?
Outdoor privacy can be difficult to achieve, especially in neighborhoods where homes are close together. A planter privacy screen offers a creative and attractive way to add separation without building a permanent structure.
Unlike fences or large walls, planter screens feel lighter and more natural. When filled with plants, they create a living wall of greenery that softens your outdoor space while still providing privacy.
A DIY privacy screen planter is perfect for:
• patios and decks
• small backyards
• outdoor dining areas
• poolside seating areas
• balconies and terraces
It’s also a wonderful option for renters because the structure can be moved or repositioned if needed.
Looking for free knitting patterns? Browse this full collection of easy knitting patterns you can start today:
50 Free Knitting Patterns You’ll Actually Want to Make (Beginner-Friendly)
A Beautiful Outdoor Privacy Solution
One of the best things about this outdoor privacy screen planter is how versatile it is. You can customize it to suit your space, your style, and the plants you want to grow.
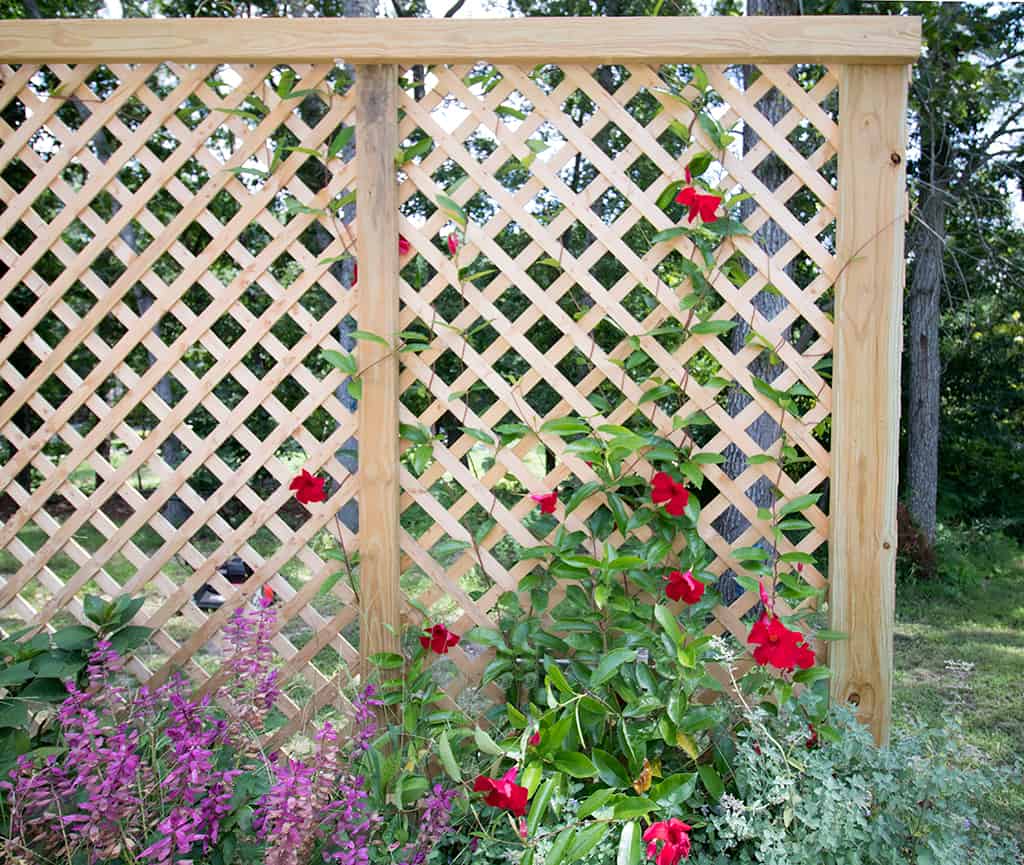
Many people choose to grow climbing plants or tall ornamental grasses in these planters. Some popular choices include:
• jasmine
• clematis
• climbing roses
• ivy
• bamboo
• tall grasses
As the plants grow and fill in, the planter becomes a lush vertical garden that naturally blocks views while adding beauty to your outdoor space.
If you enjoy decorating your outdoor space with handmade projects, you might also enjoy some of the seasonal DIY ideas on the site, such as creative fall decorating projects and handmade home decor.
Supplies needed for Privacy Screen Planter DIY:
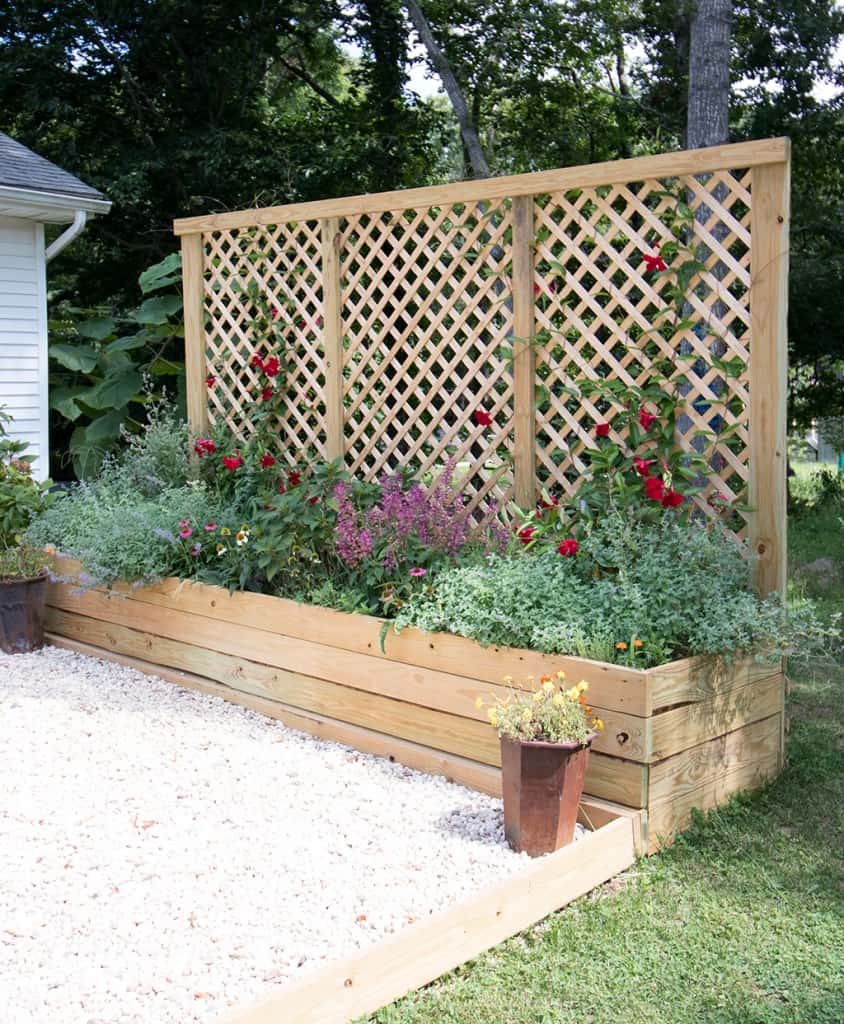
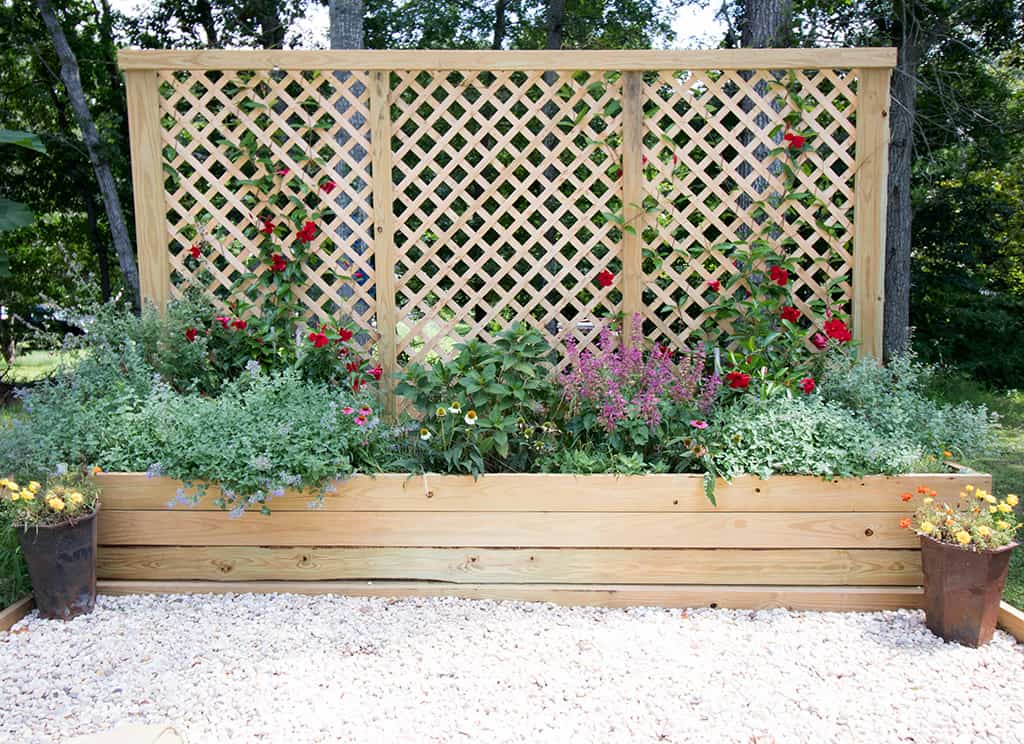
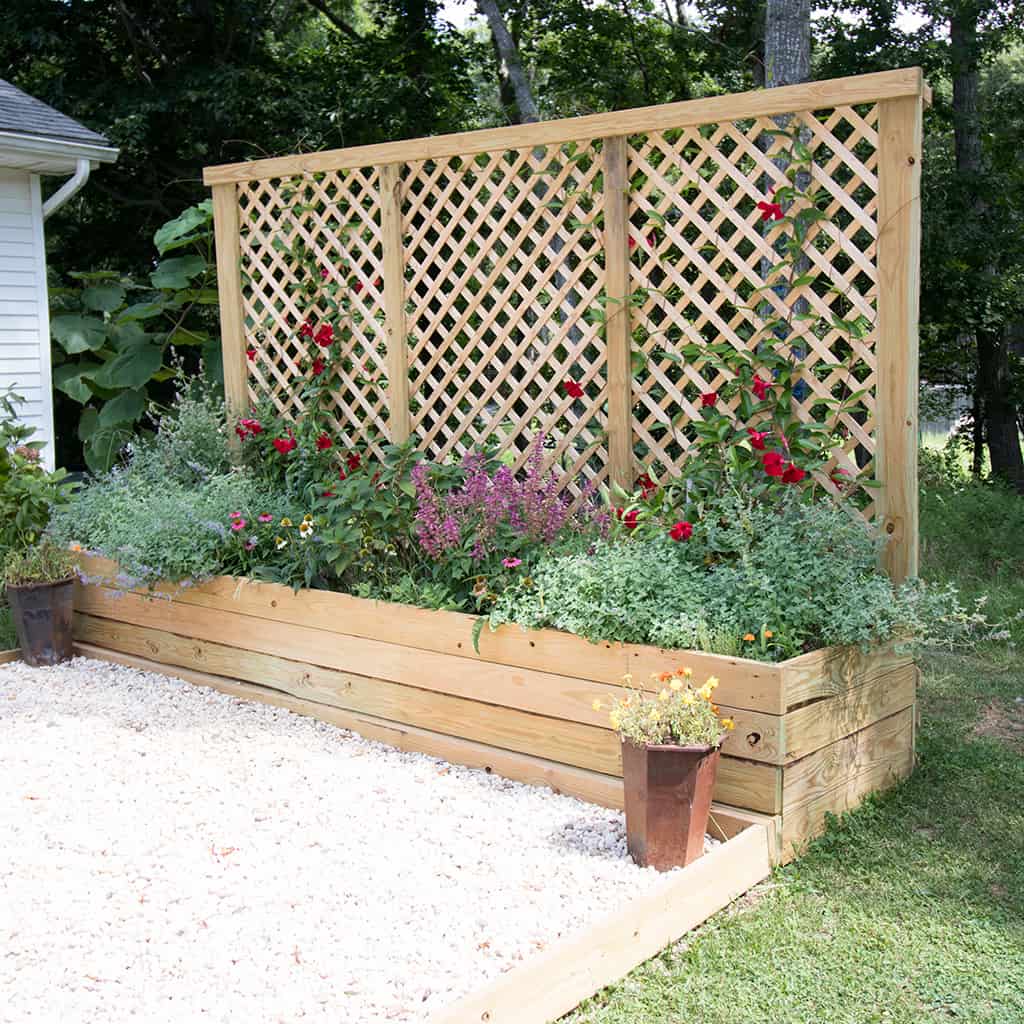
My finished Privacy Screen Planter DIY measures 12 feet long and 2 feet wide. The privacy fence is 8 feet high. This upright structure is very sturdy and the size of the planter allows for ample flowering bushes, herbs, hedges, small shrubs, and climbing vines. It’s also a nice source of shade in the summer.
Looking for more DIY outdooor planters?
Pressure treated 2 x 6s
Pressure treated 2 x 4s (I used 2- 8 foot and 1- 12 foot) (for the center of the lattice frame and the top brace)
Pressure treated wood lattice (the 3/4 inch is sturdy and easy to work with) (These wood lattice panels also come in cedar, but they’re a lot more expensive)
Pressure treated scrap wood to use on the inside of the planter
3 1/2 inch exterior screws (I used deck screws)
Saw, Drill, Nail gun
Finished length: 12 feet
Finished width: 2 feet
Looking for more DIY Projects like this outdoor privacy screen?
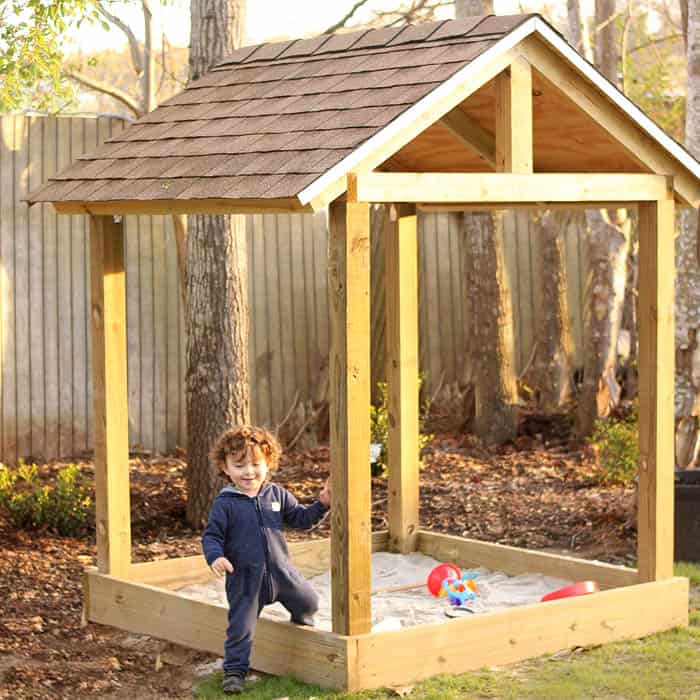
How to Build a Sandbox with a Roof
Tutorial
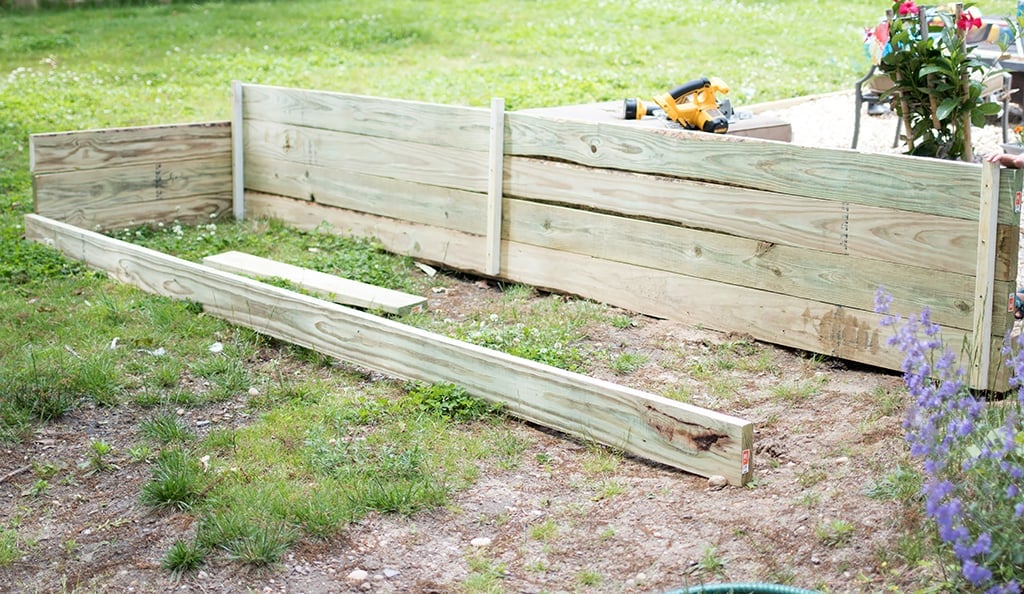
The first step is measure the area and buy the lumber in the correct lengths. Since my planter box was 12 feet long, I bought 8- 12 foot 2 x 6 boards. The sides were 2 feet so I bought 2- 8 foot 2 x 6 boards.
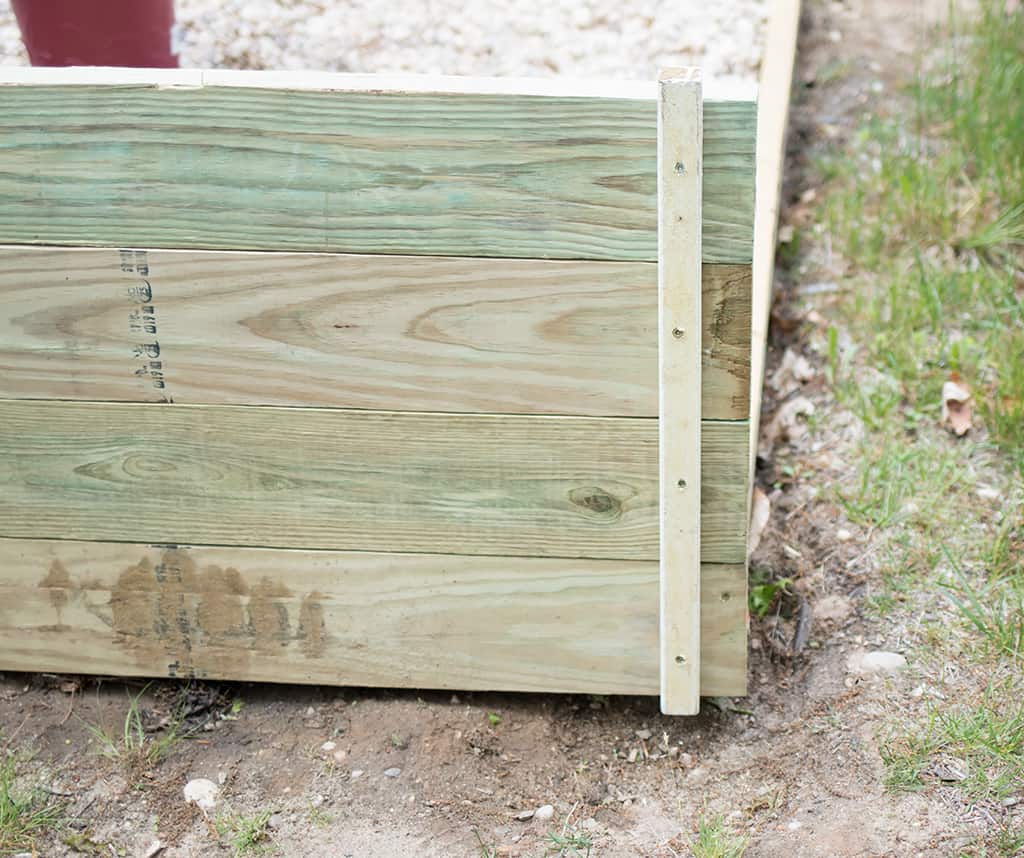
Building the planter is easy because you’re just making a simple rectangle. I used pressure-treated scrap wood on the inside of the box to prevent bowing and keep everything sturdy. It also helped to reinforce the corners.
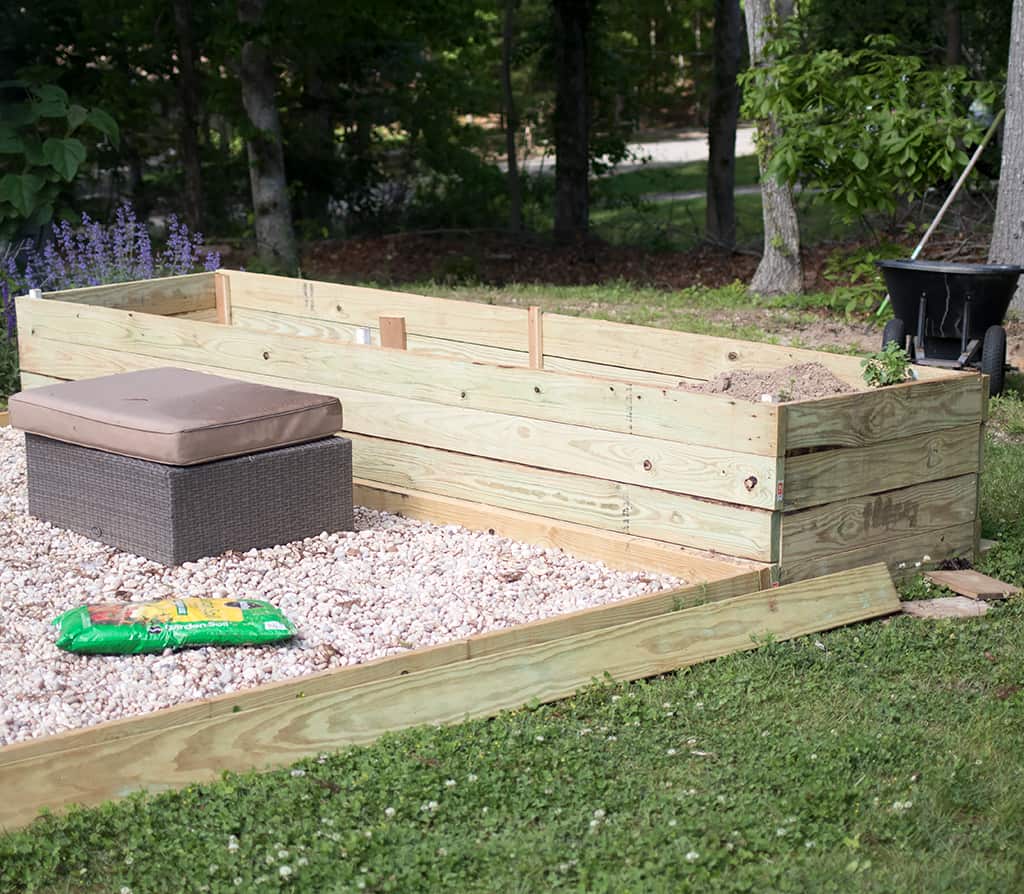
Once the planter was finished, I made some adjustments to make sure it was level.
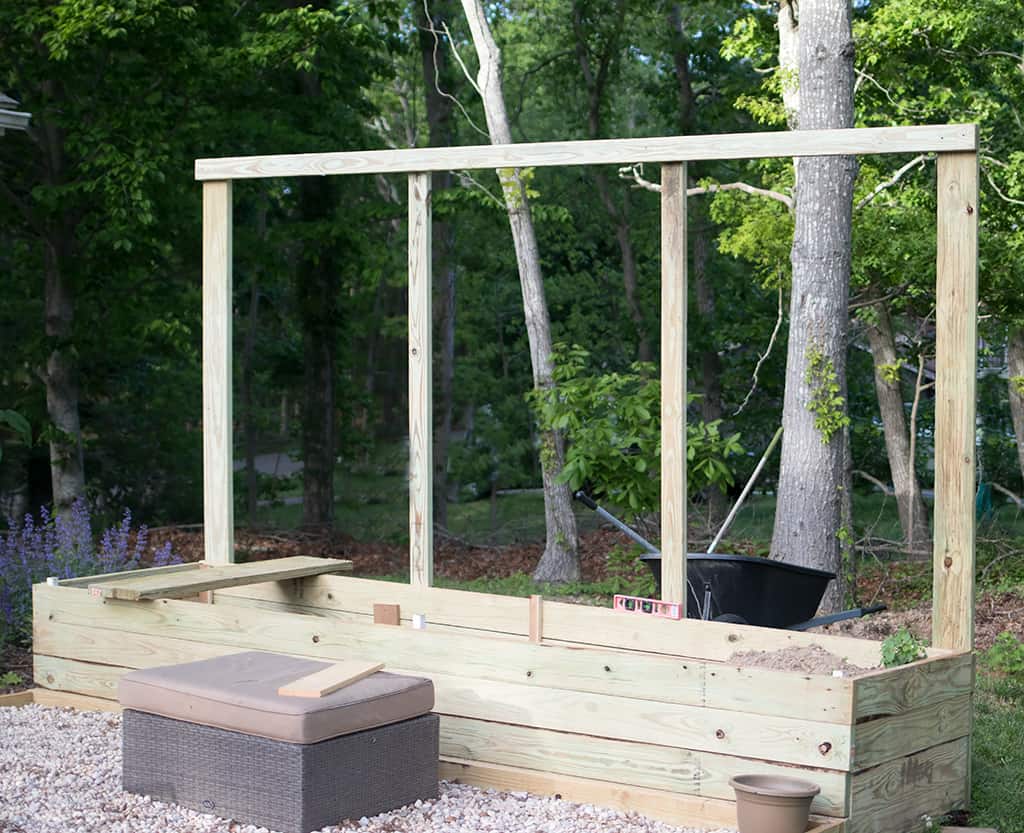
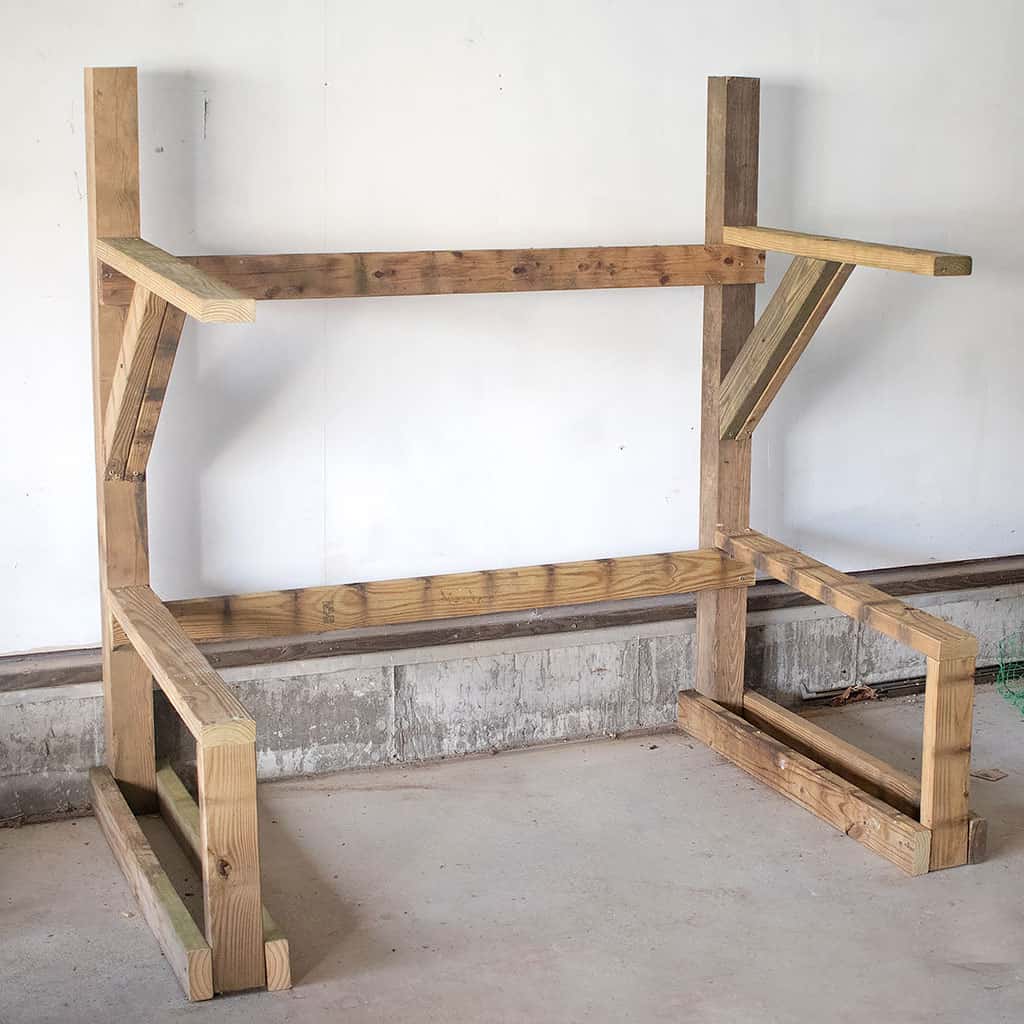
The next step was to make the wooden frame. I screwed a 2 x 6 x 8 pressure treated board to both ends, making sure they were plum. The lattice screen is 4 feet wide, so I added pressure treated 2 x 4 x 8s to the middle to hide the seams where the lattice joins together. These middle boards also make the screen secure. Once the boards are in place I attached the 2 x 4 x 12 across the top, making sure it was level.
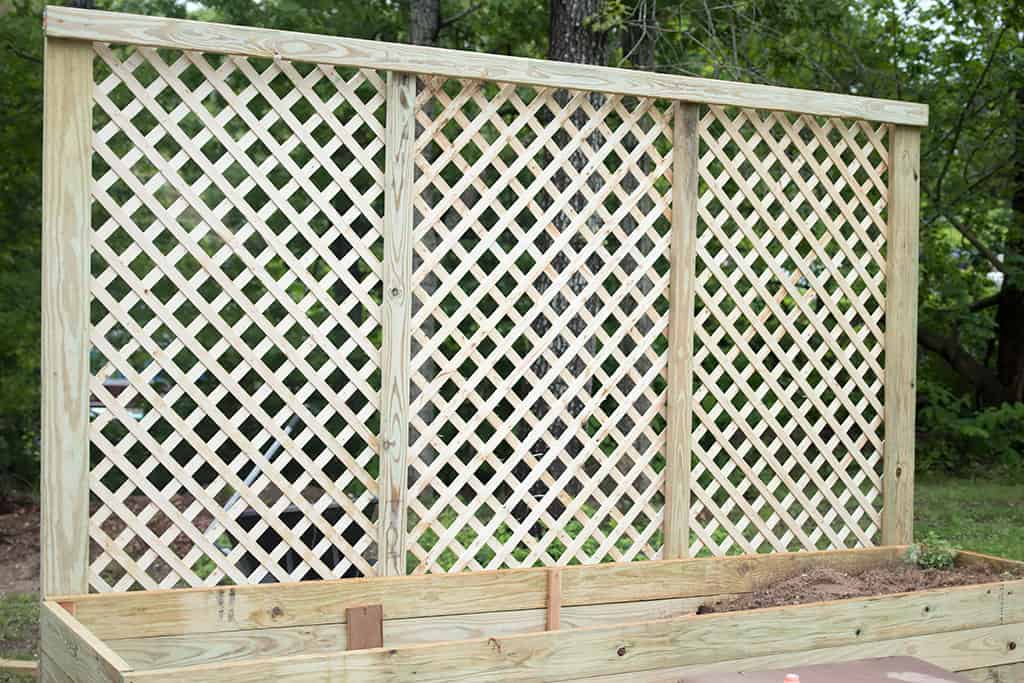
Then I attached the wood lattice using a nail gun. Best of all? No cutting was necessary! I used the full 8 foot height of the lattice and the 4 foot wide panels were perfect for my 12 foot planter. Once the planter is complete, fill with soil and add your favorite greenery and flowers.
Benefits of a DIY Privacy Screen Planter
There are many reasons homeowners and gardeners love building their own privacy planters.
Adds instant privacy
A privacy planter provides a barrier between your outdoor space and neighboring yards or buildings.
Combines plants and structure
Instead of a plain fence, you get a decorative element that supports greenery and flowers.
Works in small spaces
Even compact patios or balconies can benefit from a vertical planter screen.
Customizable design
You can adjust the height, width, and finish to match your outdoor decor.
Budget-friendly project
Building your own planter screen is often much more affordable than installing fencing or other permanent privacy structures.
Choosing Plants for Your Privacy Screen
The plants you choose will have a big impact on the overall look of your privacy screen.
If you want a lush green wall, climbing vines are an excellent option. These plants will grow up the screen structure and fill in the gaps over time.
If you prefer a more modern look, tall grasses or upright plants can create a dramatic effect while still providing privacy.
Some great plants for privacy planters include:
• climbing hydrangea
• star jasmine
• clematis
• bamboo
• ornamental grasses
• ivy
Seasonal flowers can also be added to the base of the planter to create color and visual interest.
Styling Your Outdoor Space
Once your privacy screen planter is complete, you can style the surrounding space to create a comfortable outdoor retreat.
Some ideas include:
• adding outdoor string lights
• placing a cozy seating area nearby
• incorporating lanterns or candles
• using outdoor rugs for texture
• mixing different plant heights for visual interest
Combining your planter screen with other garden elements can turn a simple patio into a relaxing outdoor escape.
More DIY Projects for Your Home
If you enjoyed building this DIY privacy screen planter, there are many more creative projects you can explore.
You might also enjoy:
• DIY outdoor planters
• seasonal decorating ideas
• simple home improvement tutorials
• handmade craft projects
Many readers enjoy combining DIY home projects with creative hobbies like knitting, gardening, and seasonal decorating.
If you enjoy handmade projects, you may also like browsing the Knitting Pattern Directory, where you can find dozens of cozy knitting projects including hats, baby garments, and seasonal patterns.
Decorating with Planters
Planters are one of the easiest ways to transform any outdoor space. Whether you’re working with a large garden or a small balcony, adding plants can instantly make the area feel more welcoming.
Large planter boxes like this one also provide structure and height, which helps create a layered and visually interesting garden design.
You can place privacy planters:
• along deck railings
• near outdoor seating areas
• beside patios or walkways
• around pools or hot tubs
• along property edges
Because they’re movable, you can experiment with different layouts until you find the perfect arrangement.
Tips for Maintaining Your Privacy Screen Planter
Once your planter is built and planted, a little maintenance will keep it looking beautiful.
Some simple care tips include:
• watering plants regularly
• trimming climbing vines
• refreshing soil each season
• checking wood for weather wear
• resealing or staining wood as needed
With proper care, your DIY privacy screen planter can remain a beautiful part of your outdoor space for many years.
This DIY privacy screen planter is a wonderful way to add privacy, greenery, and visual interest to your outdoor living space. By combining a sturdy planter box with a vertical screen structure, you can create a decorative garden feature that is both practical and beautiful.
Whether you’re trying to create a secluded patio retreat or simply want to add more greenery to your backyard, this project offers a stylish solution that’s easy to customize and build.
And once your planter is complete, you can enjoy the relaxing atmosphere of a more private and inviting outdoor space.
I love seeing your finished projects! If you enjoyed making this backyard privacy screen, or any of my other DIY planters, I’d love to see yours on Instagram, just tag me @ginamicheleny. Happy DIYing!