DIY Framed Macrame Wall Art
DIY Framed Macrame Wall Art- create one-of-a-kind art using basic macrame knots. Beginner-friendly!
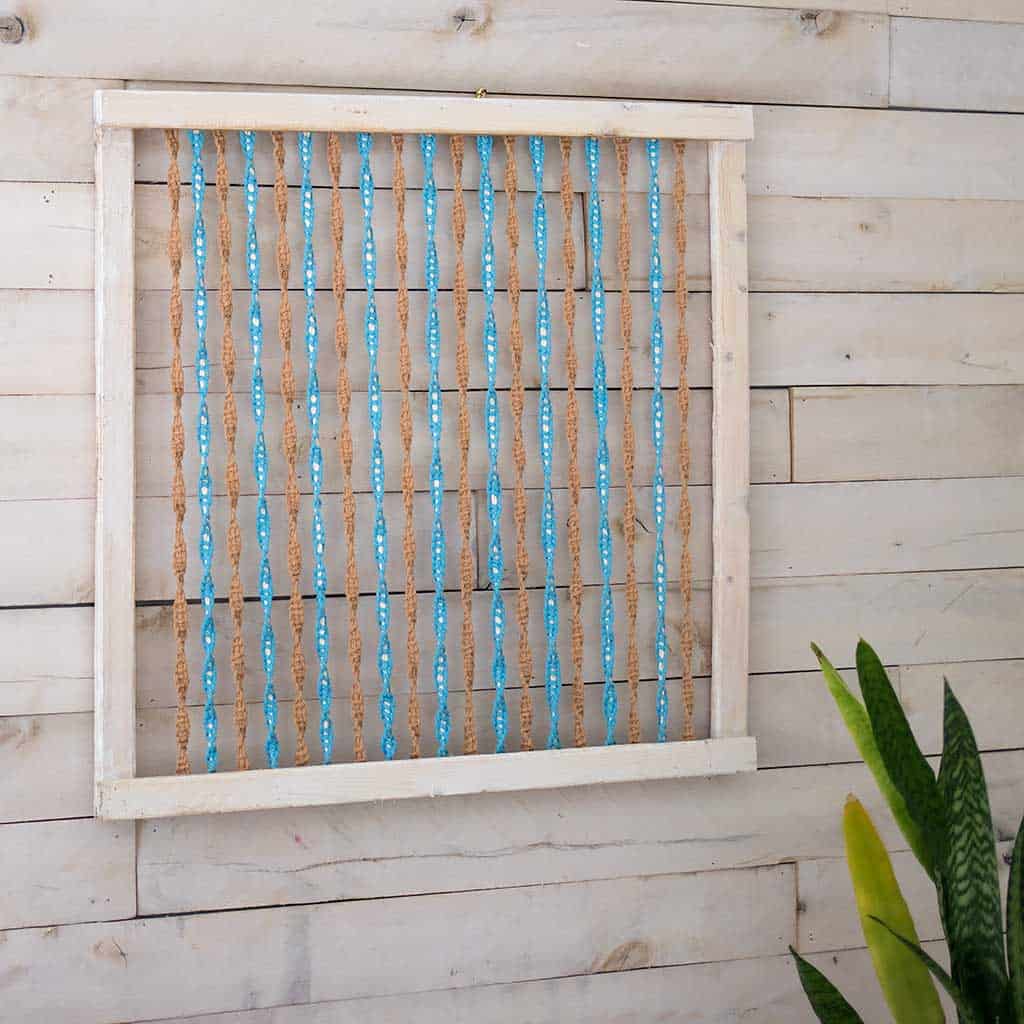
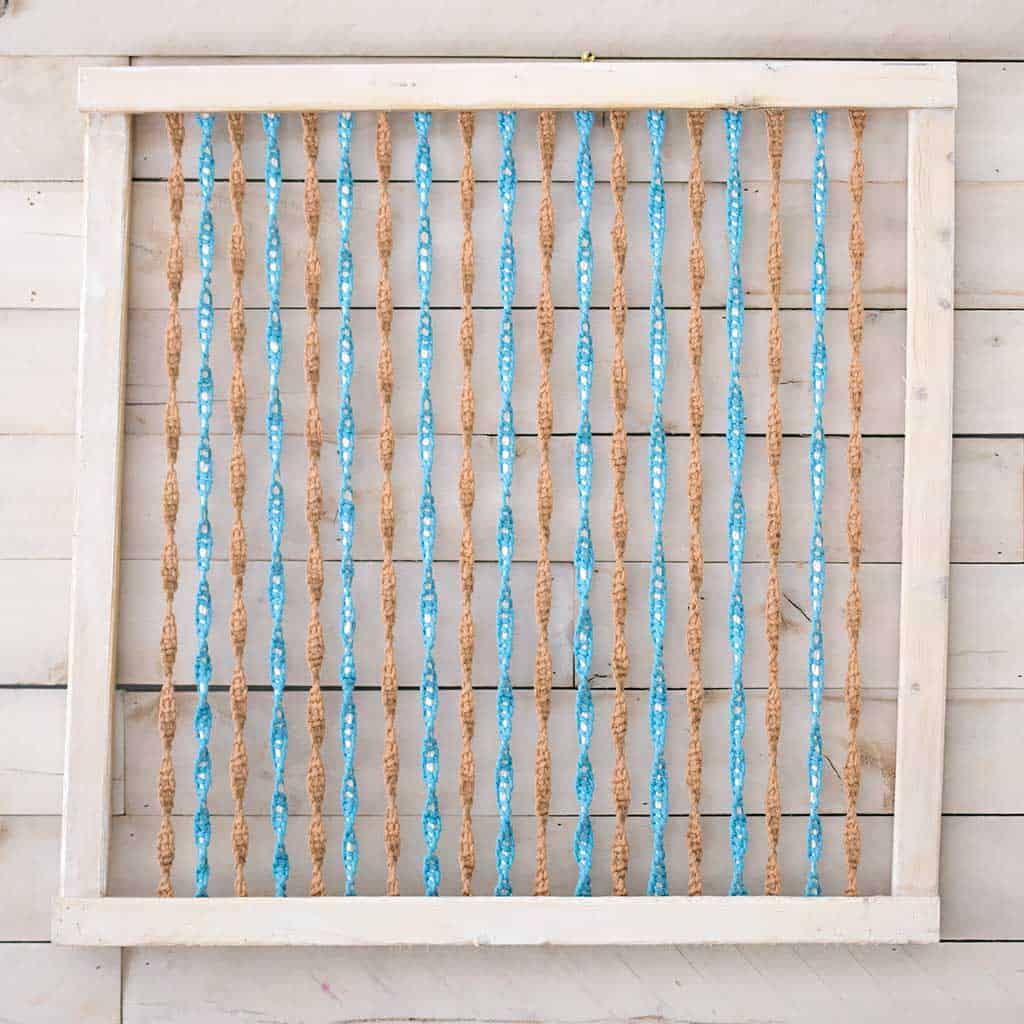
Even if you can’t draw or paint, you can still create one-of-a-kind artwork for your home. Instead of the traditional hanging macrame pieces, this wall decor incorporates an (easy!) handmade wooden frame. I chose a color palette of tan, white, and sky blue because it reminds me of the beach. I love the textures the spiral knots create.
This beginner macrame wall art is created using the Spiral Knot. The spiral knot is simply half of a Square knot that always repeats on the same side. While you repeat the knot, you’ll notice the cords start twisting. Once you get the hang of it, it’s really easy to make. I included both the written instructions and a video tutorial showing basic knots below.
How to make the Spiral Knot in Macrame
Start by tying on 4 cords.
1. Bring the right cord over and to the left of the two filler cords.
2. Place the left cord over the right cord.
3. Bring the left cord under the filler cords and through the loop formed by the right cord.
4. Pull to on the ends to tighten.
KEEP IN TOUCH! FOR MORE INSPIRATION, PROJECTS, AND FREE KNITTING PATTERNS, SIGN UP FOR OUR WEEKLY NEWSLETTER:
DIY Framed Macrame Wall Art
(As an Amazon Associate I earn from qualifying purchases)
Finished wall art measures 27 1/4 x 27 1/4 inches
Supplies needed:
Pine 1×2
Lumber Cuts:
Cut 4, 1x2s that measure 27 3/4 inches each
Staple gun
Wood glue and Pin nail gun (I used this one)
Macrame cord (I used 3mm cotton)
Step by Step Instructions:

The first step is to build the frame. The top and bottom 1x2s will sit on top of the sides. Add a small amount of wood glue and nail the corners of the frame together.

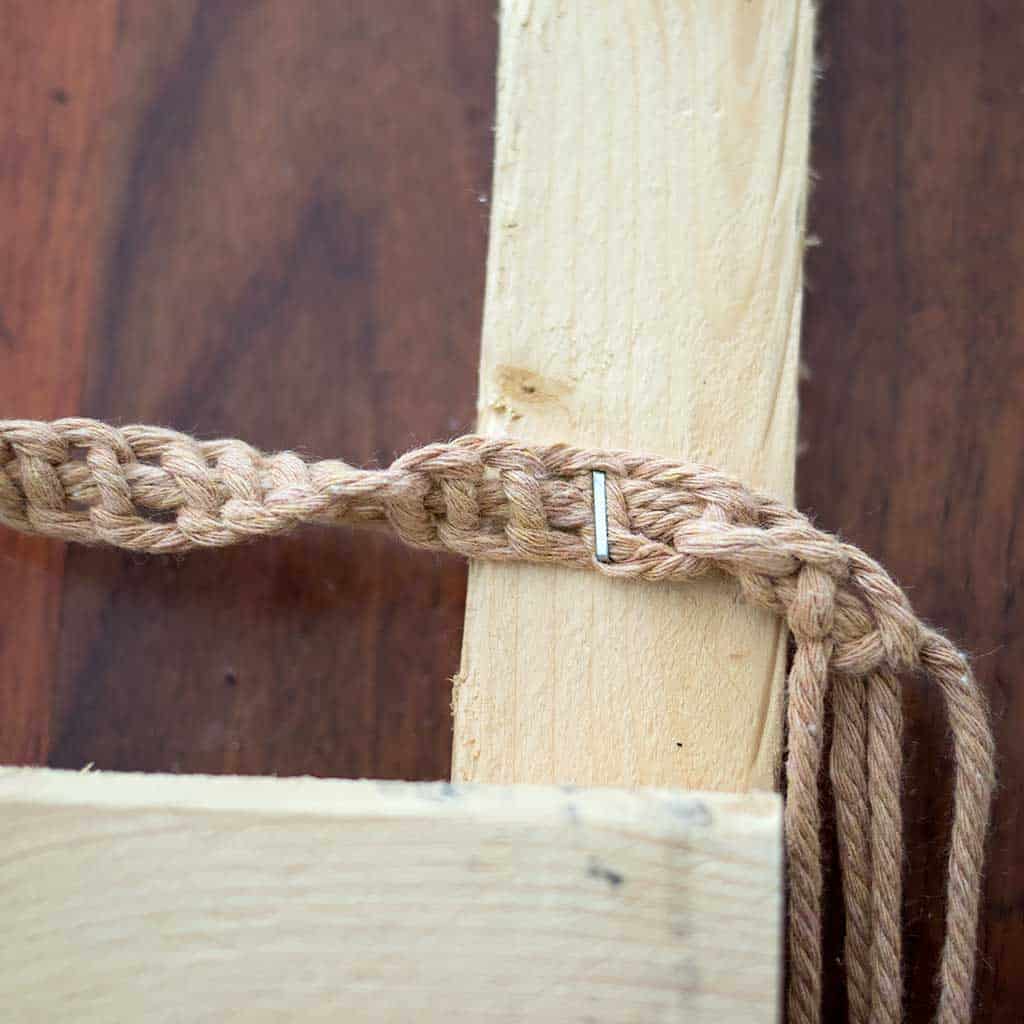
Instead of a wooden dowel, the macrame is secured to the back of the frame.
The macrame spiral knots will be 1 inch apart. You will need 4 strands to make the knot. I cut 2 cotton cord strands (measuring approximately 180 inches), folded them over, and stapled them to the top of the frame.
Make the spiral knot (as shown in the video) and staple the end to the bottom of the frame. Trim the excess cord with a pair of scissors.
I alternated between tan spiral knots and blue and white to add visual interest.
Once I was finished knotting, I decided that the frame would look better whitewashed. I watered down interior paint and applied it with a paintbrush. (It’s a lot easier to paint or stain the frame before you add the macrame.)

Looking for more craft projects like this DIY Macrame wall hanging?
How to Make Twine from Fabric Scraps
How to Fluid Paint for Total Beginners
I love seeing your finished projects! If you enjoyed making this DIY Framed Macrame Wall Art or any of my other home decor projects, I’d love to see yours on Instagram, just tag me @ginamicheleblog. Happy crafting!