How to Ice Dye Fabric: Easy DIY Ice Dyeing Tutorial for Beginners
Learn how to ice dye fabric with this easy step-by-step tutorial. Create beautiful marbled patterns on shirts, sweatshirts, and more using ice, dye, and a few simple supplies.
If you’ve ever admired colorful tie-dye projects but wanted something a little more artistic and unpredictable, you’ll love ice dyeing. This simple fabric dyeing technique uses melting ice to distribute powdered dye across fabric, creating stunning watercolor-like patterns that are impossible to duplicate.
The best part? Ice dyeing is incredibly beginner-friendly. Unlike traditional tie-dye, there’s no squeezing bottles, complicated folding techniques, or worrying about perfect spirals. Simply add ice, sprinkle on dye, and let nature do the work.
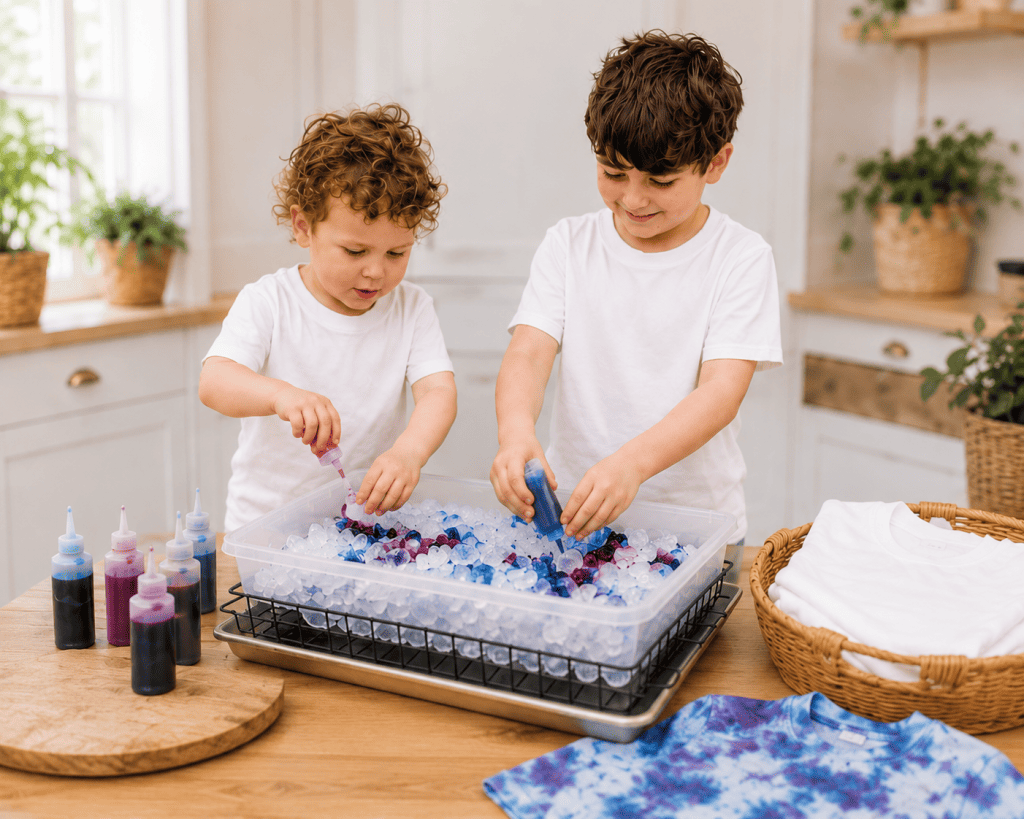
Whether you’re transforming plain t-shirts, sweatshirts, tote bags, pillow covers, or fabric for sewing projects, ice dyeing is a fun and affordable way to create custom textiles at home. It’s also a fantastic craft to do with kids since the process is simple and the results are always exciting.
In this tutorial, I’ll show you exactly how to ice dye fabric, what supplies you’ll need, and my favorite tips for achieving vibrant, long-lasting color. This method creates beautiful marbled effects with very little effort.
What Is Ice Dyeing?
Ice dyeing is a fabric dyeing technique where powdered dye is sprinkled over ice rather than mixed with water first. As the ice slowly melts, it carries the dye through the fabric, creating unique patterns, color variations, and organic textures.
Because the dye travels unevenly through the melting ice, every project turns out differently. Even if you use the exact same colors and process twice, you’ll end up with completely unique designs.
Many people love ice dyeing because:
It’s beginner-friendly
No special artistic skills are required
Every project is one of a kind
It’s perfect for adults and kids
Results look professionally dyed
It’s a great way to customize clothing
Why You’ll Love This DIY Ice Dye Project
Beautiful Results with Minimal Effort
The ice does most of the work for you. Simply set up your project and let the melting process create stunning patterns.
Budget-Friendly Craft
Most supplies are inexpensive and easy to find. You can transform inexpensive white t-shirts into custom wearable art.
Great for Upcycling
Ice dyeing is perfect for giving new life to plain clothing or refreshing stained garments.
Fun for All Ages
Kids love watching the colors blend and seeing the final reveal.
Best Fabrics for Ice Dyeing
Natural fibers absorb dye best.
Good options include:
100% cotton
Linen
Rayon
Bamboo
Hemp
Synthetic fabrics like polyester generally won’t absorb dye well and may produce faded results.
White or very light-colored fabrics work best because they allow the dye colors to show clearly.
Looking for free knitting patterns? Browse this full collection of easy knitting patterns you can start today:
50 Free Knitting Patterns You’ll Actually Want to Make (Beginner-Friendly)
10 Easy Baby Knitting Patterns for Beginners
10 Quick Summer Knitting Patterns
15 Easiest Free Knitting Patterns
15 Easy Summer Knitting Patterns You Can Make This Weekend
10 Easy Baby Knitting Patterns That Look Impressive (But Are Actually Beginner-Friendly)
How to Ice Dye Fabric: Easy DIY Ice Dyeing Tutorial for Beginners
(As an Amazon associate, I earn from qualifying purchases)
Supplies needed:
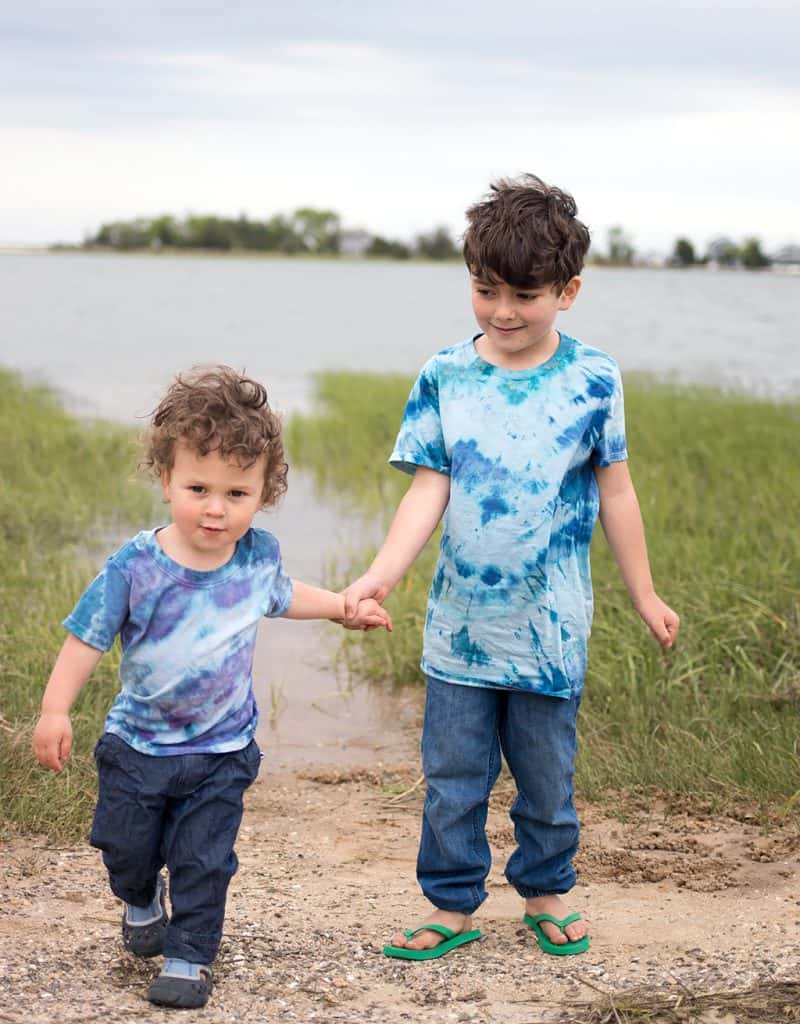
White cotton t shirts (I used these toddler and kid size shirts)
Rit powder dye in a variety of colors
Ice
Rubber bands
Baking sheet and cooling rack
Outer part of a springform pan (if you don’t have a springform pan, you can use a cardboard box that has the top and bottom cut off)
Rit dye fixative

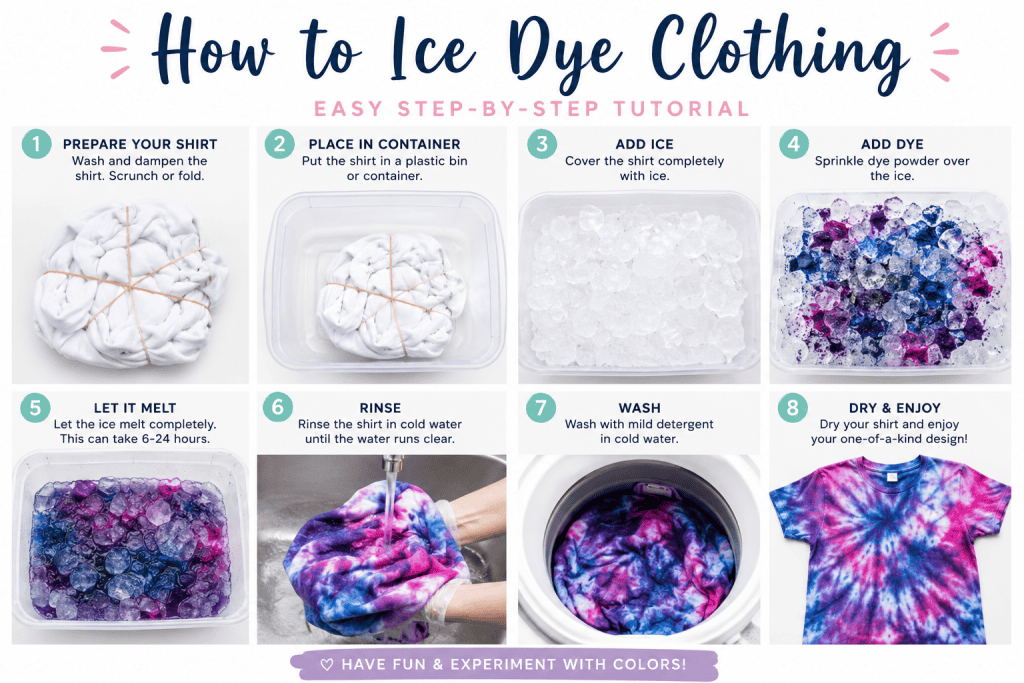
Prepare the Fabric
Start by dampening your fabric.
Twist, scrunch, or crumple the fabric tightly. Secure it with rubber bands to hold the shape.
Different folding methods create different patterns:
Scrunch Method
Creates a marbled, cloud-like appearance.
Spiral Method
Produces a traditional tie-dye look.
Accordion Fold
Creates more geometric patterns.
For beginners, the scrunch method is the easiest and most forgiving.
Secure with rubber bands. Place the outer part of the springform pan on the cooling rack with the baking sheet underneath. Arrange the t-shirts inside. Make sure they are not overlapping.

Completely cover the fabric with ice.
Make sure every section of fabric is hidden beneath the ice layer.
The more evenly distributed the ice, the more evenly the dye will travel through the fabric.

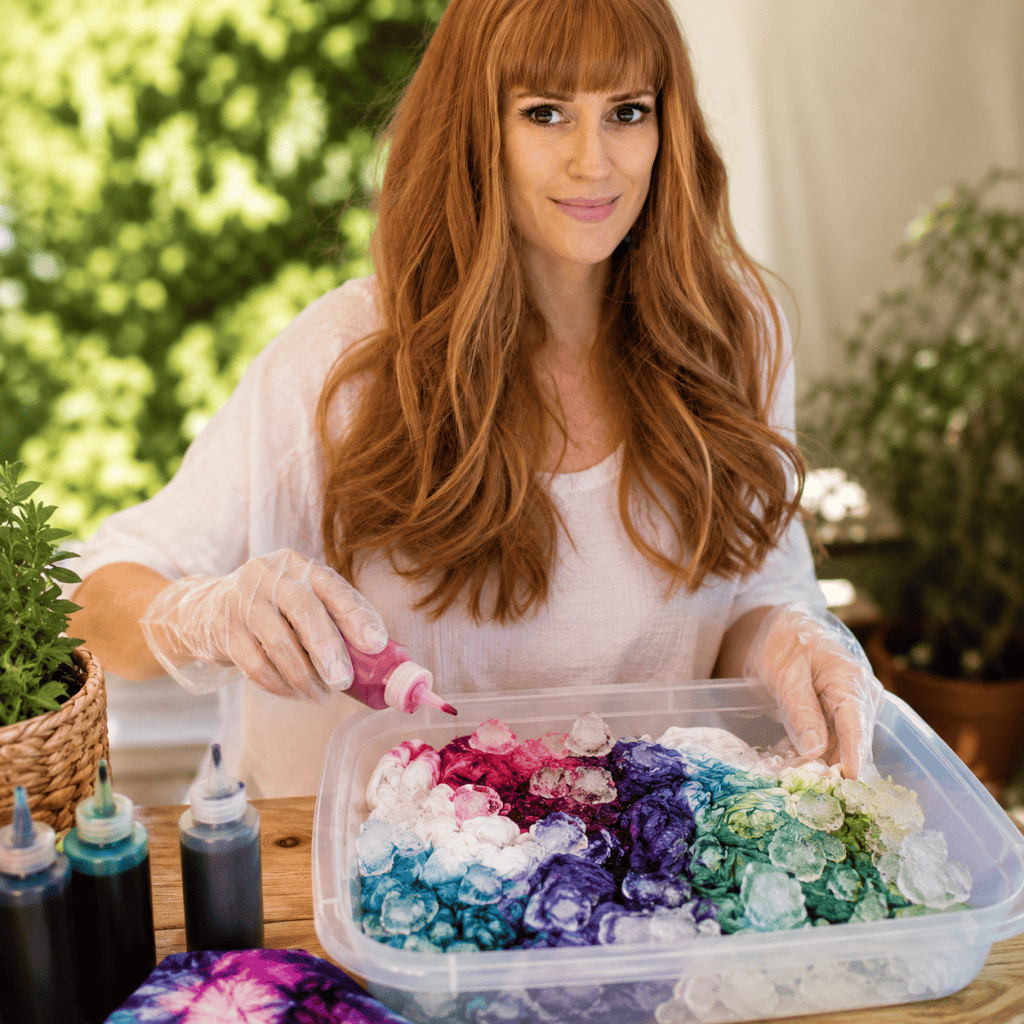
Spoon the powdered dye on top of the ice. I used a different color on each section.
For the most vibrant results:
Use colors sparingly at first
Avoid placing too many muddy colors together
Allow some white space for contrast
As the ice melts, the colors will spread and blend naturally.
Let the ice melt. This process can take several hours depending on temperature and the amount of ice used.
You’ll begin to see incredible color movement and marbling as the dye travels through the fabric.
Add the dye fixative to a bucket with hot water. Let the shirts sit in it for 10 minutes. Remove the shirts, take off the rubber bands and wash (using the hottest water setting), and dry.
Ice Dye Color Combination Ideas
Need inspiration?
Try these combinations:
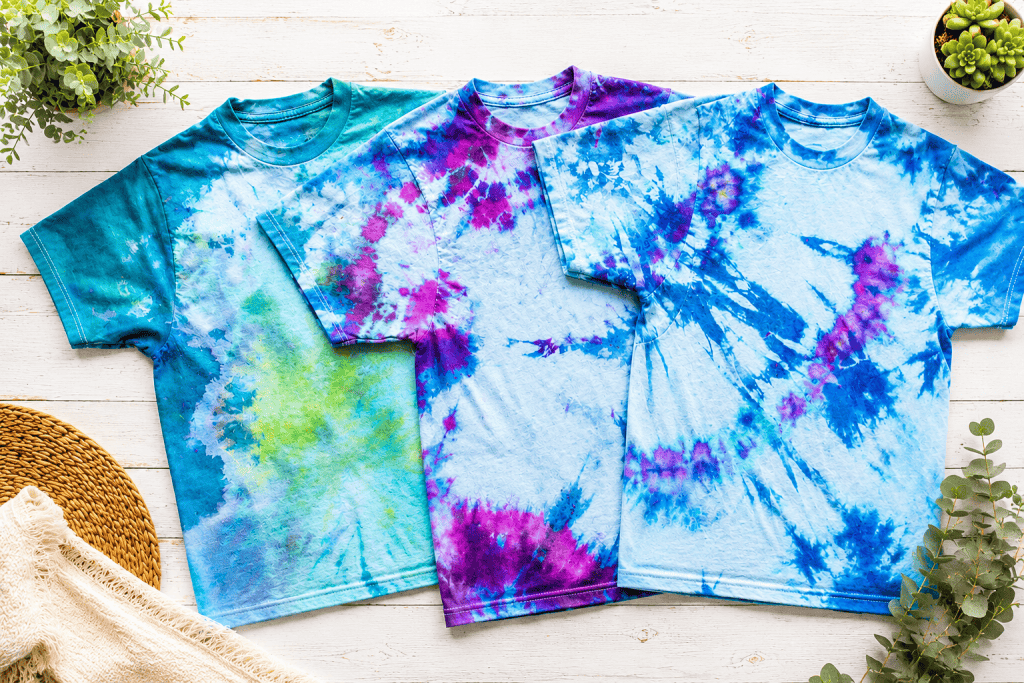
Ocean Blues
Turquoise
Navy
Teal
Sunset
Orange
Coral
Magenta
Rainbow
Red
Yellow
Blue
Purple
Earth Tones
Mustard
Olive
Rust
Pastel Mix
Lavender
Aqua
Soft Pink
Common Ice Dyeing Mistakes to Avoid
Using Synthetic Fabric
Natural fibers absorb dye much better.
Not Using Enough Ice
Insufficient ice can leave portions of fabric undyed.
Applying Too Much Dye
A little dye goes a long way.
Skipping the Fixative
Using a fixative helps maintain vibrant colors after washing.
What Can You Ice Dye?
The possibilities are endless.
Try dyeing:
T-shirts
Sweatshirts|
Tank tops
Tote bags
Pillow covers
Tea towels
Baby onesies
Fabric for sewing projects
Canvas shoes
More DIY Projects You’ll Love
If you enjoy colorful DIY projects, check out these tutorials next:
DIY Marbled Flower Pot Tutorial (Easy + Budget-Friendly Painted Planters)
DIY Floral Party Backdrop for Under $15 (Easy Budget-Friendly Party Decor)
Raffia Pom Pom Sandals DIY (Easy Summer Sandals You Can Make in Under an Hour)
DIY Fabric Transfer Tea Towels (Easy Custom Kitchen Towel Tutorial)
DIY Macrame Plant Hanger (Easy Beginner-Friendly Hanging Planter You Can Make in an Afternoon)
How to Make Container Candles (Easy DIY Soy Candles for Beginners)
How to Make Custom Flower Pots With Cricut (Easy DIY Gift Idea for Beginners)
DIY Framed Macrame Wall Art (Easy Boho Wall Decor You Can Make in an Afternoon)
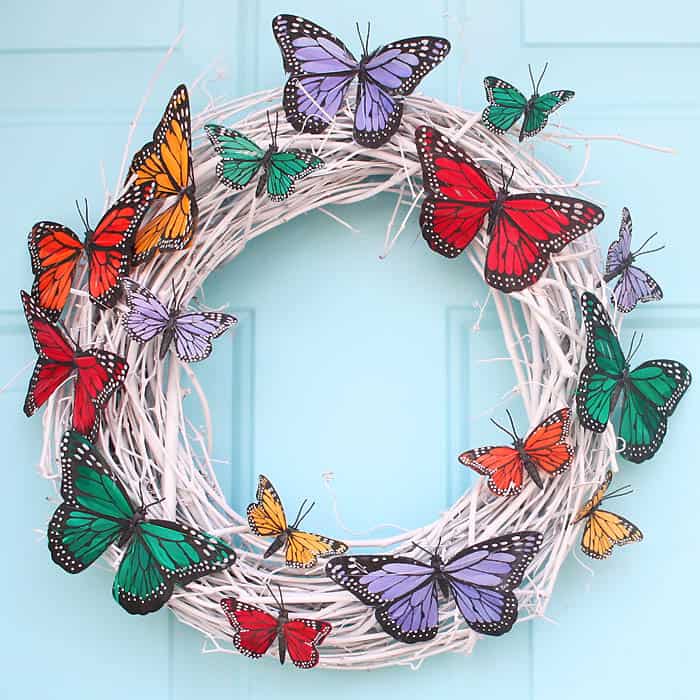
DIY Butterfly Wreath (Easy Spring Wreath That Looks Store-Bought)
You can find even more ideas in my DIY craft archives.
Frequently Asked Questions
Do I need special dye for ice dyeing?
Powdered fabric dyes work best because they can be sprinkled directly onto the ice.
How long does ice dyeing take?
The active setup only takes about 15–20 minutes, but the melting process can take several hours.
Can I ice dye colored fabric?
Yes, but the existing color will affect the final results. White fabric produces the brightest colors.
Is ice dyeing permanent?
When done correctly and set with fixative, the color is long-lasting and washable.
Can kids do this project?
Absolutely. Adult supervision is recommended when handling powdered dye, but the process itself is simple and fun for children.
Why does ice dyeing create unique patterns?
As the ice melts, it distributes dye unevenly through the fabric, creating natural color variations and marbling effects.
Ice dyeing is one of the easiest ways to create custom clothing and fabric at home. The process is simple, inexpensive, and surprisingly forgiving, making it ideal for beginners and experienced crafters alike.
Whether you’re creating colorful summer shirts, refreshing old clothing, or looking for a fun afternoon project with kids, ice dyeing delivers beautiful results every time. The unpredictability is part of the magic—no two projects will ever look exactly the same.
Grab some ice, pick your favorite colors, and start creating your own wearable works of art.
✨ I’d love to see what you’re making! ✨
If you’ve tried one of my knitting patterns, crochet projects, DIYs, or recipes, share your finished project on Instagram and tag me so I can see it 💛
There’s nothing better than seeing your creations come to life—from cozy knits to delicious recipes and everything in between. It truly makes my day!
Tag me @ginamicheleny so I can share your work and cheer you on!
Happy making!