Easy Flat Knit Seed Stitch Pumpkins Knitting Pattern (Beginner-Friendly Fall Decor)
Learn how to knit these cozy Flat Knit Seed Stitch Pumpkins with this easy beginner-friendly knitting pattern. Knit flat on straight needles with simple stitches and finish in an afternoon!
Flat Knit Seed Stitch Pumpkins
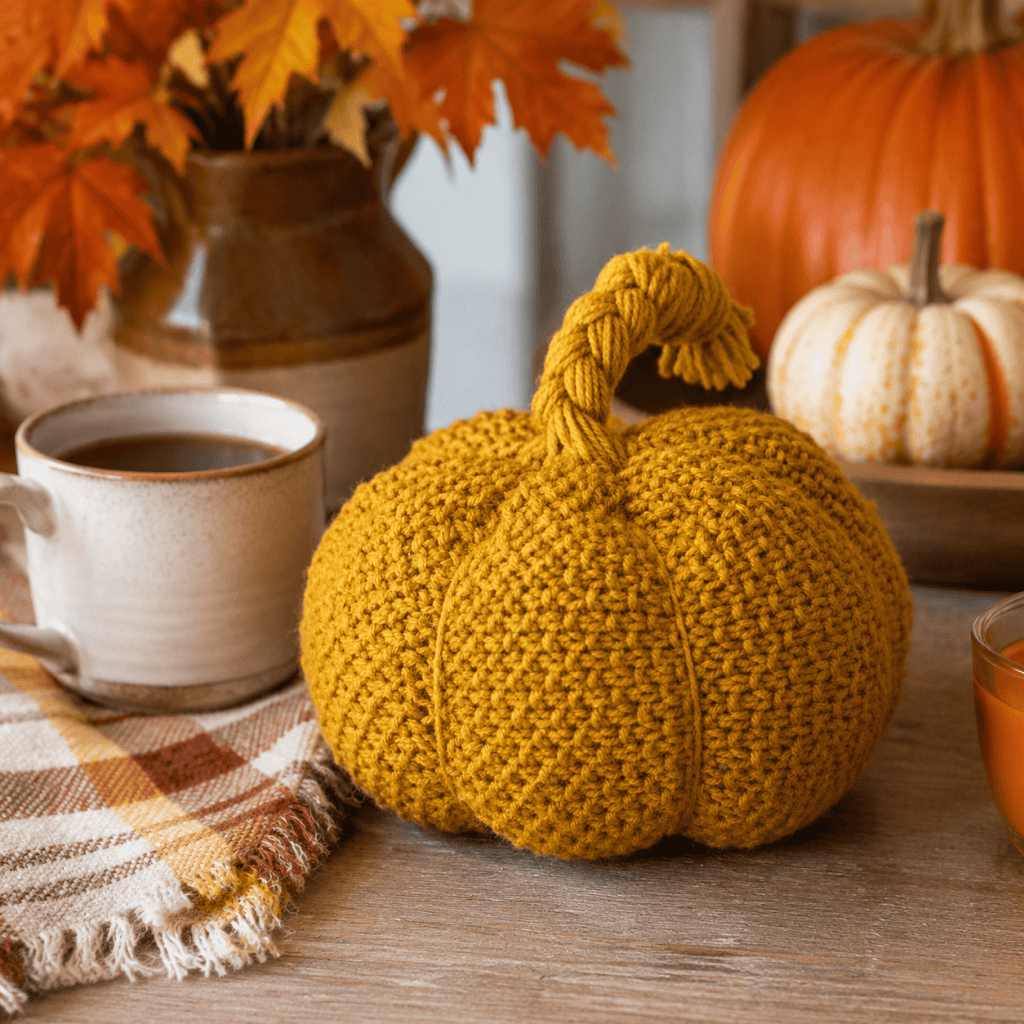
Looking for an easy fall knitting project that doesn’t require knitting in the round? These Flat Knit Seed Stitch Pumpkins are the perfect way to add handmade charm to your autumn décor. Knit flat on straight needles, they’re a relaxing beginner-friendly project featuring simple seed stitch texture and easy finishing.
Whether you’re decorating a mantel, filling a woven basket, or creating a cozy centerpiece, these knitted pumpkins bring warmth and texture to every room. They’re quick to make, easy to customize in different sizes and colors, and are a wonderful way to use up leftover yarn from your stash.
Best of all, because they’re worked flat, they’re ideal for knitters who prefer straight needles or are just learning new techniques.
✨ Want to knit without ads? Download the printable PDF version from my shop for instant access, printer-friendly instructions, and lifetime downloads.
Why You’ll Love These Flat Knit Pumpkins
Knit flat on straight needles
Beginner-friendly seed stitch
No knitting in the round required
Quick weekend project
Great stash buster
Beautiful textured finish
Perfect for fall decorating
Fun to make in multiple sizes
Wonderful handmade gifts
If you’ve been searching for an easy pumpkin knitting pattern that doesn’t require circular or double-pointed needles, this project is for you.
Knit Flat on Straight Needles
One of my favorite things about this pumpkin knitting pattern is that it’s worked flat instead of in the round.
Many beginner knitters feel more comfortable using straight knitting needles, making this an excellent project for building confidence. After knitting the rectangle in seed stitch, the pumpkin is simply seamed, gathered, stuffed, and finished with a stem.
If you’ve never knit a three-dimensional project before, you’ll be surprised by how simple the finishing process is. It’s a fun introduction to creating soft home décor without learning complicated shaping techniques.
If you love flat knitting projects, be sure to visit my:
12 Easy Garter Stitch Knitting Patterns for Beginners (Simple, Relaxing Projects)
15 Easy Straight Needle Baby Knitting Patterns (Beginner-Friendly + No Circular Needles)
12 Simple Knitting Patterns for New Knitters
You’ll find dozens of cozy projects that are all worked flat and perfect for beginners.
What Is Seed Stitch?
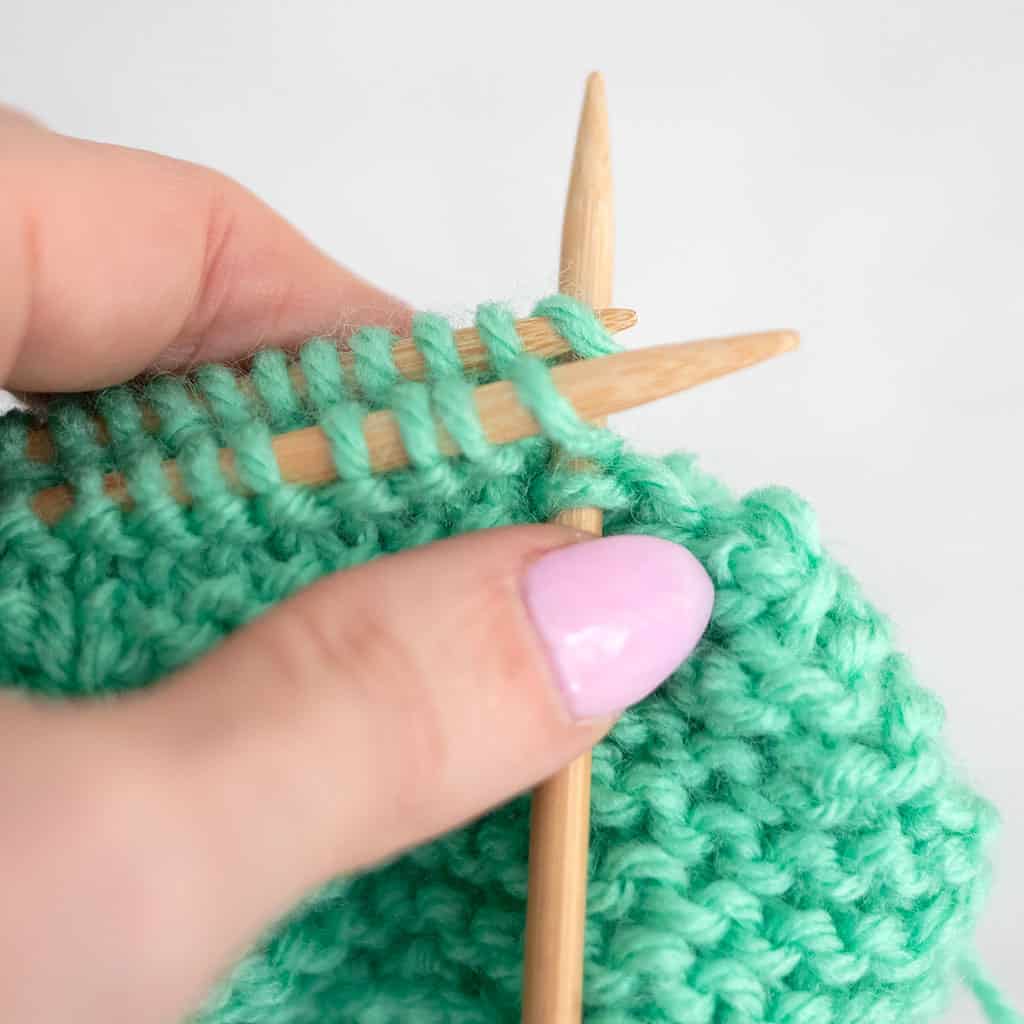
Seed stitch is one of the easiest textured knitting stitches to learn.
It’s created by alternating knit and purl stitches across every row, producing a fabric filled with tiny raised bumps. The finished texture resembles scattered seeds, giving the stitch its name.
Seed stitch offers several advantages:
Doesn’t curl like stockinette
Creates beautiful texture
Looks great on both sides
Easy to memorize
Excellent for beginners
It’s the perfect stitch for pumpkins because the textured surface naturally resembles the ridges and character found on real pumpkins.
Looking for free knitting patterns? Browse this full collection of easy knitting patterns you can start today:
50 Free Knitting Patterns You’ll Actually Want to Make (Beginner-Friendly)
10 Easy Baby Knitting Patterns for Beginners
10 Quick Summer Knitting Patterns
15 Easiest Free Knitting Patterns
15 Easy Summer Knitting Patterns You Can Make This Weekend
10 Easy Baby Knitting Patterns That Look Impressive (But Are Actually Beginner-Friendly)
Easy Flat Knit Seed Stitch Pumpkins Knitting Pattern (Beginner-Friendly Fall Decor)
✨ Ad-Free Printable Pattern Available! ✨
The ad-free, printable PDF of this pattern is now available for purchase at Shop Gina Michele—perfect for easy, distraction-free stitching.
Looking for more projects? Browse the Knitting Pattern Directory to explore all my knitting patterns in one place.
(As an Amazon Associate, I earn from qualifying purchases.)
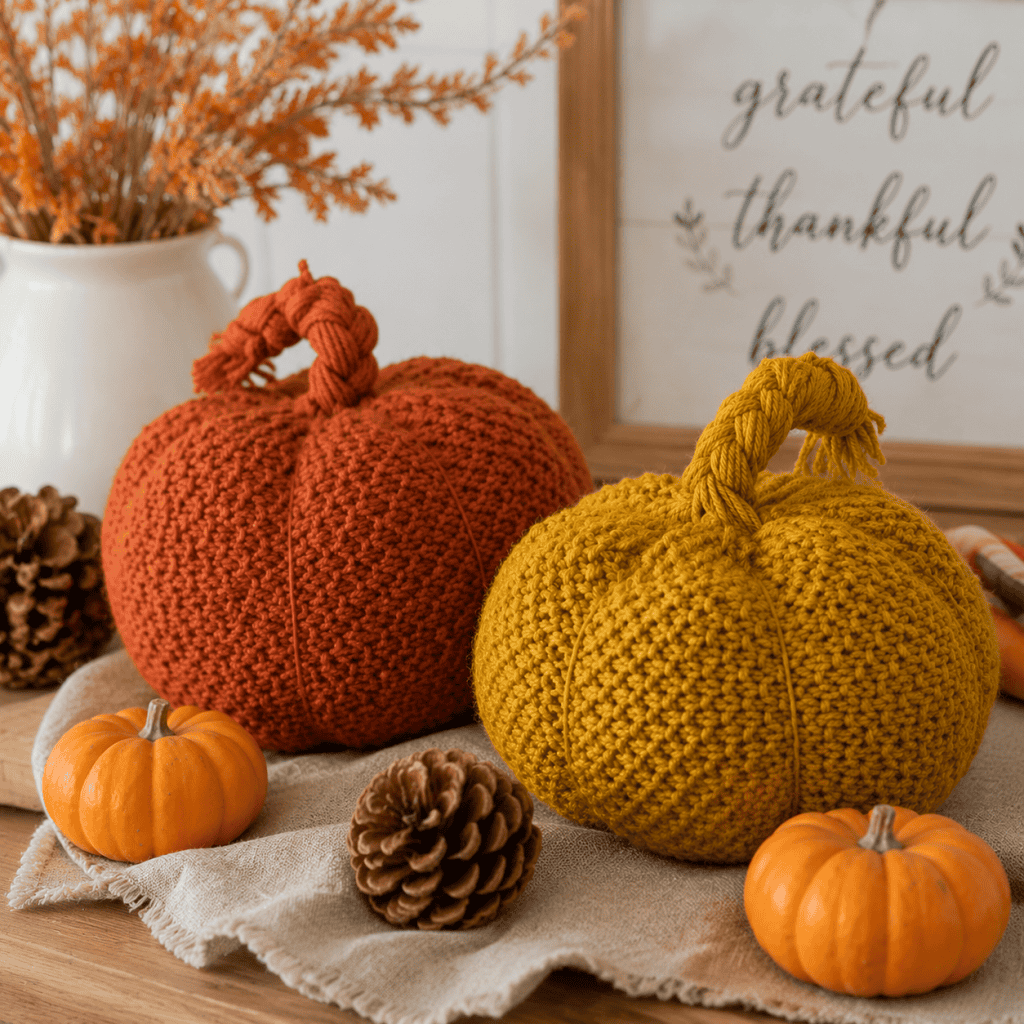
Yarn: Loops & Threads Impeccable yarn in Gold, and in Pumpkin (you can substitute this yarn for any #4 weight)
Needles: Size US 8 single point knitting needles
Gauge: Not important for this project
Also needed: fiber fill, yarn needle
Size: Pumpkins measure approximately 6 inches tall (not including the stem)
You Might Also Like


Pattern instructions:
Cast on 33 stitches.
Row 1: K1, P1 across the row.
Row 2: P1, K1 across the row.
Work these two rows for pattern. Once the piece measures 11 inches from the cast-on edge, bind off in ribbing.
Get the Printable PDF Pattern
Want an easy-to-read, ad-free version of this pattern? The printable PDF includes the complete pattern in a convenient format you can save or print.
Buy the PDF PatternHow to Assemble the Seed Stitch Pumpkins
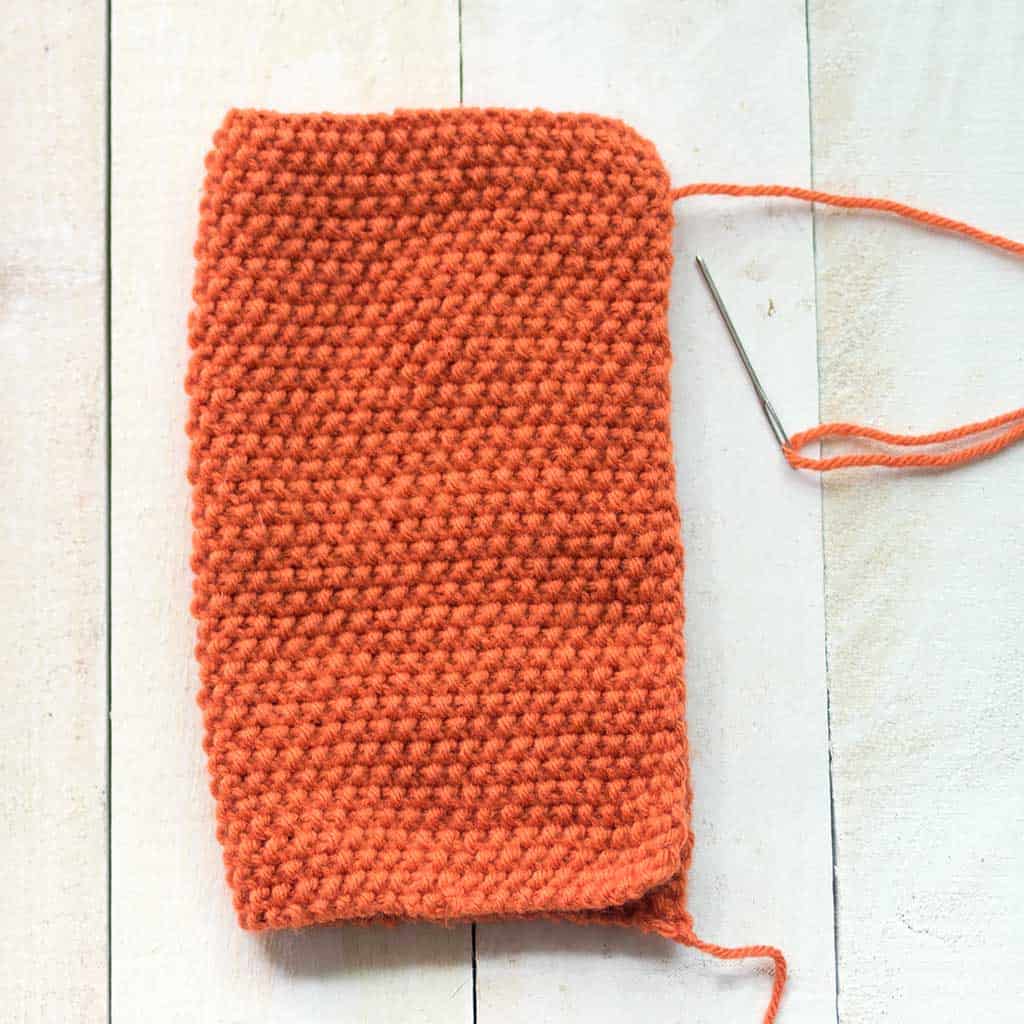
Once you are finished knitting, fold the piece over lengthwise and sew the seam.

Thread the yarn needle and weave it in and out around the bottom of the pumpkin to create a loose gathering stitch.
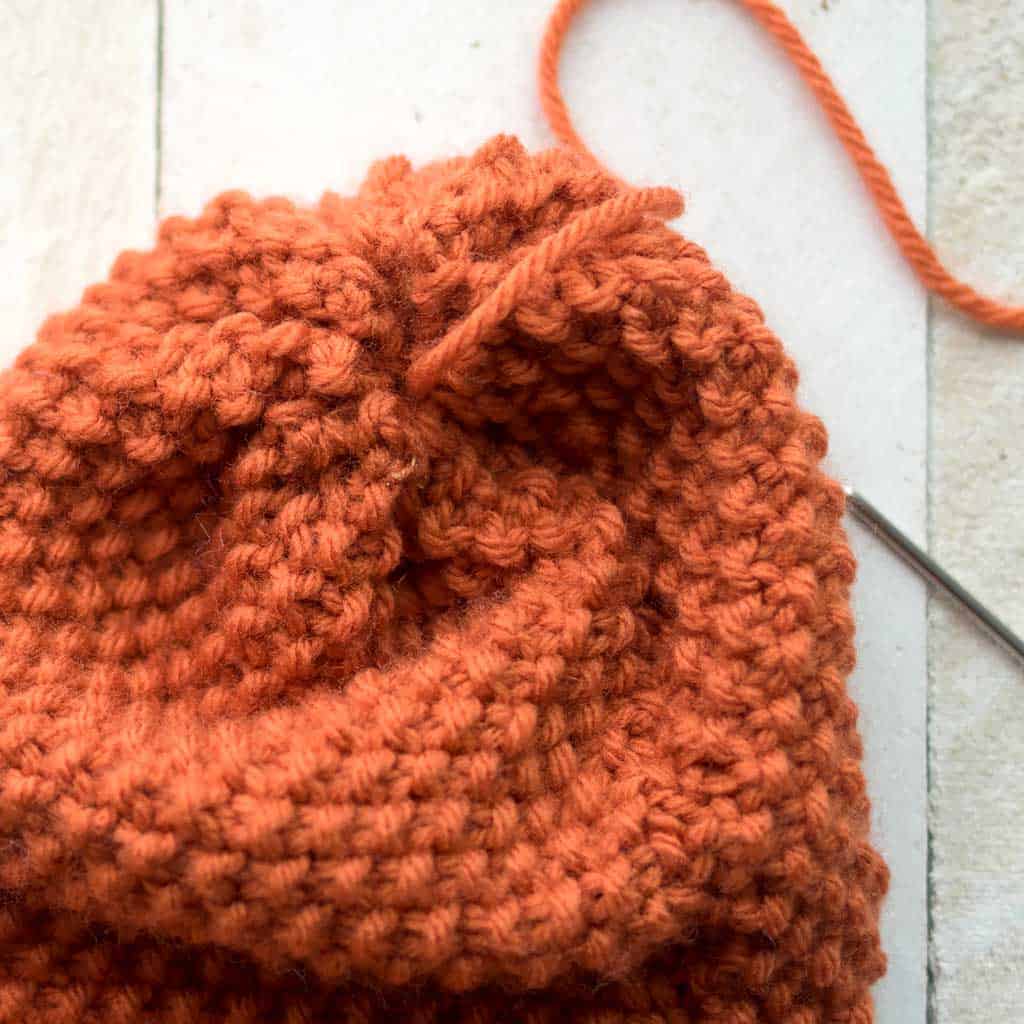
Pull the gathering stitch to close the opening. Make a stitch to secure.

Stuff the pumpkin. Use a liberal amount of fiberfill until the pumpkin takes shape. It should be firm enough to stand upright on its own.

Making a gathering stitch at the top of the pumpkin and pull to close. Make a stitch to secure.
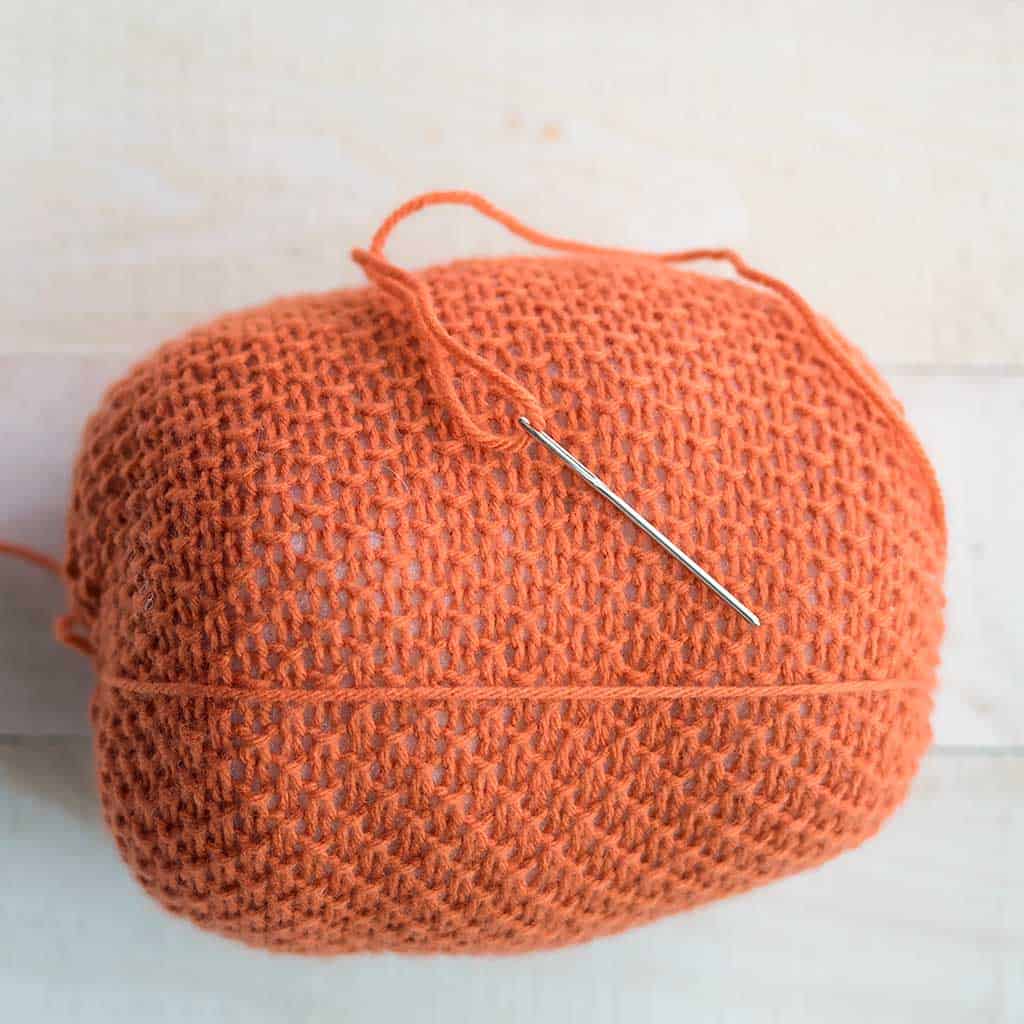
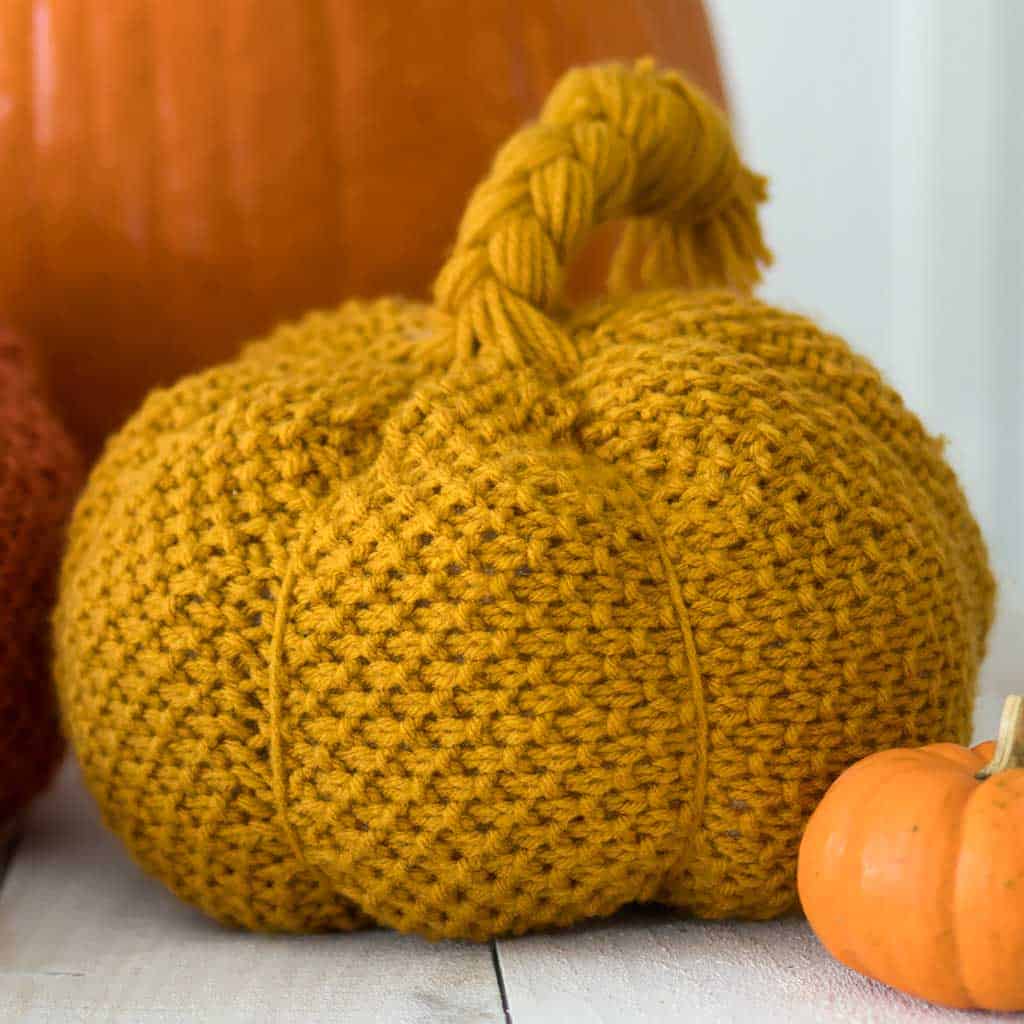
The next step is to create ridges on the pumpkin which will give it shape. These ridges are loops of yarn that are threaded through the center of the pumpkin. When these loops are pulled, the pumpkin takes shape.
To make: cut a long length of yarn (approximately 24 inches) and thread the yarn needle. Starting at the bottom, press the needle through the center of the pumpkin, bringing the yarn through the top. Thread through the bottom of the pumpkin again to create the first ridge. When you pull on the yarn the loop will tighten and the pumpkin will start to take shape.

Repeat the looping process until you have 8 evenly spaced ridges. Make a knot to secure the yarn at the bottom.
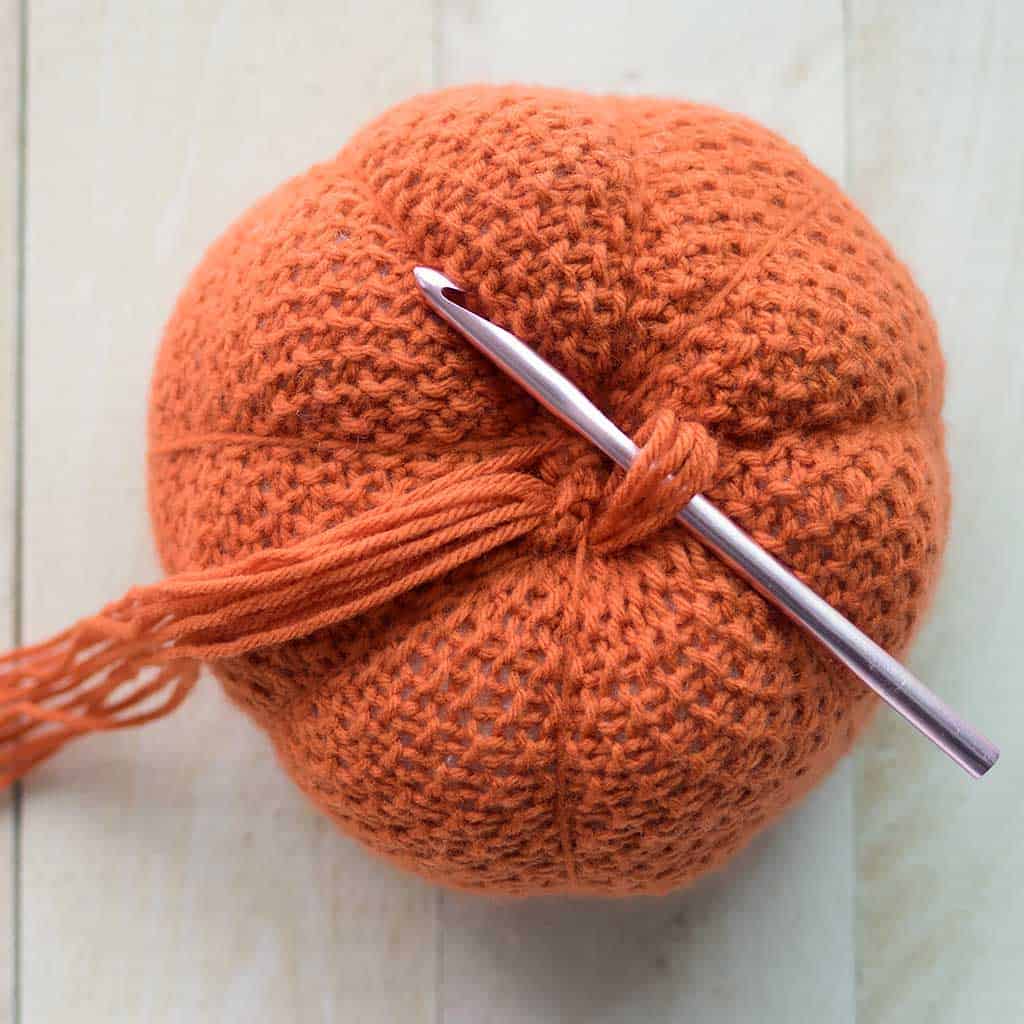
The stem on the pumpkin is made by braiding together strands of yarn that have been looped through the top of the pumpkin. Cut lengths of yarn that measure approximately 14 inches.
Loop 3-4 strands of yarn through the top of the pumpkin using a crochet hook.

Repeat looping the yarn in a circular motion until the center of the pumpkin is covered.
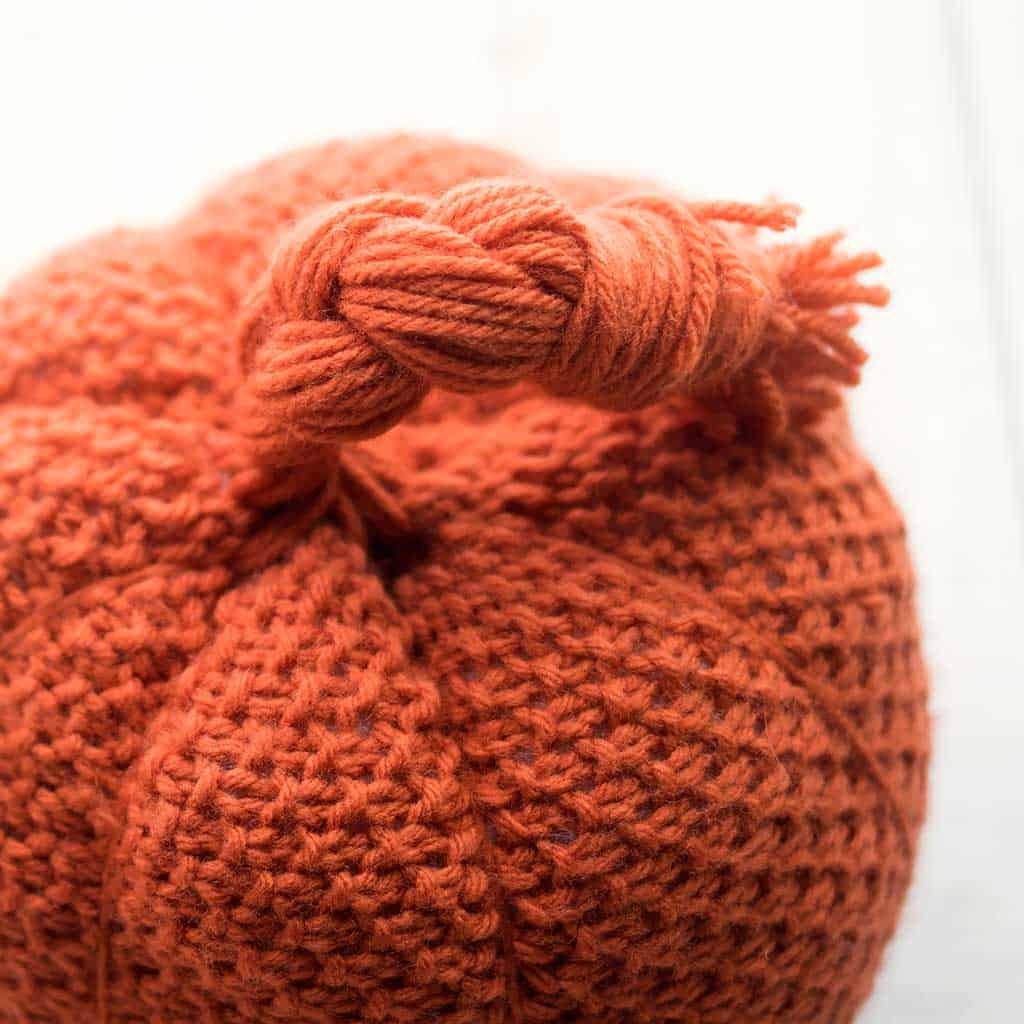
Braid the yarn strands and make a knot at the end. Trim the excess yarn.
Looking for more Pumpkin Knitting Patterns?
Straight Needle Pumpkin Knitting Pattern and Video Tutorial
Easy Jumbo Pumpkin Knitting Pattern
Scrap Yarn Pumpkin Knitting Pattern
Pumpkin Topiary Knitting Pattern
Flat Knit Cable Pumpkins
Prefer the Printable PDF?
If you’d rather knit from a printer-friendly pattern, the ad-free PDF is available in my shop.
The printable version includes:
Instant digital download
Easy-to-read formatting
Lifetime access
Perfect for tablets or printing
Convenient offline knitting
✨ Grab the printable PDF and start knitting your pumpkin collection today!
A Perfect Beginner Fall Knitting Project
If you’ve recently learned the knit and purl stitches, this project is a wonderful next step.
There are no complicated shaping techniques or advanced stitches required. Instead, you’ll practice creating even tension while watching the seed stitch texture develop.
Because the pumpkins knit up quickly, they’re also incredibly satisfying. You can easily finish several in a weekend and create a beautiful seasonal display.
Looking for more easy projects?
Be sure to explore my:
Easy Knitting Patterns Hub: Quick Projects You Can Finish in a Weekend
Easy Knit Hat Hub: Beginner to Intermediate Hat Knitting Patterns (Cozy, Stylish Projects You’ll Actually Wear)
Baby Knitting Hub: Easy Baby Knitting Patterns You’ll Love Making (Soft, Simple & Beginner-Friendly Projects)
Beginner Knitting Hub: Easy Knitting Patterns for New Knitters (Simple Projects You’ll Actually Finish)
These collections are filled with relaxing projects perfect for every skill level.
Decorating with Knit Pumpkins
One of my favorite things about these pumpkins is how versatile they are.
Mix several sizes together for a collected look or scatter them throughout your home for subtle seasonal charm.
Try displaying them:
In a woven basket
On a coffee table tray
Along a mantel
On floating shelves
On your dining room centerpiece
Beside candle
Next to lanterns
In an entryway vignette
Their soft texture pairs beautifully with wood, linen, dried grasses, woven baskets, and cozy blankets.
Looking for more Halloween knitting patterns?
Kids Ghost Hat Knitting Pattern
Baby Pumpkin Hat Knitting Pattern
Frankenstein Hat Knitting Pattern
Kids Black Cat Hat Knitting Pattern
Get the Printable PDF Pattern
Want an easy-to-read, ad-free version of this pattern? The printable PDF includes the complete pattern in a convenient format you can save or print.
Buy the PDF Pattern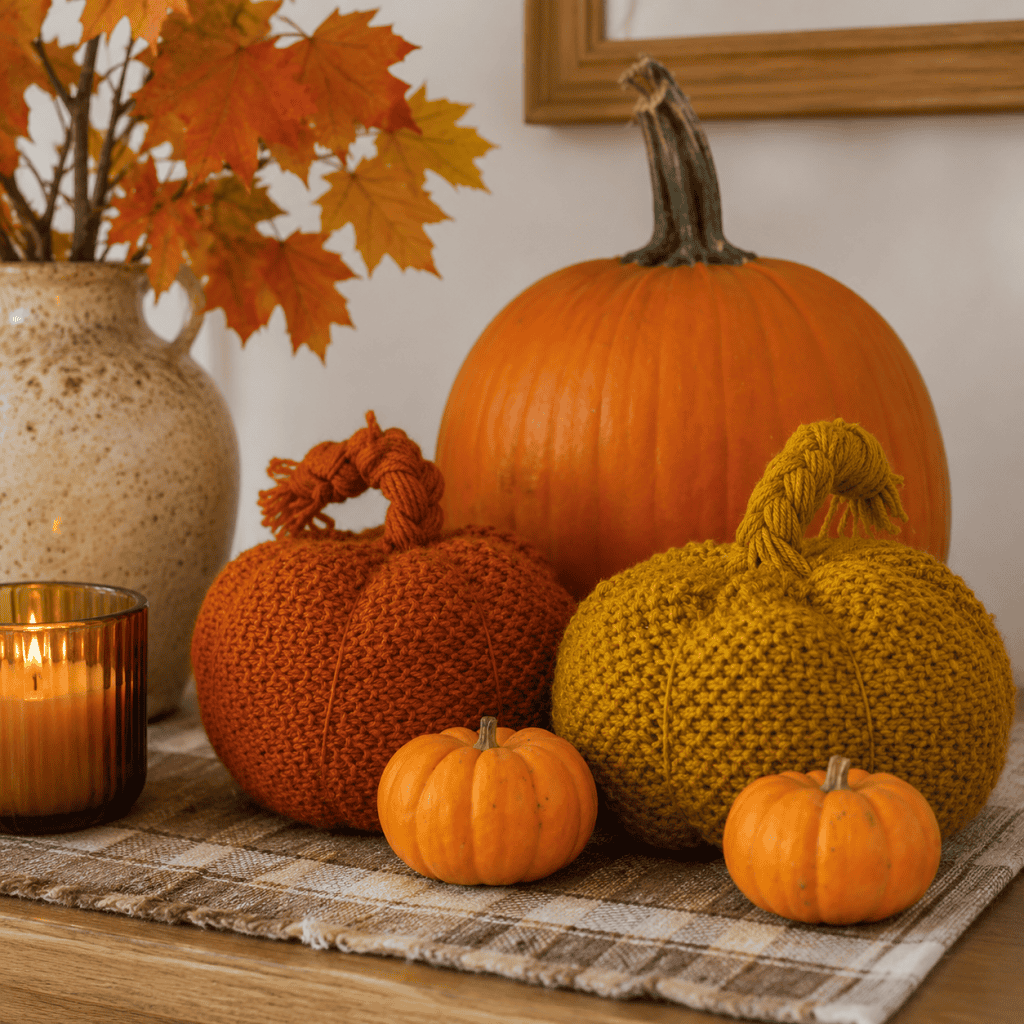
Tips for Beautiful Finished Pumpkins
A few simple finishing techniques can make your pumpkins look even more polished.
Use quality stuffing
Firmly stuffed pumpkins hold their shape better and create smooth curves.
Shape carefully
Take a few extra moments to adjust the stuffing before closing the pumpkin.
Add natural stems
Small branches collected outdoors create realistic pumpkin stems.
Cinnamon sticks also make beautiful stems with the added bonus of a subtle autumn scent.
Mix textures
Display knitted pumpkins alongside woven baskets, chunky blankets, dried flowers, and candles for a cozy seasonal vignette.
Frequently Asked Questions about Flat Knit Seed Stitch Pumpkins
Is this a beginner-friendly knitting pattern?
Yes! Seed stitch uses only knit and purl stitches, making this an excellent project for beginners who are ready to move beyond basic garter stitch. The texture is easy to learn and creates beautiful results with minimal effort.
What yarn works best?
Almost any worsted or bulky yarn with good stitch definition will showcase the seed stitch texture beautifully. Wool blends create especially cozy pumpkins that hold their shape well.
Can I make different sizes?
Absolutely! Knit several pumpkins in different sizes and colors to create a more natural-looking display. Grouping them together adds depth and visual interest to your seasonal décor.
What should I use for the pumpkin stem?
Small branches, twigs, cinnamon sticks, corks, or wooden dowels all make excellent stems. Natural branches provide the most realistic appearance and pair beautifully with the knitted texture.
Do seed stitch pumpkins curl?
No. One of the biggest advantages of seed stitch is that it naturally lies flat, making it ideal for projects like pumpkins where you want the fabric to hold its shape without curling.
Are these pumpkins good for gifting?
Definitely! They’re quick to knit, inexpensive to make, and become cherished handmade decorations that recipients can enjoy every autumn.
Get the Printable PDF Pattern
Want an easy-to-read, ad-free version of this pattern? The printable PDF includes the complete pattern in a convenient format you can save or print.
Buy the PDF PatternThese Easy Seed Stitch Pumpkin Knitting Patterns are one of those timeless projects you’ll look forward to making every fall. Their classic texture, cozy appearance, and beginner-friendly construction make them a wonderful addition to any autumn decorating tradition.
Whether you knit just one pumpkin or an entire collection, you’ll love displaying these handmade creations throughout your home season after season.
✨ I’d love to see what you’re making! ✨
If you’ve tried one of my knitting patterns, crochet projects, DIYs, or recipes, share your finished project on Instagram and tag me so I can see it 💛
There’s nothing better than seeing your creations come to life—from cozy knits to delicious recipes and everything in between. It truly makes my day!
Tag me @ginamicheleny so I can share your work and cheer you on!
Happy making!