DIY Giant Tissue Paper Flowers (Easy Party Decor That Looks Expensive)
Learn how to make DIY giant tissue paper flowers with this easy step-by-step tutorial. Perfect for party backdrops, nursery decor, weddings, and colorful wall displays.
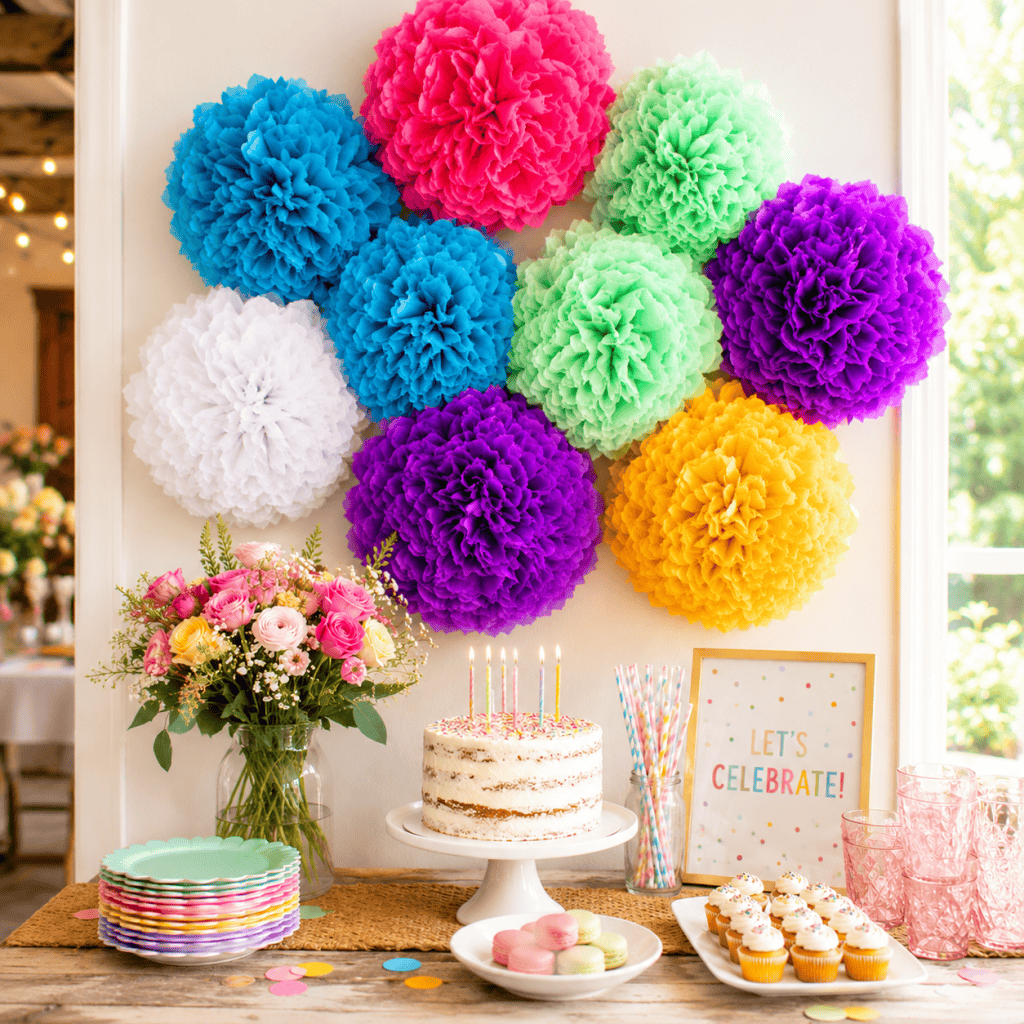
Looking for an easy DIY project that makes a huge impact? These DIY giant tissue paper flowers are one of the easiest ways to create colorful party decor on a budget. Whether you’re decorating for a birthday party, baby shower, bridal shower, wedding, nursery, or summer celebration, oversized tissue paper flowers instantly make any space feel festive and fun.
The best part? They’re inexpensive, beginner-friendly, and surprisingly easy to customize. You can make them in any color combination to match your party theme or home decor style. Hang them on walls, use them as a photo backdrop, decorate dessert tables, or create an eye-catching party installation.
These oversized flowers look beautiful indoors or outdoors and can be made in under an hour using just a few simple supplies. If you love easy DIY decor projects that look high-end without the expensive price tag, this is a project you’ll come back to again and again.
Why You’ll Love This DIY Giant Tissue Paper Flowers Tutorial
These giant flowers are one of those DIY projects that look impressive but are actually very simple to make. Even beginners can create beautiful results.
Here’s why they’re so popular:
Budget-friendly party decor
Perfect for birthdays, weddings, and baby showers
Lightweight and easy to hang
Customizable colors and sizes
Great for photo backdrops
Kid-friendly craft project
Makes a big visual impact with minimal supplies
If you enjoy colorful decor projects, you may also love my
DIY Fabric Transfer Tea Towels (Easy Custom Kitchen Towel Tutorial)
DIY Macrame Plant Hanger (Easy Beginner-Friendly Hanging Planter You Can Make in an Afternoon)
How to Make Container Candles (Easy DIY Soy Candles for Beginners)
How to Make Custom Flower Pots With Cricut (Easy DIY Gift Idea for Beginners)
DIY Framed Macrame Wall Art (Easy Boho Wall Decor You Can Make in an Afternoon)
How to Make Perfect Pom Poms with a Clover Pom Pom Maker (Easy Step-by-Step Guide)
DIY Butterfly Wreath (Easy Spring Wreath That Looks Store-Bought)
DIY Giant Tissue Paper Flowers (Easy Party Decor That Looks Expensive)
(as an Amazon associate, I earn from qualifying purchases)
Supplies:
Tissue paper
Pipe cleaners
Scissors
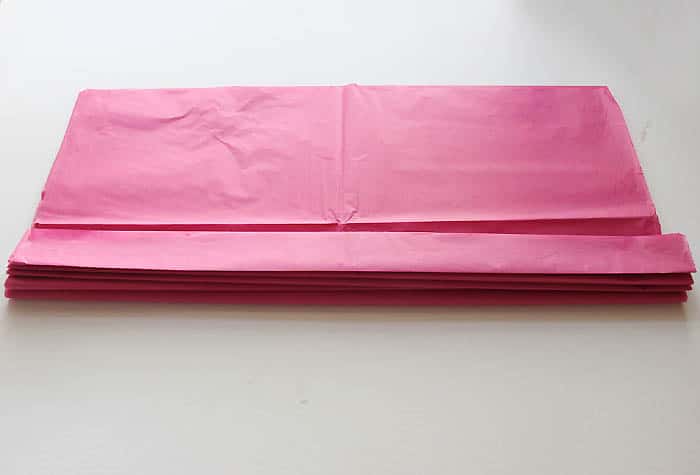
Take 10 sheets of tissue paper and place them on top of each other. With the shorter side of the rectangle facing you, fold them accordion (aka “fan”) style. Make the folds about 1 inch wide. Fold the entire length of tissue.
The more layers you use, the fuller your flower will appear.
For giant flowers, larger sheets work best. You can also combine multiple colors to create an ombre or layered effect.
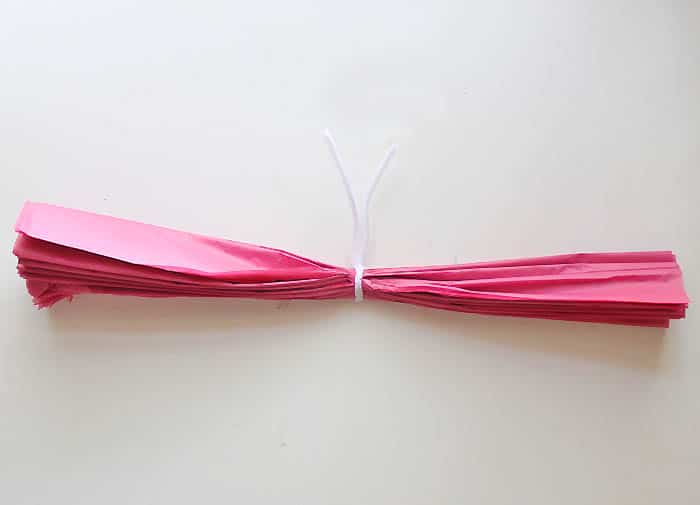
Wrap floral wire or a pipe cleaner tightly around the center of the folded strip.
This creates the center of the flower and holds everything together.

Use scissors to trim the ends into rounded or pointed petal shapes.
Rounded edges create a soft flower look while pointed edges create more dramatic petals.
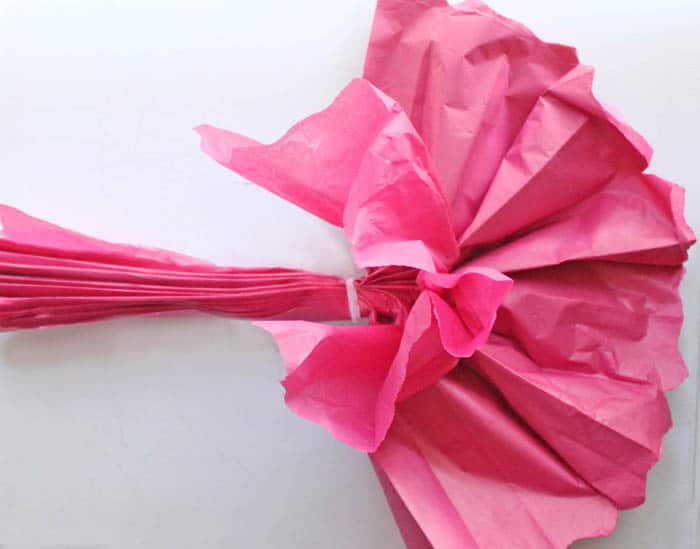
Carefully pull apart each tissue paper layer one at a time toward the center.
This step takes the longest, but it’s where the flower starts to come to life. Be gentle since tissue paper tears easily.

Once all layers are separated, fluff the petals until the flower looks full and rounded.
You can gently curl some petals around a pencil for a more realistic flower appearance.
Best Ways to Use Giant Tissue Paper Flowers
These oversized flowers are incredibly versatile and can be used for all kinds of celebrations and home decor projects.
Party Backdrops
Create a colorful statement wall by hanging multiple flowers together in different sizes and colors.
They work beautifully for:
Birthday parties
Baby showers
Bridal showers
Weddings
Graduation parties
Summer parties
Nursery Decor
Soft pastel tissue flowers look adorable in nurseries or little girls’ bedrooms. Arrange them above a crib, changing table, or reading nook.
Photo Booth Decor
Oversized flowers create a gorgeous DIY photo backdrop for parties and events.
Wall Decor
Cluster giant flowers together for temporary wall art that feels cheerful and whimsical.
Looking for free knitting patterns? Browse this full collection of easy knitting patterns you can start today:
50 Free Knitting Patterns You’ll Actually Want to Make (Beginner-Friendly)
10 Easy Baby Knitting Patterns for Beginners
10 Quick Summer Knitting Patterns
15 Easiest Free Knitting Patterns
15 Easy Summer Knitting Patterns You Can Make This Weekend
10 Easy Baby Knitting Patterns That Look Impressive (But Are Actually Beginner-Friendly)
Tips for Making Tissue Paper Flowers Look Professional
Use Multiple Sizes
Mix large, medium, and small flowers together for a more organic arrangement.
Stick to a Color Palette
Choose 2–4 coordinating colors for a polished look.
Popular combinations include:
Blush + white + peach
Pink + yellow + turquoise
Sage + cream + dusty rose
Rainbow brights for kids’ parties
Hang in Clusters
Instead of spacing flowers evenly, arrange them in natural-looking clusters for a more designer-inspired display.
Add Greenery
Artificial greenery or paper leaves help create dimension and make the flowers look even fuller.
How to Hang Giant Tissue Paper Flowers
These flowers are lightweight, so hanging them is easy.
Best Hanging Methods
Command strips
Painter’s tape
Push pins
Fishing line for suspended displays
If creating a backdrop, start with the largest flowers first and fill in gaps with smaller blooms.
Common Mistakes to Avoid
Pulling the Layers Too Quickly
Tissue paper tears easily, so separate layers slowly and carefully.
Using Too Few Sheets
Flowers can look flat if you don’t use enough layers. Aim for at least 8 sheets for fullness.
Forgetting Color Balance
Too many random colors can look chaotic. Stick with a simple palette for the best results.
Hanging Flowers Too Far Apart
Cluster flowers close together to create a fuller, more dramatic backdrop.

DIY Giant Tissue Paper Flowers for Every Season
One of the best things about this project is how easy it is to customize seasonally.
Spring
Use soft pastel shades like blush, lavender, mint, and pale yellow.
Summer
Bright tropical colors like coral, turquoise, hot pink, and orange look fun and festive.
Fall
Warm shades like rust, mustard, burgundy, and burnt orange create cozy autumn decor.
Winter
White, silver, champagne, and icy blue flowers feel elegant and wintery.
Storage Tips
Want to reuse your flowers for future parties?
Store them carefully in a large plastic bin or hang them in a closet to help maintain their shape.
Avoid crushing them under heavy items since tissue paper wrinkles easily.

Frequently Asked Questions about DIY Giant Tissue Paper Flowers
What kind of tissue paper works best?
Standard craft tissue paper works perfectly for this project. Thicker tissue paper tends to hold its shape better and tears less easily.
How many sheets of tissue paper do I need per flower?
Most flowers use 8–10 sheets. Larger flowers may need 12–15 sheets for a fuller appearance.
Can I make giant tissue paper flowers ahead of time?
Yes! These flowers are great for party prep because they can be made days or even weeks in advance if stored carefully.
How do you make tissue paper flowers fluffier?
Using more layers and separating each layer carefully creates fuller flowers. You can also gently curl petals outward for extra dimension.
Are tissue paper flowers reusable?
Yes. If stored properly, they can be reused multiple times for parties and events.
What sizes should I make?
A mix of large and medium flowers usually looks best for backdrops. Try making flowers between 10–24 inches wide.
Can kids help make these?
Absolutely. Older children can help fold tissue paper and fluff petals, making this a fun family craft project.
Looking for Easy DIY Outdoor Projects?
How to Build a DIY Cornhole Board (Easy Backyard Game You Can Make in a Weekend)
DIY Cedar Window Boxes: Easy Custom Planters That Make Your House Look Instantly Prettier
DIY Trellis (Easy, Budget-Friendly Garden Upgrade That Looks Expensive)
15 Easy Outdoor DIY Projects That Will Transform Your Backyard This Weekend
Rust-Oleum Outdoor Fabric Paint Review (Does It Actually Work?)
How to Build an Easy Kayak Rack (Cheap DIY That Holds Multiple Kayaks)
These DIY giant tissue paper flowers are one of the easiest ways to create beautiful party decor without spending a fortune. They’re colorful, lightweight, customizable, and perfect for everything from birthday parties to weddings and nursery decor.
Whether you create a full flower wall backdrop or just a few oversized blooms for a dessert table, these giant tissue paper flowers instantly make any celebration feel extra special.
✨ I’d love to see what you’re making! ✨
If you’ve tried one of my knitting patterns, crochet projects, DIYs, or recipes, share your finished project on Instagram and tag me so I can see it 💛
There’s nothing better than seeing your creations come to life—from cozy knits to delicious recipes and everything in between. It truly makes my day!
Tag me @ginamicheleny so I can share your work and cheer you on!
Happy making!