How to Make Melt and Pour Soap (Easy Beginner Guide + Step-by-Step Tutorial)
Learn how to make melt and pour soap with this easy beginner guide! Step-by-step instructions, tips, and ideas for creating beautiful handmade soap at home.
If you’ve ever wanted to try soap making but felt intimidated by complicated ingredients or working with lye, this how to make melt and pour soap guide is the perfect place to start. Melt and pour soap is one of the easiest and safest ways to create your own handmade soap at home—no advanced skills required.
Unlike traditional soap making, melt and pour uses a pre-made soap base that has already gone through the chemical process. That means all you have to do is melt it, customize it, and pour it into molds.
It’s quick, beginner-friendly, and honestly… kind of addictive once you start.
Looking for more easy DIY projects?
Easy Aromatherapy Shower Melts
DIY Butterfly Wreath (Easy Spring Wreath That Looks Store-Bought)
How to Make Geode Bath Bombs
Easy DIY Bath Bomb Recipe- Step by Step Tutorial
What Is Melt and Pour Soap?
Melt and pour soap is a pre-made soap base that has already gone through the soap-making process, so you don’t need to work with lye or handle complicated ingredients. Instead, you simply melt the base, customize it with color and fragrance, and pour it into molds to create your own handmade soap.
This method is one of the easiest ways to get started with soap making because it removes the more advanced steps and lets you focus on the fun, creative part. The soap base typically contains ingredients like glycerin, which helps create a smooth texture and gives the finished bars a moisturizing feel.
Because it’s so simple and beginner-friendly, melt and pour soap is perfect for anyone looking to try DIY soap making for the first time. It’s also a great option if you want to make quick, customized gifts without spending days on a project.
Why You’ll Love Melt and Pour Soap
Perfect for beginners – no complicated chemistry or lye
Quick to make – ready in just a few hours
Customizable – choose your colors, scents, and add-ins
Great for gifts – handmade soaps always feel special
Budget-friendly – minimal supplies needed
If you love DIY projects that are easy but still feel creative, this is one of the best ones to try.
How to Make Melt and Pour Soap (Easy Beginner Guide + Step-by-Step Tutorial)
Note: Making melt and pour soap is a simple and easy process and does not require the use of lye, making it a safe option for those who are new to soap making.
To make melt and pour soap, you will need the following ingredients and equipment:
ou can customize this soap recipes with your favorite scents and colors
(As an Amazon associate, I earn from qualifying purchases)
Ingredients:
- Melt and pour soap base (I used Shea butter, but you can also use glycerin soap base or goat milk for goat milk soap)
- Fragrance oils, colorants, and other additives (I used Warm Vanilla Sugar fragrance, soap dye and mica powder) Some other suggestions are: rose petals, lavender buds, aloe vera and lavender essential oil. Add oatmeal for oatmeal soap. Experiment until you find your favorite pour soap recipes!
Equipment:
- Double boiler or microwave-safe bowl
- Soap mold (I like silicone molds because the soap pops out easily)
- Spoon or fork
Steps:
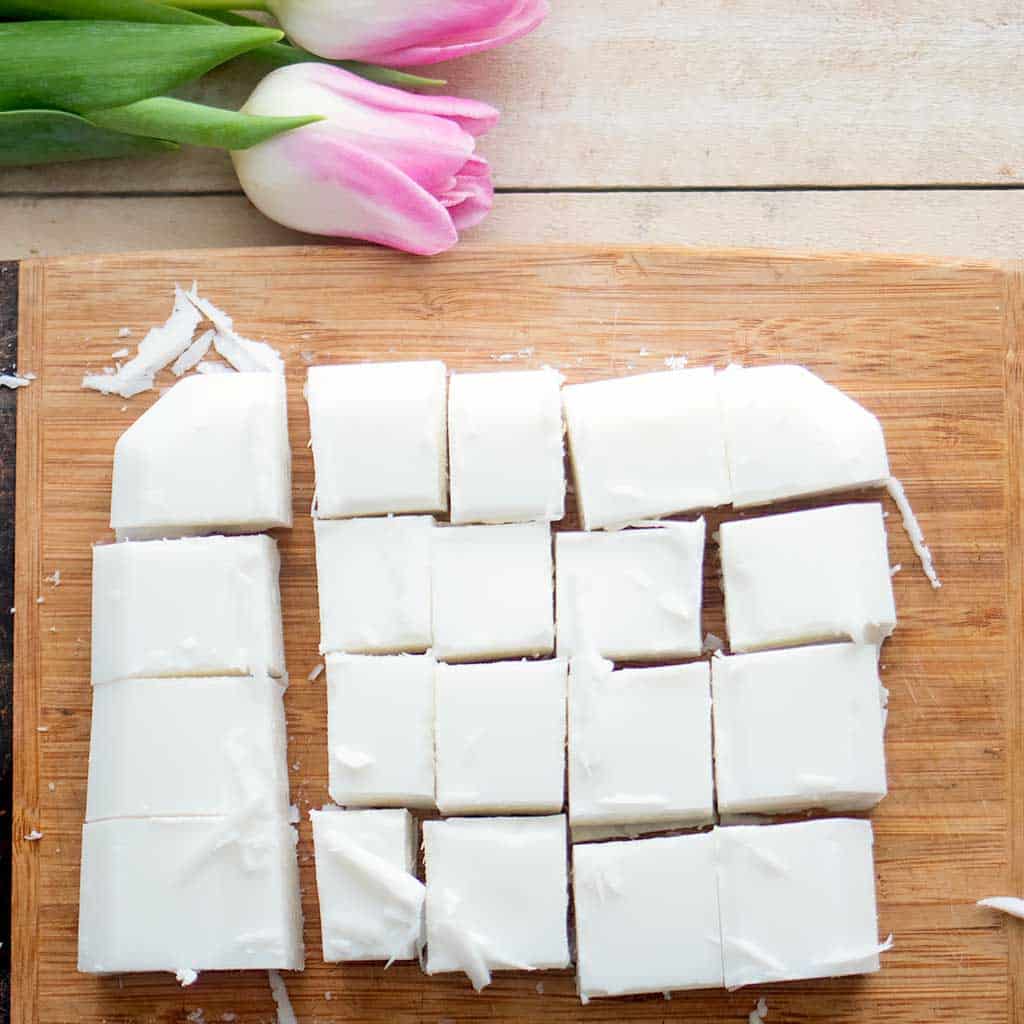
Start by cutting your soap base into small, even cubes. This helps it melt faster and more evenly.

Place the soap base chunks in a double boiler or a microwave-safe bowl. Heat the soap base in the double boiler or in the microwave, using 30-second increments, until it is fully melted. I find the microwave to be faster and easier than the stove.
Be careful not to overheat—soap that gets too hot can lose its texture.
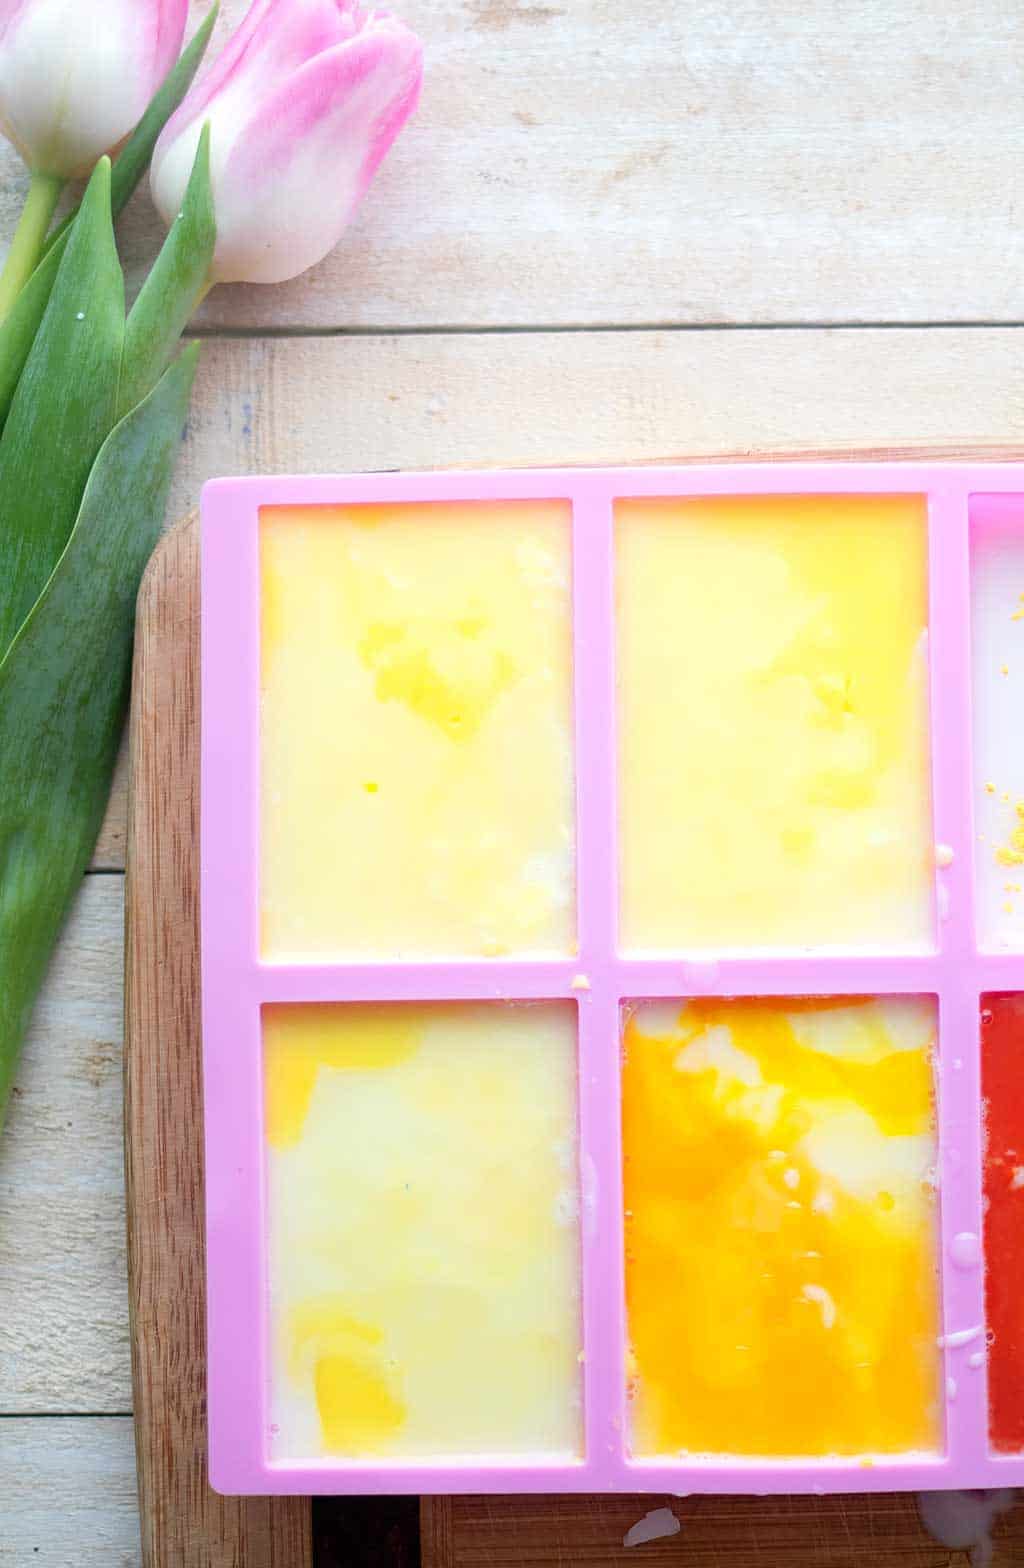
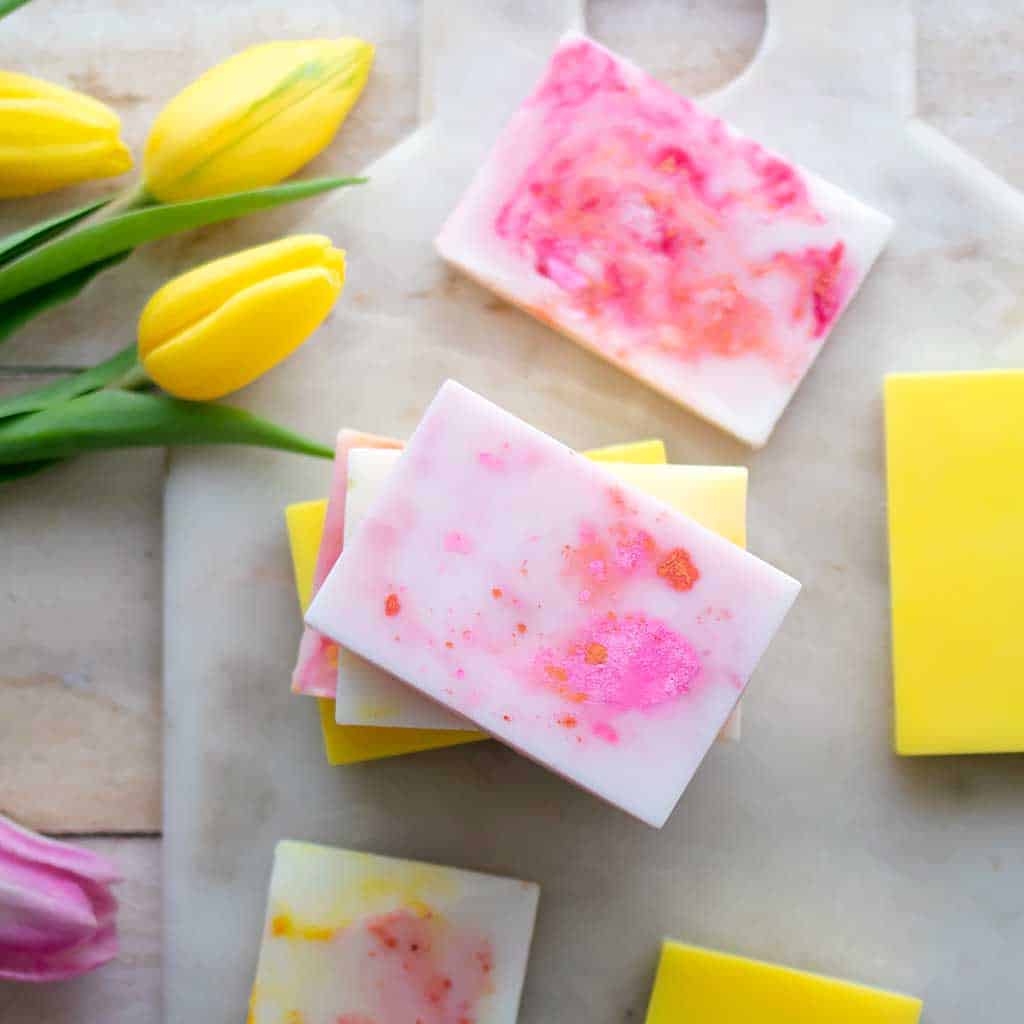
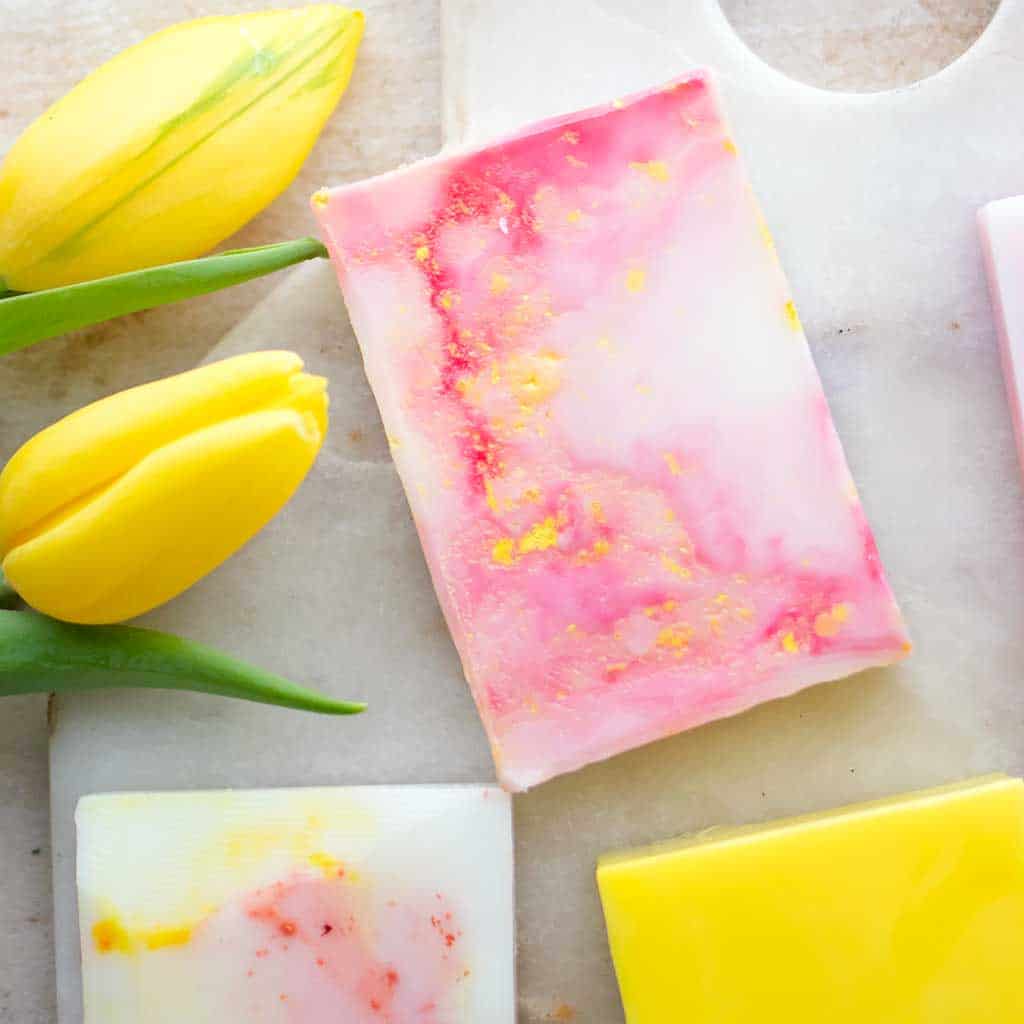
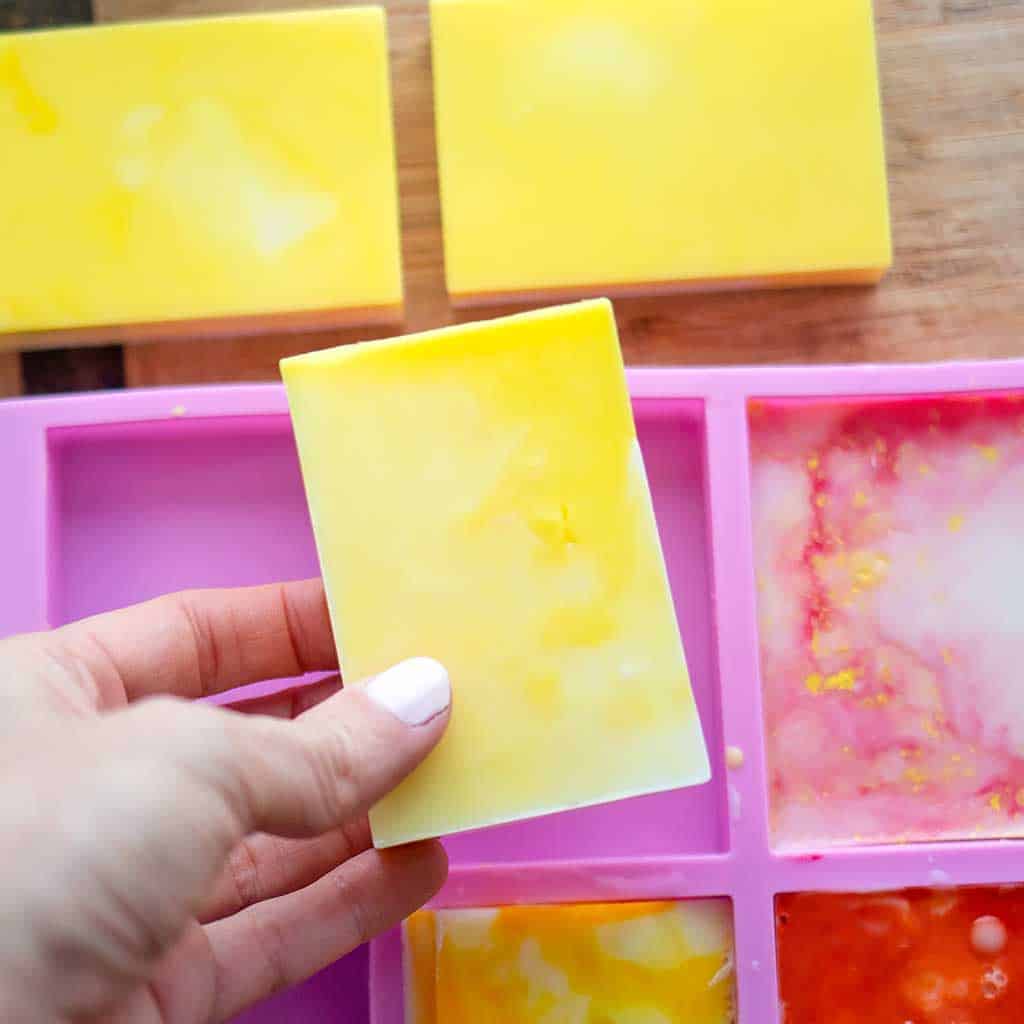
Stir in fragrance oils, colorants, or other additives as desired. Now is the time to unleash your creativity! I added a warm vanilla fragrance, soap dye (in yellow and pink) and mica powder. I made two kinds of soap- one colored with yellow soap dye and another created by adding drops of pink soap dye and swirling around with a fork. I finished the swirl bars by dusting them with mica powder.

Pour the melted soap mixture into a soap mold.
Allow the soap to cool and harden completely. This usually takes a few hours, though some recommend letting it sit longer for best results.

Once fully hardened, gently pop the soap out of the molds.
And that’s it—you’ve made your own soap!
What are some ingredients I can add when making soap?
When making soap, you can add a variety of ingredients to customize the scent, texture, and benefits of your soap bars. Here are some common ingredients that you can add to soap bars:
- Essential oils or fragrance oils – to add scent to your soap bars
- Natural colorants – such as clays, spices, or herbs – to give your soap bars a natural color
- Exfoliants – such as oatmeal, coffee grounds, or poppy seeds – to provide a gentle exfoliation
- Milk or dairy products – such as goat milk or yogurt – to add creaminess and moisturizing properties to your soap bars
- Honey or beeswax – to provide antibacterial and moisturizing properties
- Carrier oils – such as olive oil, coconut oil, or shea butter – to add moisturizing and nourishing properties to your soap bars
- Activated charcoal – to provide deep cleansing and detoxifying benefits to your soap bars.
Tips for the Best Results
If you want your soap to look more polished and professional, these tips make a big difference:
Don’t overheat your soap base (it can get rubbery)
Stir gently to avoid air bubbles|
Add fragrance at the right temperature (not too hot)
Use silicone molds for easy removal
Work quickly—soap can start to set fast
Common Melt and Pour Soap Mistakes (and How to Fix Them)
Even though melt and pour soap is beginner-friendly, a few small mistakes can affect your results. Here’s what to watch for:
Overheating the Soap Base
One of the most common mistakes is overheating the soap. If it gets too hot, it can become rubbery or lose its smooth texture.
👉 Fix: Heat in short intervals (30–60 seconds) and stir in between. Stop heating as soon as it’s melted.
Adding Fragrance at the Wrong Time
If you add essential oils or fragrance while the soap is too hot, the scent can fade or evaporate.
👉 Fix: Let the soap cool slightly before adding fragrance, then stir gently.
Using Too Much Color
It’s easy to go overboard with colorants, which can lead to overly dark or uneven soap.
👉 Fix: Start with a small amount and build gradually until you reach your desired shade.
Not Spraying Alcohol for Bubbles
Air bubbles can form on the surface after pouring, leaving your soap with an uneven finish.
👉 Fix: Lightly spray rubbing alcohol on top right after pouring to remove bubbles.
Adding Too Many Extras
Adding too many dried flowers, oils, or exfoliants can affect how the soap sets and performs.
👉 Fix: Keep add-ins minimal and evenly distributed for best results.
Removing Soap Too Early
Trying to pop soap out of the mold before it’s fully set can cause it to bend or break.
👉 Fix: Let it cool completely before removing—patience makes a big difference.
Not Wrapping Finished Soap
Melt and pour soap can “sweat” if left exposed to air due to its glycerin content.
👉 Fix: Wrap finished bars in plastic wrap or store in an airtight container.

FAQ: Melt and Pour Soap
Is melt and pour soap safe for beginners?
Yes, melt and pour soap is one of the safest methods for beginners because it doesn’t require handling lye. The soap base has already gone through the chemical process, so you can focus on melting, customizing, and pouring. It’s a great introduction to soap making without the risks involved in traditional methods.
How long does melt and pour soap take to harden?
Most melt and pour soap sets within 2–4 hours, depending on the size of your mold and the room temperature. Smaller molds will harden faster, while larger or layered soaps may take a bit longer. For best results, let the soap fully cool before removing it from the mold.
Why is my melt and pour soap sweating?
Sweating happens because melt and pour soap contains glycerin, which attracts moisture from the air. This is completely normal and doesn’t affect the quality of the soap. To reduce sweating, store your finished bars in a cool, dry place or wrap them in plastic wrap.
Can I add essential oils to melt and pour soap?
Yes, essential oils can be added for fragrance, as long as they are skin-safe and used in proper amounts. It’s best to add them after the soap has cooled slightly to prevent the scent from evaporating due to high heat.
Can I remelt melt and pour soap?
Yes, one of the benefits of melt and pour soap is that it can be remelted if needed. If your soap doesn’t turn out the way you expected, simply cut it into pieces and melt it again. Just be careful not to overheat it, as this can affect the texture.
Learning how to make melt and pour soap is one of the easiest ways to get into DIY crafting. It’s simple, creative, and incredibly satisfying—you can go from idea to finished product in just a few hours.
Whether you’re making soap for yourself, as gifts, or even to sell, this method keeps things approachable while still allowing for endless creativity.
Once you make your first batch, don’t be surprised if you immediately start planning your next one.
Looking for more Bath & Beauty Crafts?
How to Make Hand Sanitizer Spray
How to Make Essential Oil Room and Linen Spray
The Best Homemade Essential Oil Dryer Sheets- Reusable & All-Natural
How to Make Essential Oil Rollers
I love seeing your finished projects! If you enjoyed making this Melt and Pour Soap or any of my other bath & beauty DIYs, I’d love to see yours on Instagram, just tag me @ginamicheleny. Happy crafting!