How to Etch Glass with Cricut (Easy Step-by-Step Guide Using Armour Etch)
Learn how to etch glass with Cricut using Armour Etch in this easy step-by-step guide. Create custom glasses, jars, and gifts with this beginner-friendly tutorial.
If you’ve ever wanted to personalize glassware—think custom wine glasses, etched mason jars, or even decorative mirrors—this is one of the easiest and most satisfying DIY projects you can try.
Glass etching with a Cricut machine looks high-end, but it’s surprisingly simple. With just a few supplies and a little patience, you can create permanent, professional-looking designs that won’t peel or fade over time.
Whether you’re making gifts, upgrading your home decor, or adding something unique to your shop, this technique is one you’ll come back to again and again.
New to Cricut? Don’t miss my beginner-friendly tutorial here: How to Use Cricut Explore Air 2 (Beginner Setup Guide + First Project)
What Is Armour Etch?
Armour Etch is a specially formulated glass etching cream that permanently creates a frosted design on glass surfaces. It works by lightly “etching” the top layer of the glass, giving it that soft, matte look that won’t peel, fade, or wash off over time.
Unlike vinyl decals or paint, this isn’t something that sits on top of the glass—the design becomes part of the glass itself. That’s what makes it so durable and perfect for everyday items like drinking glasses, jars, and home decor.
Why You’ll Love This Project
There’s something really satisfying about taking a plain piece of glass and turning it into something custom and meaningful. Unlike vinyl decals, etched designs are permanent—they won’t wash off, scratch easily, or peel over time.
It’s also incredibly beginner-friendly. If you’ve used your Cricut to cut vinyl before, you already have the skills you need. And if you haven’t? This is still a great place to start.
How to Etch Glass with Cricut (Easy Step-by-Step Guide Using Armour Etch)
Supplies needed:
Glass to etch
Isopropyl Alcohol
Cricut
Vinyl
Transfer tape
Scraper
Painter’s tape
Armour Etch and paintbrush
Best Glass Items to Etch
You can etch almost any glass surface, but some work better than others. Smooth, flat surfaces are the easiest, especially when you’re just starting out.
Some great options include:
Wine glasses
Mason jars
Glass food storage containers
Mirrors
Glass vases
Avoid heavily curved or textured surfaces until you’re comfortable with the process—they can make stencil placement trickier.
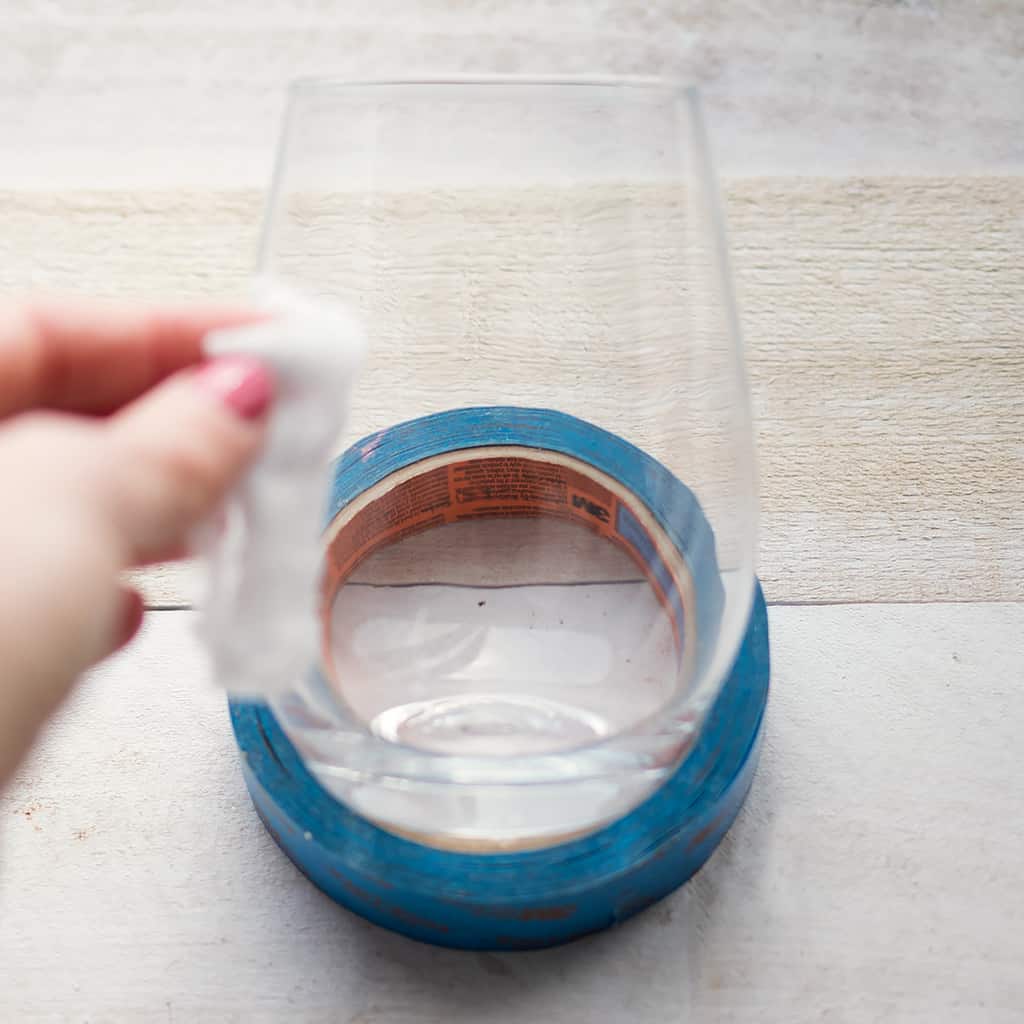
I like to place my glass inside a roll of painter’s tape to keep it steady while I work—it helps prevent rolling and makes applying the stencil much easier. Before placing your design, take a soft cloth and wipe the outside of the glass with isopropyl alcohol to remove any dust, oils, or fingerprints. This step is important because a clean surface helps the vinyl stencil stick properly and prevents the etching cream from bleeding under the edges.
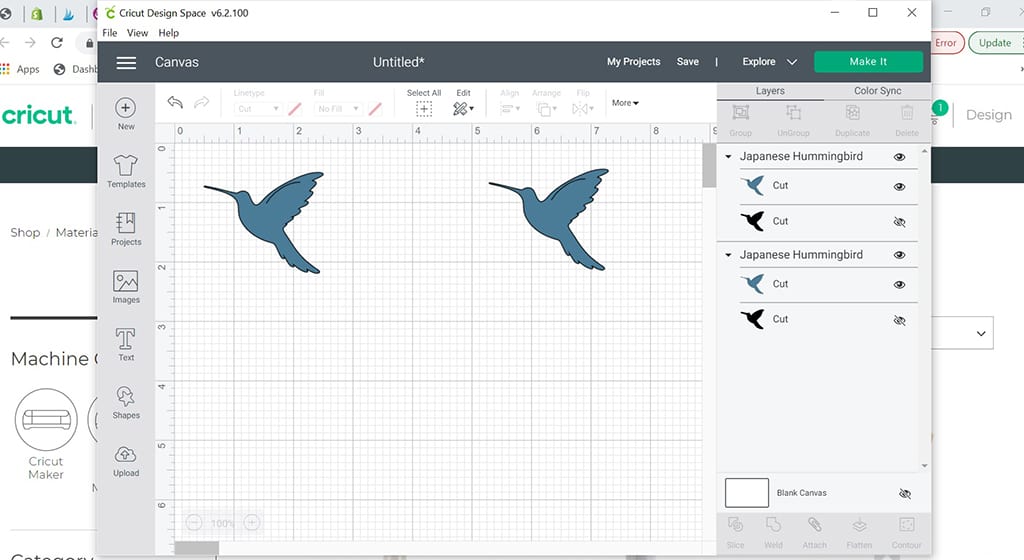
Open Cricut Design Space and chose your image. For etching, simpler is best. The vinyl will need to lay flat on the drinking glass, so a smaller design is better than a larger one. Measure the area on your glass and resize the image so it fits in the space. The stencils can’t be re-used, so if you’re etching multiple glasses, you need multiple stencils.
Press the vinyl on the cutting mat and change the dial on the Cricut to “vinyl”. Feed the mat and begin cutting. Once the image is cut, remove the mat and peel off the vinyl. The best way to do this is to put the mat face down and peel it away from the vinyl (as opposed to pulling the vinyl off the mat). This prevents the vinyl from getting damaged.
“Weed” the image by carefully removing the cut vinyl pieces to create your stencil. Start by peeling away the sections of vinyl where you want the glass to be etched, leaving the rest of the design intact. Take your time—especially around small letters or detailed areas—so you don’t accidentally lift parts of the stencil you need. Using a weeding tool or tweezers can make this step much easier and help keep your edges clean and precise.
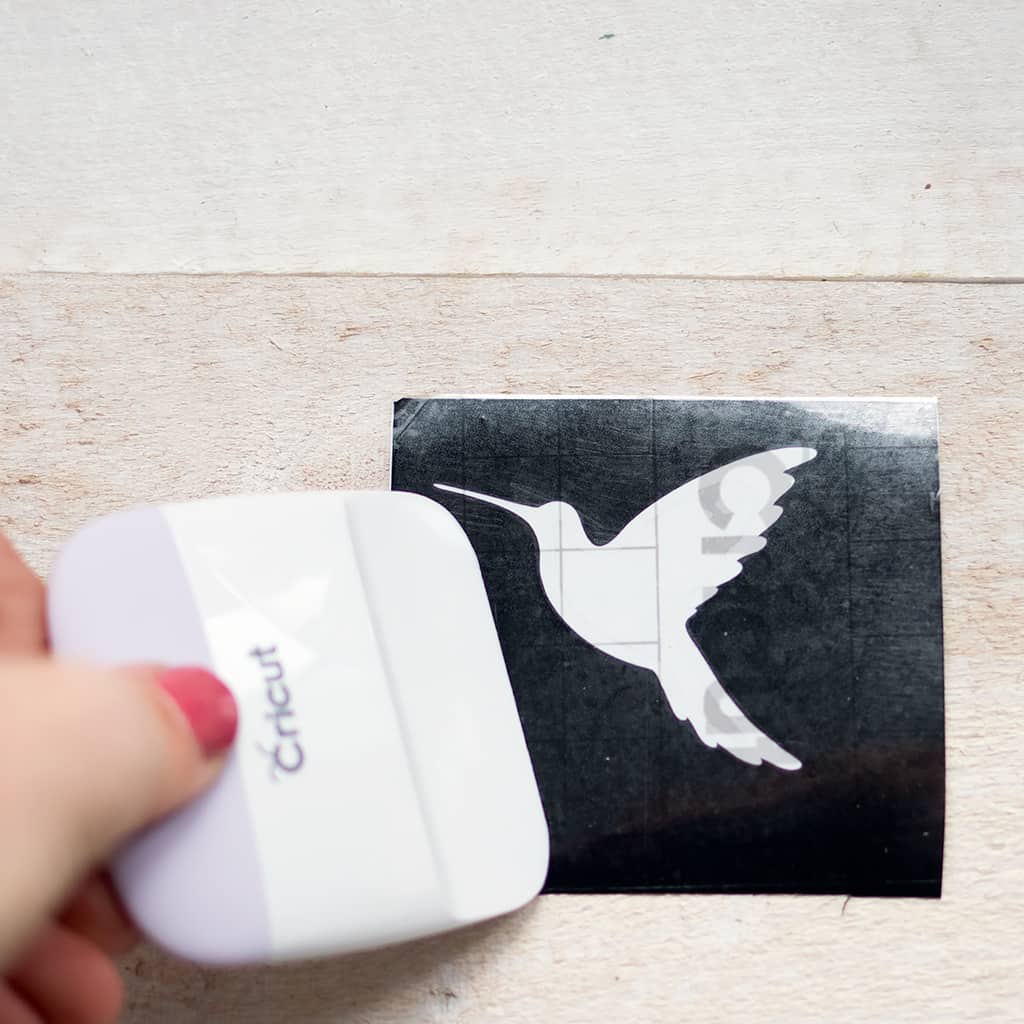
Cut a piece of transfer tape that’s the size of your image. Peel the backing off and stick it on top of your vinyl. Use the scraper tool to burnish (rub) the top of the tape. This will remove any air bubbles or wrinkles.

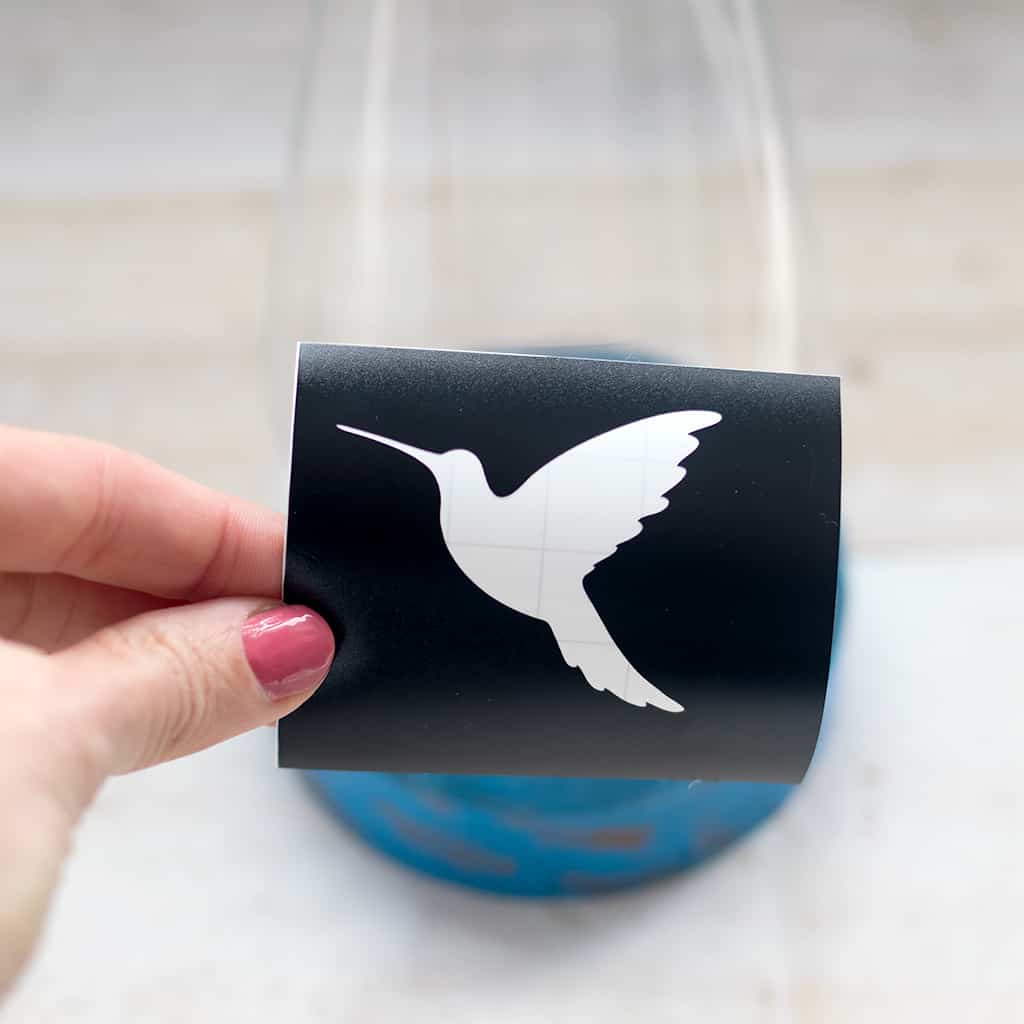
Peel the backing from the vinyl and affix the image to the glass. Burnish it a bit more and then remove the transfer tape. Make sure the stencil lays flat and there are no wrinkles on the image itself. As you can see in the pic, there was a wrinkle on the right side of my vinyl. This is ok because that area wasn’t getting etched.
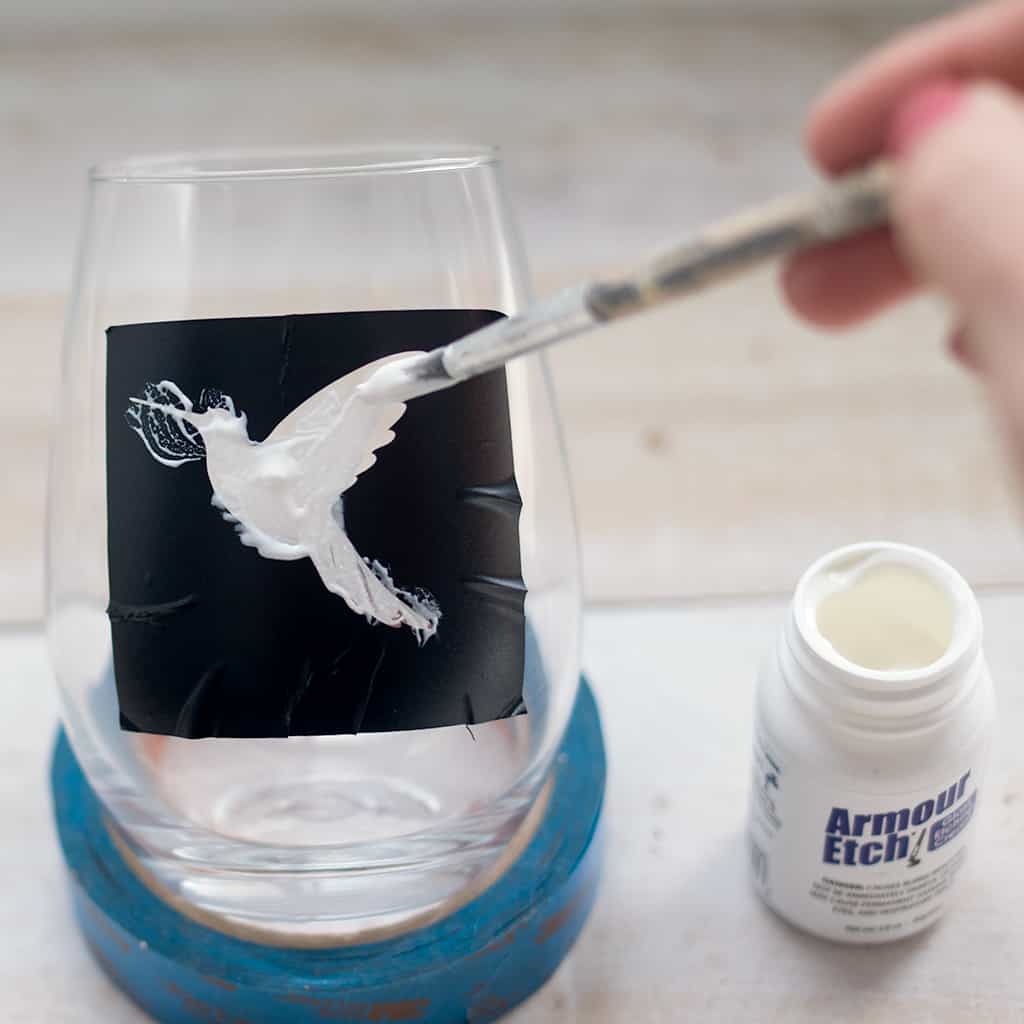
Paint on a liberal coat of the Armour Etch. The bottle says to leave it on for 1-3 minutes. I always do the full 3 minutes. After the time is up, rinse off the image under water and remove the stencil.
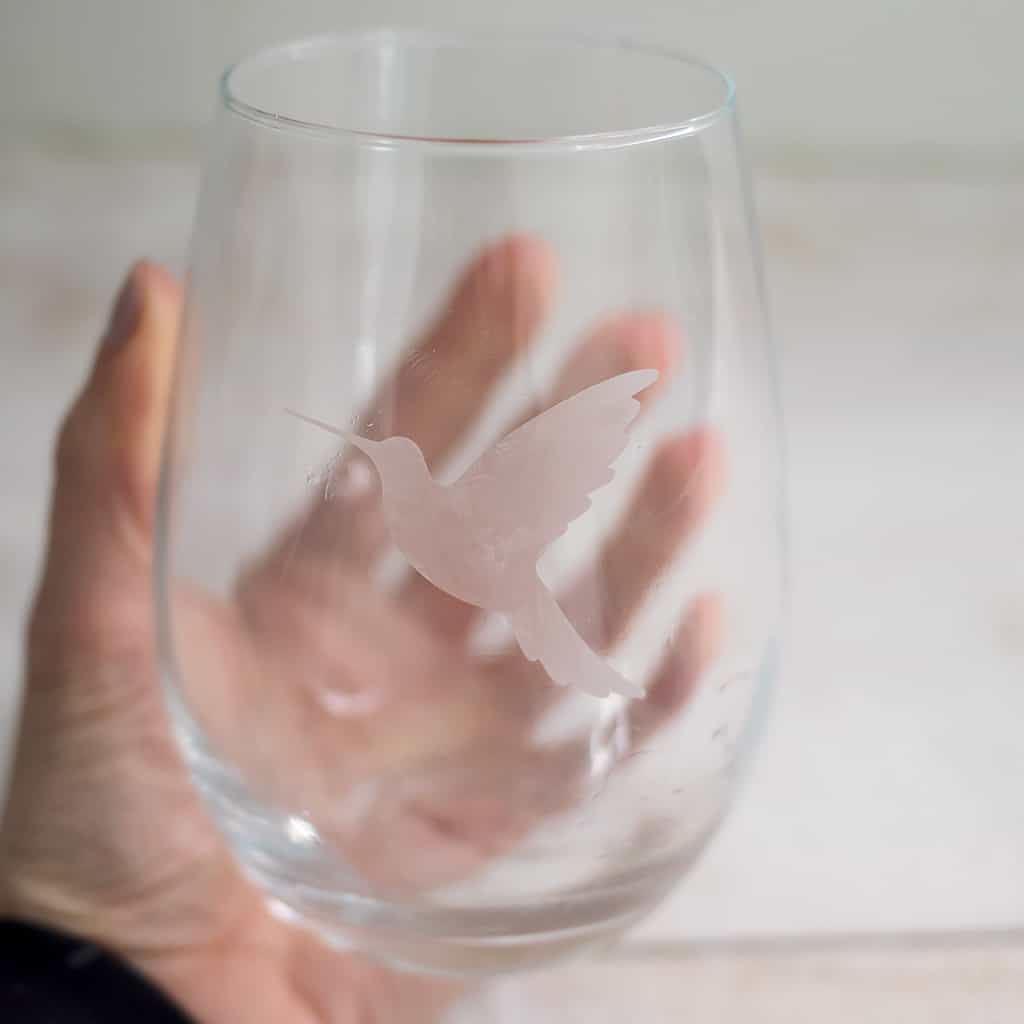
Just wash as you normally would—your design is permanently etched into the glass.
More Easy DIY Projects You’ll Love
If you enjoyed this project, here are a few more beginner-friendly ideas to try next:
How to Sew a Wrap Top
Cricut Iron on T shirt Tutorial Without Heat Press
Guide to Using Different Materials with the Cricut Explore Air
Tips for the Best Results
If this is your first time etching glass, these tips will help you avoid the most common mistakes and get a clean, professional-looking finish:
Make sure your stencil is sealed well
Take a few extra seconds to press down all the edges of your vinyl stencil firmly, especially around small details and letters. This prevents the etching cream from bleeding underneath and keeps your design crisp and clean.
Use enough etching cream
Apply a thick, even layer over the exposed glass—don’t try to stretch a small amount. A generous layer ensures full coverage and helps the etching develop evenly for that smooth, frosted look.
Don’t leave it on too long
It might be tempting to leave the cream on longer for a stronger effect, but more time doesn’t always mean better results. Stick to the recommended timing on the bottle to avoid uneven or over-etched areas.
Test first if you can
If you’re working on something special (like a gift or multiple pieces), try a quick test on a spare glass first. This helps you get comfortable with the process and see exactly how your design will turn out.
Work on a clean, dry surface
Before applying your stencil, wipe down your glass with rubbing alcohol or soap and water. Any oils, fingerprints, or dust can prevent the vinyl from sticking properly and affect your final result.
Looking for more projects?
How to Layer Iron-On Vinyl with Cricut (Easy 2-Color T-Shirt Tutorial)
|How to Make Twine out of Fabric Scraps
How to Make a Butterfly Wreath

FAQ: How to Etch Glass with Cricut (Easy Step-by-Step Guide Using Armour Etch)
Can I use any Cricut machine for glass etching?
Yes! Any Cricut machine that can cut adhesive vinyl will work, including the Cricut Explore Air 2, Cricut Maker, and Cricut Joy. Since you’re only cutting a stencil (not the glass itself), there’s no need for special blades or tools.
Is Armour Etch permanent?
Yes, Armour Etch creates a permanent design by chemically altering the surface of the glass. The frosted look won’t peel, fade, or wash off—even with regular use and cleaning.
Can I put etched glass in the dishwasher?
Absolutely. Once the etching cream has been rinsed off, the design is completely dishwasher safe. There’s no need to seal it or treat it differently than regular glassware.
What kind of vinyl should I use for stencils?
Permanent adhesive vinyl works best because it sticks firmly to the glass and helps prevent the etching cream from bleeding underneath. Avoid removable vinyl, as it may lift during the process.
Why did my design come out uneven?
This is usually caused by uneven cream application or a stencil that wasn’t sealed tightly. Make sure to apply a thick, even layer and press down all edges of your stencil before starting.
Can I reuse my stencil?
In most cases, no. Vinyl stencils are typically one-time use because they lose their adhesive after removal.
Glass etching with a Cricut is one of those projects that looks complicated—but once you try it, you realize how simple and satisfying it really is. With just a few supplies and a little patience, you can turn everyday glass items into something custom, personal, and truly one-of-a-kind.
Whether you’re making gifts, organizing your home, or creating products to sell, this is a technique that delivers beautiful, professional results every time. And once you get the hang of it, you’ll start seeing endless possibilities for designs you can create.
✨ I’d love to see what you’re making! ✨
If you’ve tried one of my knitting patterns, crochet projects, DIYs, or recipes, share your finished project on Instagram and tag me so I can see it 💛
There’s nothing better than seeing your creations come to life—from cozy knits to delicious recipes and everything in between. It truly makes my day!
Tag me @ginamicheleny so I can share your work and cheer you on!
Happy making!