How to Use Cricut Explore Air 2 (Beginner Setup Guide + First Project)
New to Cricut? Learn how to use Cricut Explore Air 2, make your first cut, and start creating in minutes with this beginner-friendly step-by-step guide.
If you’re new to Cricut crafting, this Beginner’s Guide to the Cricut Explore Air 2 will help you learn everything you need to know to get started. The Cricut Explore Air 2 is one of the most popular cutting machines for DIY projects, home decor, gifts, and crafting. With the ability to cut paper, vinyl, iron-on, cardstock, and more, this machine opens up endless possibilities for creative projects.
Whether you’re making custom t-shirts, vinyl decals, greeting cards, or home decorations, the Cricut Explore Air 2 makes crafting faster and easier. This beginner step-by-step guide walks through the basics of the machine, including how it works, what materials you can cut, and the essential tools beginners need.
If you’ve recently purchased a Cricut machine or are considering buying one, this Beginner’s Guide to the Cricut Explore Air 2 will help you feel confident getting started.
Looking for free knitting patterns? Browse this full collection of easy knitting patterns you can start today:
50 Free Knitting Patterns You’ll Actually Want to Make (Beginner-Friendly)
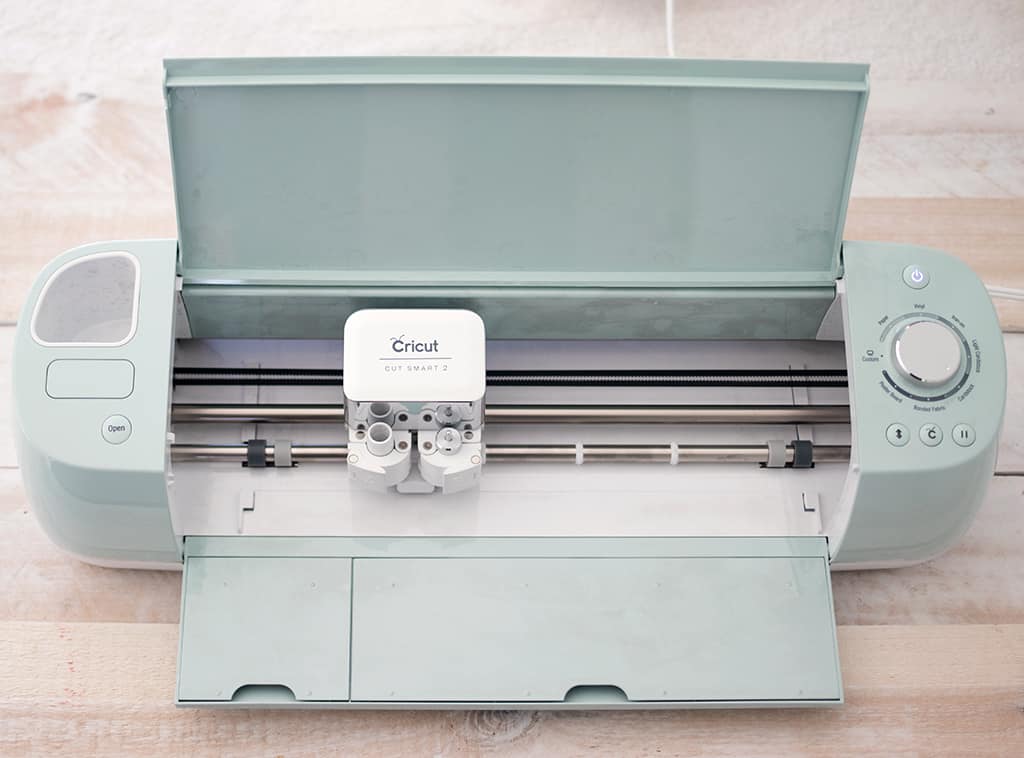
What Is the Cricut Explore Air 2?
The Cricut Explore Air 2 is an electronic cutting machine that allows you to cut designs from a wide variety of materials using digital design software. Instead of cutting shapes by hand, the Cricut machine automatically cuts precise designs using a small blade.
Crafters use this cutting machine for projects such as:
• custom t-shirts
• vinyl decals
• greeting cards
• home decor signs
• scrapbooking
• party decorations
Because the machine can cut extremely detailed designs, it allows crafters to create professional-looking projects at home.
The Cricut Explore Air 2 connects to your computer, tablet, or phone through Bluetooth or USB, allowing you to send designs directly to the machine from Cricut’s design software.
Some key features of the Cricut Explore Air 2 include:
- Dual carriage: The dual carriage allows you to cut and write or cut and score at the same time, saving you time and effort.
- Bluetooth connectivity: You can connect the machine to your computer or mobile device via Bluetooth for wireless cutting.
- Cricut Design Space software: This software is where you can create your designs and send them to the machine for cutting. It features a variety of templates, fonts, and images to help you get started.
- Adjustable cutting pressure: You can adjust the cutting pressure to match the type of material you are cutting, ensuring accurate and precise cuts.
- Fast cutting speed: The Cricut Explore Air 2 has a cutting speed of up to 2x faster than previous models, making it ideal for larger projects.
Overall, this cutting machine is a versatile and user-friendly cutting machine that can help you bring your creative ideas to life.
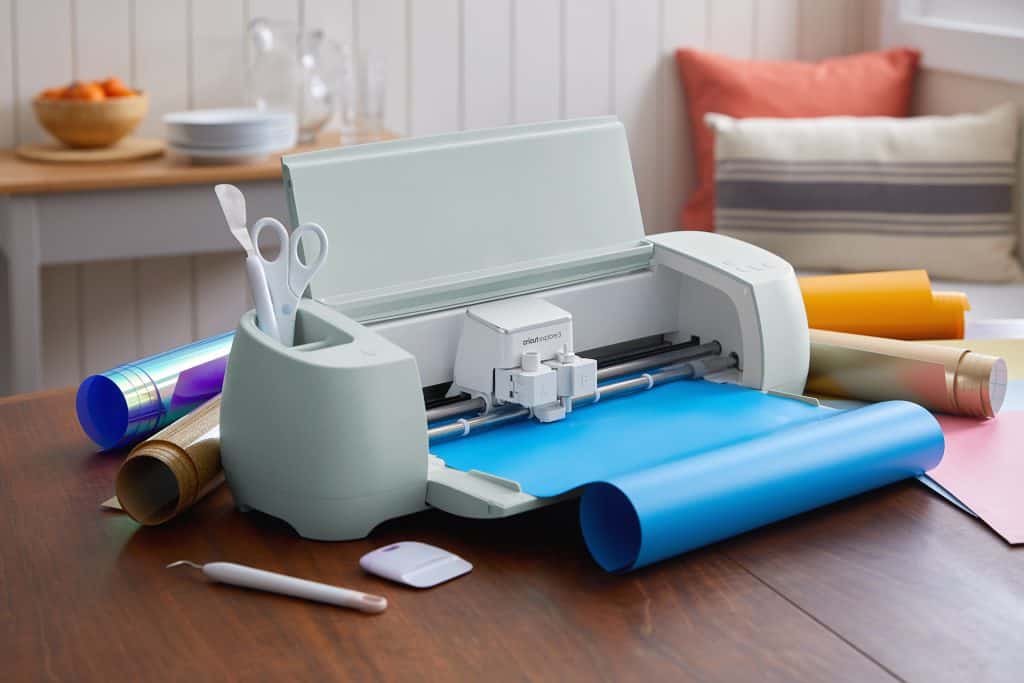
What Comes in the Cricut Explore Air 2 Box?
When you purchase a Cricut Explore Air 2, the box typically includes several basic tools and accessories.
Most machines include:
• the Cricut Explore Air 2 machine
• fine-point blade
• cutting mat
• power adapter
• USB cable
• sample materials
You may also receive a small selection of vinyl or cardstock to practice with during your first projects.
What Can the Cricut Explore Air 2 Cut?
One of the best features of the Cricut Explore Air is its ability to cut many different materials. This versatility makes it useful for a wide range of creative projects.
Common materials the Cricut Explore Air 2 can cut include:
• adhesive vinyl
• heat transfer vinyl (iron-on)
• cardstock
• paper
• faux leather
• fabric (with special tools)
• poster board
This wide range of materials allows you to create everything from delicate paper crafts to durable vinyl decals.
Why the Cricut Explore Air 2 Is Great for Beginners
The Cricut Explore Air 2 is especially popular with beginner crafters because it’s easy to learn and extremely versatile.
Some reasons beginners love the Cricut Explore Air 2 include:
• simple setup
• user-friendly software
• wide material compatibility
• huge library of project ideas
• fast cutting speed
Cricut’s software also includes thousands of ready-to-use designs, making it easy to start crafting even if you have no design experience.
Tools You Need for Cricut Projects
While the Cricut Explore Air 2 comes with a few starter tools, there are several additional tools that can make crafting easier.
Popular Cricut tools include:
• weeding tool
• scraper tool
• spatula
• transfer tape
• extra cutting mats
These tools help you remove excess vinyl, transfer designs, and keep materials securely attached to your cutting mat.
How to Use Cricut Explore Air 2 (Beginner Setup Guide + First Project)
What are the differences between the Explore Air and Explore Air 2?
The Cricut Explore Air 2 cuts twice as fast as the Air.
Cricut Explore Air 2 vs Cricut Maker vs Cricut Joy
The Cricut Explore Air 2, Cricut Maker, and Cricut Joy are all cutting machines made by Cricut, but each has its own unique features and capabilities.
- Cricut Explore Air 2: This is a versatile cutting machine that can cut a wide range of materials, including paper, vinyl, fabric, and cardstock. It has a dual carriage for cutting and writing or cutting and scoring at the same time and a cutting speed of up to 2x faster than previous models.
- Cricut Maker: The Cricut Maker is a high-performance cutting machine that can cut even more materials than the Explore Air 2, including thicker materials like balsa wood and leather. It also has a dual carriage and a powerful motor that allows for faster and more precise cuts.
- Cricut Joy: The Cricut Joy is a compact and portable cutting machine designed for quick and easy projects. It can cut a variety of materials, including cardstock, vinyl, and iron-on, and has a cutting width of up to 4.5 inches. It’s perfect for small projects and on-the-go crafting.
In conclusion, the choice between these machines will depend on your specific needs and the type of projects you plan to create. The Explore Air 2 is a great all-around machine, the Maker is ideal for more advanced projects and a wider range of materials, and the Joy is perfect for small and quick projects.
What can the Explore Air 2 do?
Simply put, the Explore Air 2 is a cutting machine. This device can create everything from 3D projects to leather jewelry to t-shirt transfers. A quick search online will provide thousands of projects using Cricut. If you love to create, this machine is for you!
What materials can the Explore Air 2 cut?
This little machine can cut 100 materials – everything from cardstock, vinyl, and iron-on to a range of specialty materials.
How to use the machine
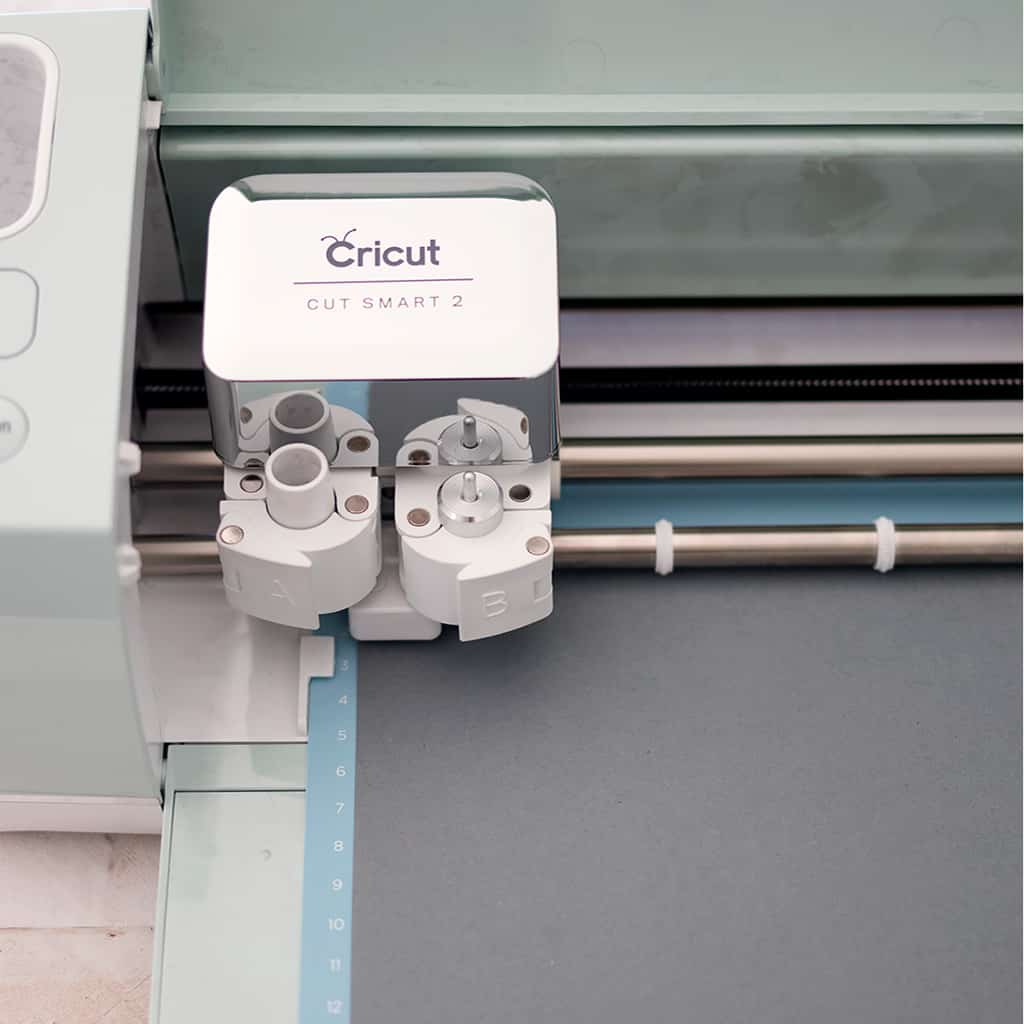
The Cricut Explore Air 2 can be used both wirelessly or with a USB cable (you will need an Internet connection to use this machine). To begin, place the machine on a surface with at least 10″ available behind it so the cutting mat will have plenty of room.
- Plug in the machine, connecting the power adapter and the USB cable, or set up Bluetooth for wireless.
- Turn on the Explore Air 2 power button as well as your computer.
- Visit the Cricut website and register a user account and download the plugin software.
- Run the installer and visit design.cricut.com. Design Space is available for Windows, Mac, iOS, and Android.
- Click the menu icon in the top left corner and select New Machine Setup. You will be guided through the installation process and you will create a test project.
What accessories do you need?
The cutting mat is an essential accessory for the Cricut. The mat is used to load most material into the machine. It’s sticky on one side of that the material is held firmly in place while it is being cut, inked or scored.
There are 3 different types of mats:
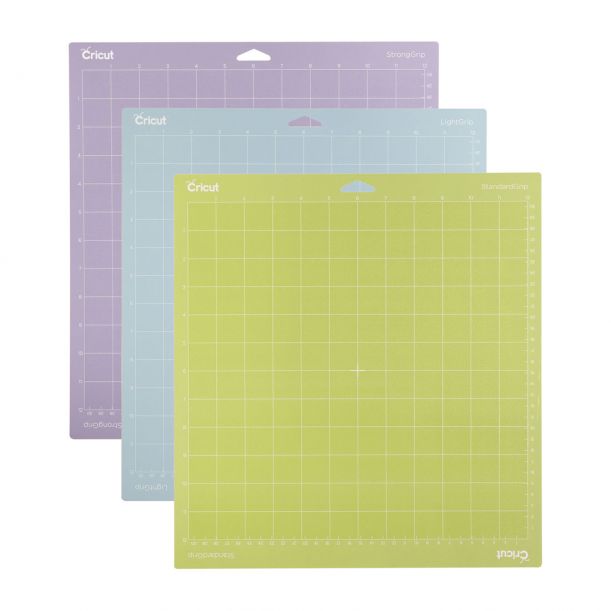
Light Grip Mat (blue) is suited for standard paper, light card stock, and vellum.
Standard Grip Mat (green) is suited for heavy cardstock, iron-on, and vinyl.
Strong Grip Mat (purple) is suited for specialty cardstock, matboard, backed fabric, faux leather and more.
Another important accessory if the Cricut Basic Tool Set.
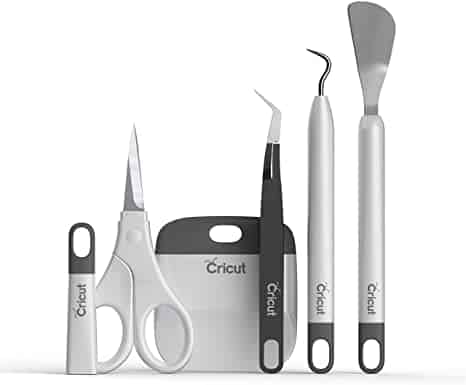
This set contains scissors, reverse grip tweezers (enabling them to lift and secure in one step), scraper (constructed to scrape and clean unwanted scraps from the Circuit cutting mats, contributing to a longer-lasting mat), spatula (precisely lifts images from the Circuit cutting mat, preventing tearing and curling), and a weeder (perfect for removing tiny cuts, including Negative pieces of vinyl and iron – on from the carrier sheet, or poking out tiny negative pieces from a cut cardstock image).
What blades do I need for the Cricut Explore Air 2?
The Cricut Explore Air 2 is compatible with these blades: the Fine-Point Blade, and the Deep-Point blade.
The Fine-Point blade is ideal for cutting light to medium-weight materials, like:
- Cardstock
- Paper
- Sticker Paper
- Infusible Ink Transfer sheets
- Adhesive vinyl
the Deep-Point blade can cut thicker materials since it is stronger, such as:
- Cardboard
- Chipboard
- Craft Foam
- Genuine Leather
First Project:
How to create a design
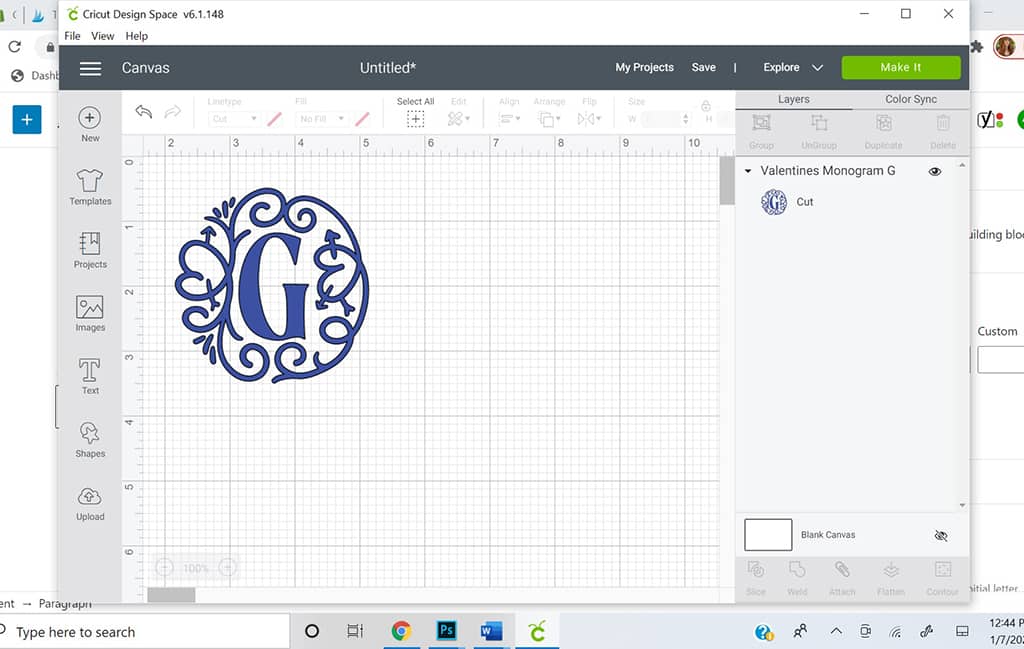
Go to Cricut Design Space- design.cricut.com. Click the menu icon in the top left corner and select New Machine Setup. (You can also use the Design Space app)
Remove the protective firm from your cutting mat and set it aside. Don’t throw it out because it is used to cover the mat when it’s not in use.
On the left-hand side, there is a menu where you can choose from templates, projects (created by other crafters), image library, text library, shapes or upload your own image. Once you’ve made your selection, it appears on the grid where you can make edits.
Once you’re finished choosing and editing your project, add the cardstock (or whatever material you’re using) to the mat. Press it down in the upper left-hand corner (textured side facing up).
Set the smart set dial on the machine to cardstock (or whatever material you’re using). Place the mat in the guides and press the arrow (load/unload) button to feed it. Press the “C” button on the machine on the machine to begin creating the design.
Once your design is finished, press the arrow button to release the mat. Place the cutting mat face down and peel it away to free your design.
What is Cricut Access?
Cricut Access is a premium subscription service offered by Cricut. It gives you access to over 100,000 images, over 500 fonts, and 1000’s of ready-made projects. It also gives you 10% off purchases at Cricut.com for $9.99/month. If you plan on using your Cricut frequently, it’s a great deal.
Popular Cricut Explore Air 2 Projects
Once you get comfortable with your Cricut machine, you can explore many different creative projects.
Some popular Cricut projects include:
• personalized mugs
• custom t-shirts
• wall decals
• greeting cards
• gift tags
• holiday decorations
Because the Cricut machine can cut intricate designs, it allows you to create projects that would be difficult to cut by hand.
Looking for Cricut Projects?
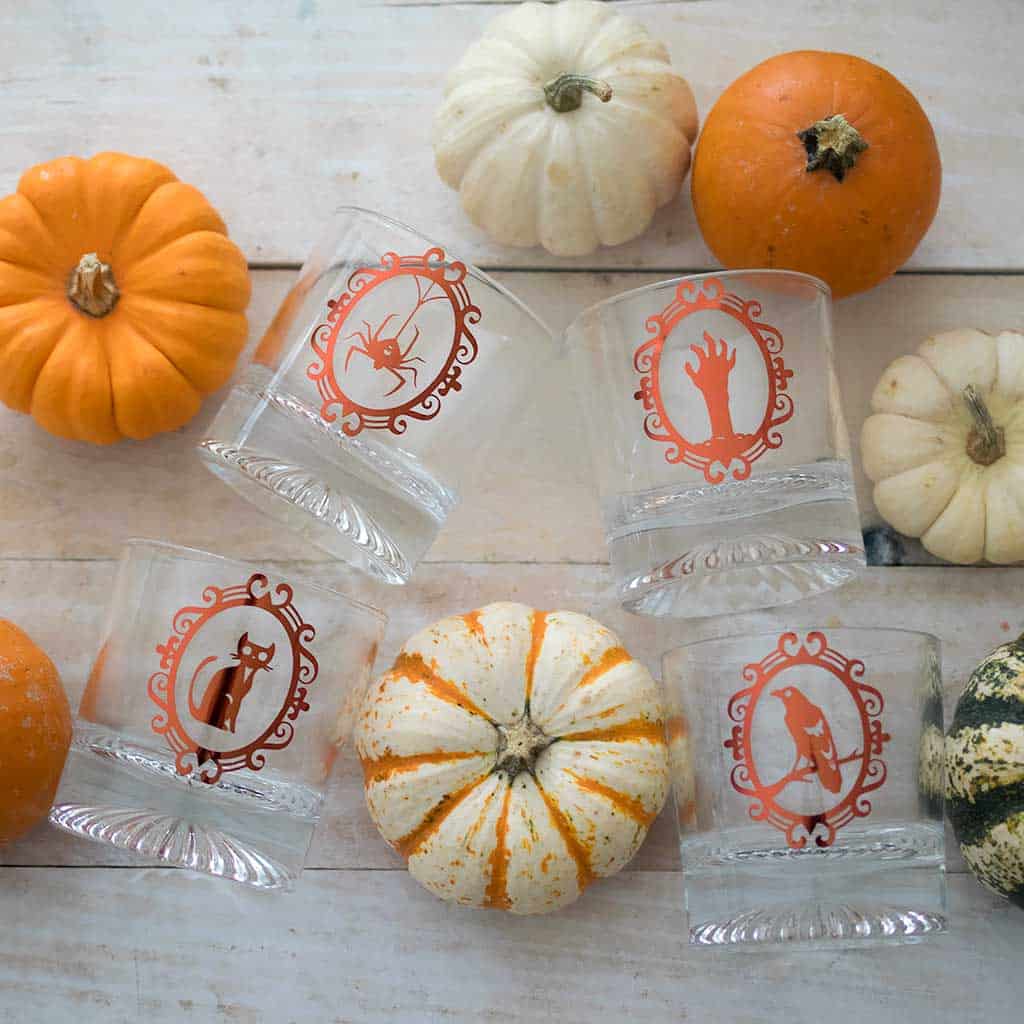
How to Apply Vinyl to Glass with Cricut
How to Make a 2 Color Iron On T Shirt with Cricut
How to Etch Glass with Armour Etch and Cricut
Tips for Cricut Beginners
If you’re just getting started with your Cricut Explore Air 2, these tips will help you avoid common mistakes.
Use the Correct Cutting Mat
Different materials require different mat strengths.
Start with Simple Designs
Complex designs can be harder to weed.
Keep Your Blade Clean
Debris can build up on the blade over time.
Practice with Scrap Materials
Before cutting expensive materials, test your design with scrap pieces.
Cricut Materials Beginners Should Try First
Some materials are easier for beginners to work with than others.
Good beginner Cricut materials include:
• permanent vinyl
• removable vinyl
• cardstock
• heat transfer vinyl
These materials are easy to cut and forgiving for beginners.
Troubleshooting Common Cricut Problems
Even experienced Cricut users occasionally run into issues.
Here are some common problems and how to fix them.
Material Not Cutting All the Way
Try adjusting the cutting pressure or replacing the blade.
Vinyl Tearing
Use a lighter cutting pressure or check that the material is placed correctly.
Design Cutting in the Wrong Location
Make sure the material is aligned properly on the cutting mat.
Best Cricut Projects for Beginners
If you’re looking for inspiration for your first Cricut projects, here are some easy ideas.
• vinyl decals
• personalized water bottles
• greeting cards
• custom labels
• holiday ornaments
These projects are simple but still showcase the Cricut machine’s cutting precision.
Looking for more crafting projects like this Cricut machine tutorial?
How to Make Twine from Fabric Scraps
How to Make Essential Oil Room and Linen Spray
Cricut Explore Air 2 Project Ideas for Beginners
Once you become comfortable using your Cricut machine, the number of projects you can create grows quickly. The Cricut Explore Air 2 is designed to make crafting easier, and many beginners are surprised at how quickly they can start producing professional-looking DIY projects.
If you’re wondering what to make after your first few practice cuts, there are many beginner-friendly Cricut projects that are both simple and rewarding.
Some easy Cricut project ideas include:
• personalized water bottles
• custom laptop stickers
• vinyl wall decals
• handmade greeting cards
• personalized tote bags
• custom labels for jars and containers
Vinyl decals are one of the most popular first projects because they are simple to cut and easy to apply. Adhesive vinyl can be used to decorate water bottles, laptops, phone cases, notebooks, and even home decor items.
Another great beginner project is custom t-shirts using heat transfer vinyl (HTV). The Cricut Explore Air 2 cuts iron-on vinyl designs that can be transferred to fabric using a heat press or household iron. This allows you to create personalized clothing for birthdays, holidays, family events, or small handmade businesses.
Greeting cards are also a fun Cricut project for beginners. Using cardstock and simple cut designs, you can create beautiful handmade cards for birthdays, holidays, and special occasions.
As you gain experience using the Cricut Explore Air 2, you may find yourself experimenting with more advanced projects like layered vinyl designs, paper flowers, or decorative home signs.
One of the best things about owning a Cricut machine is that it encourages creativity. With thousands of designs available in Cricut Design Space and endless project possibilities, the Cricut Explore Air 2 quickly becomes one of the most versatile tools in a crafter’s workspace.
Many crafters discover that once they begin using their Cricut machine, they constantly come up with new ideas for personalized gifts, decorations, and DIY projects.
The Cricut Explore Air 2 is an incredibly versatile crafting machine that allows you to create professional-looking projects at home. From vinyl decals and personalized clothing to greeting cards and home decor, the possibilities are nearly endless.
With a little practice, beginners can quickly learn how to use the Cricut Explore Air 2 and start creating beautiful DIY projects.
Whether you’re crafting for fun, making gifts, or starting a small handmade business, the Cricut Explore Air is a powerful tool that can bring your creative ideas to life.
Once you become comfortable using the machine, you’ll likely discover even more creative ways to use it in your crafting projects.
I love seeing your finished projects! If you enjoyed making this post- Beginner’s Guide to the Cricut Explore Air 2, or any of my other crafting projects, I’d love to see yours on Instagram, just tag me @ginamicheleny. Happy crafting!