How to Add Beads to Knitting (Easy Step-by-Step Guide for Beginners)
Learn how to add beads to knitting with this easy beginner-friendly guide. Step-by-step methods, tips, and mistakes to avoid for beautiful beaded projects.
If you’ve ever wanted to add a little extra detail to your knitting projects, beads are one of the easiest ways to instantly elevate your work.
They add texture, sparkle, and a custom look that feels high-end—without making the project much more complicated. And the best part? You don’t need advanced skills to do it, which makes this a perfect technique for beginners looking to try something new.
Whether you’re working on a bag, scarf, hat, or even a baby project, learning how to add beads to knitting is a simple technique that can completely transform your finished piece. It’s a small detail, but it makes a big impact—turning basic stitches into something that feels polished, intentional, and a little bit special.
Once you get the hang of it, you’ll start seeing endless ways to incorporate beads into your projects, from subtle accents to more decorative designs.
Why Add Beads to Knitting?
Adding beads to your knitting gives your projects a polished, decorative finish. It’s especially popular for:
Bags and totes
Scarves and shawls
Hats and accessories
Special gift items
Beads can be subtle or bold depending on the style you choose. A neutral bead adds texture, while metallic or glass beads can create a more eye-catching design.
Beginner Cricut + Craft Tutorials You’ll Love
If you enjoy adding details and customizing your projects, you might also love these tutorials:
How to Use Cricut Explore Air 2 (Beginner Setup Guide + First Project)
How to Etch Glass with Cricut (Easy Step-by-Step Guide Using Armour Etch)
DIY Butterfly Wreath (Easy Spring Wreath That Looks Store-Bought)
For this project I created both a video tutorial and step-by-step instructions.
How to Add Beads to Knitting (Easy Step-by-Step Guide for Beginners)
(As an Amazon Associate I earn from qualifying purchases)
Supplies needed
Plastic beads
Yarn (I used Bernat Home Decor yarn in Clay (yarn weight #5 bulky)
Very small crochet hook or loop turner
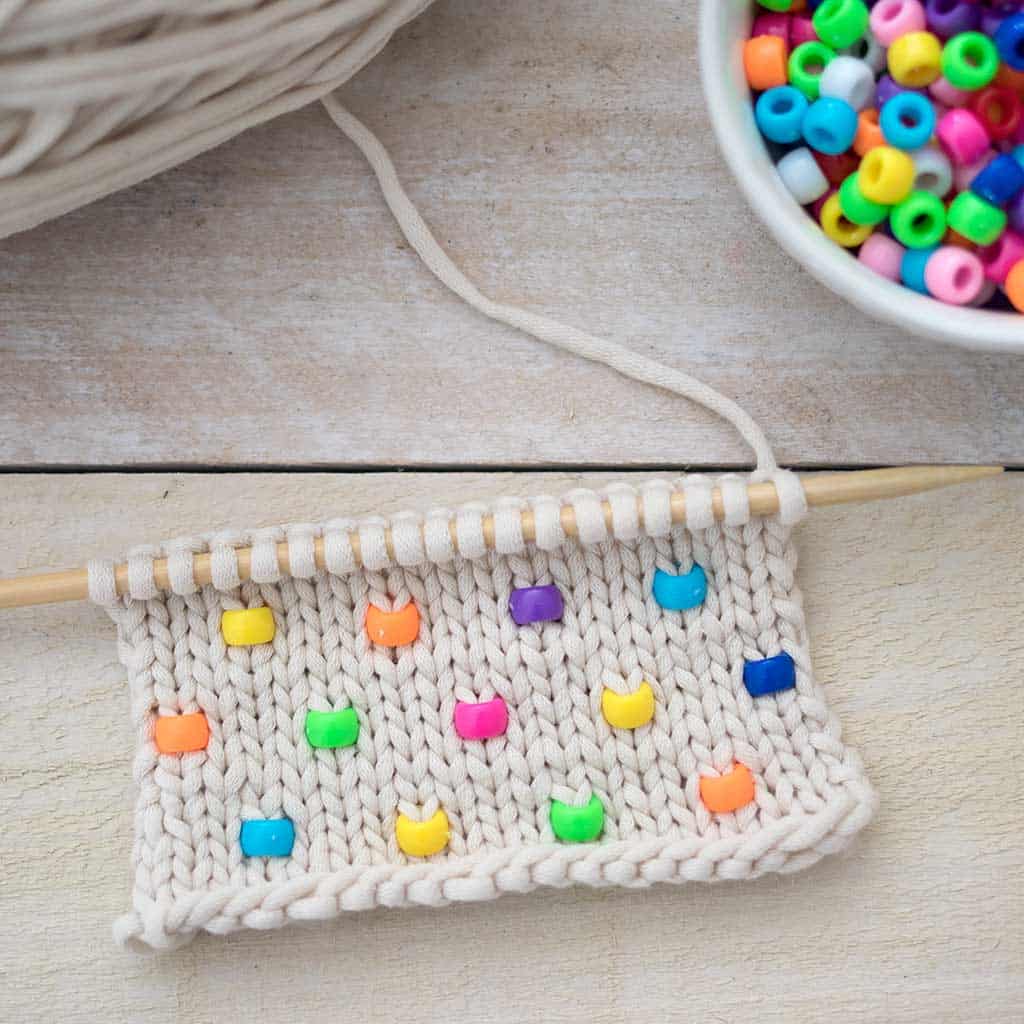
If you want to create an intricate design with the beads, you can sketch it out on graph paper first. I wanted to create rows with alternating placement of the beads, so I just eyeballed it.
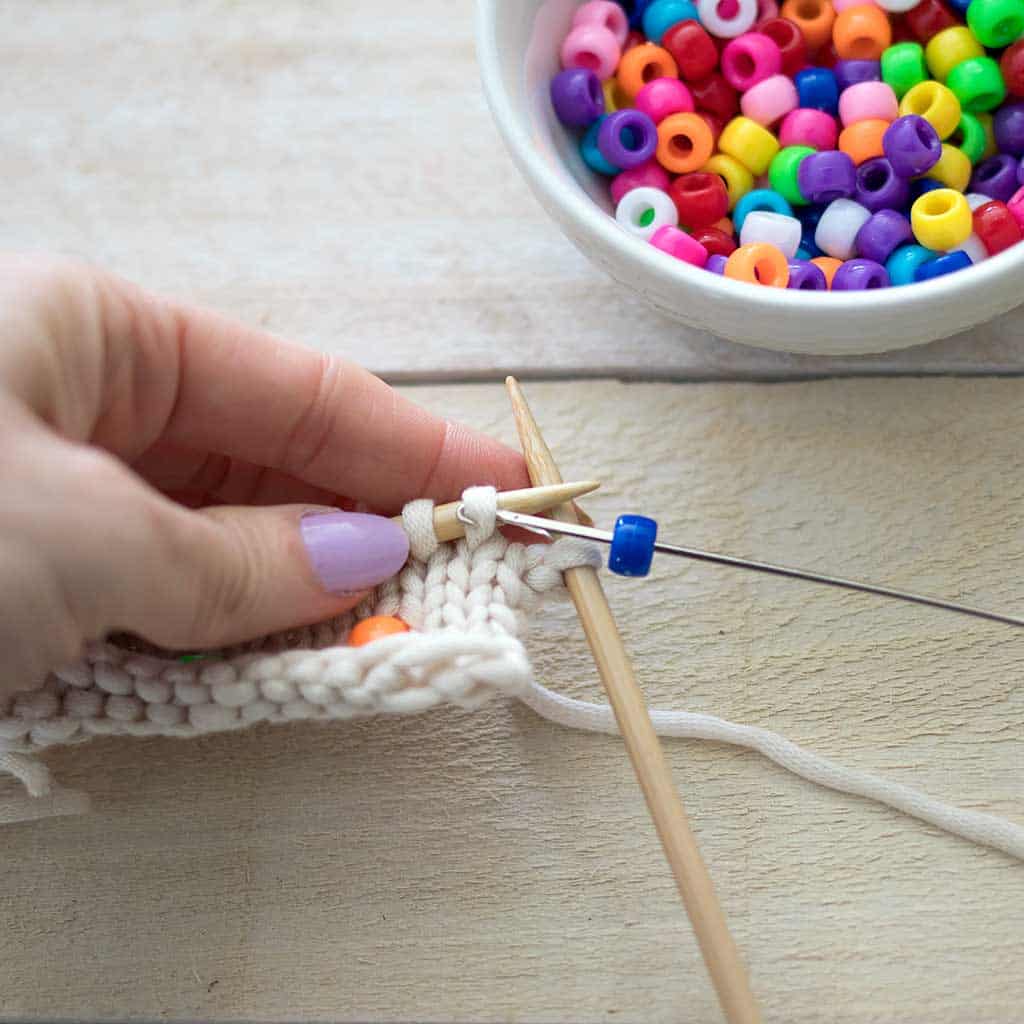
Beads are added on the right side of the work. Thread a bead onto the crochet hook. Then, insert the hook through the stitch on the left needle.
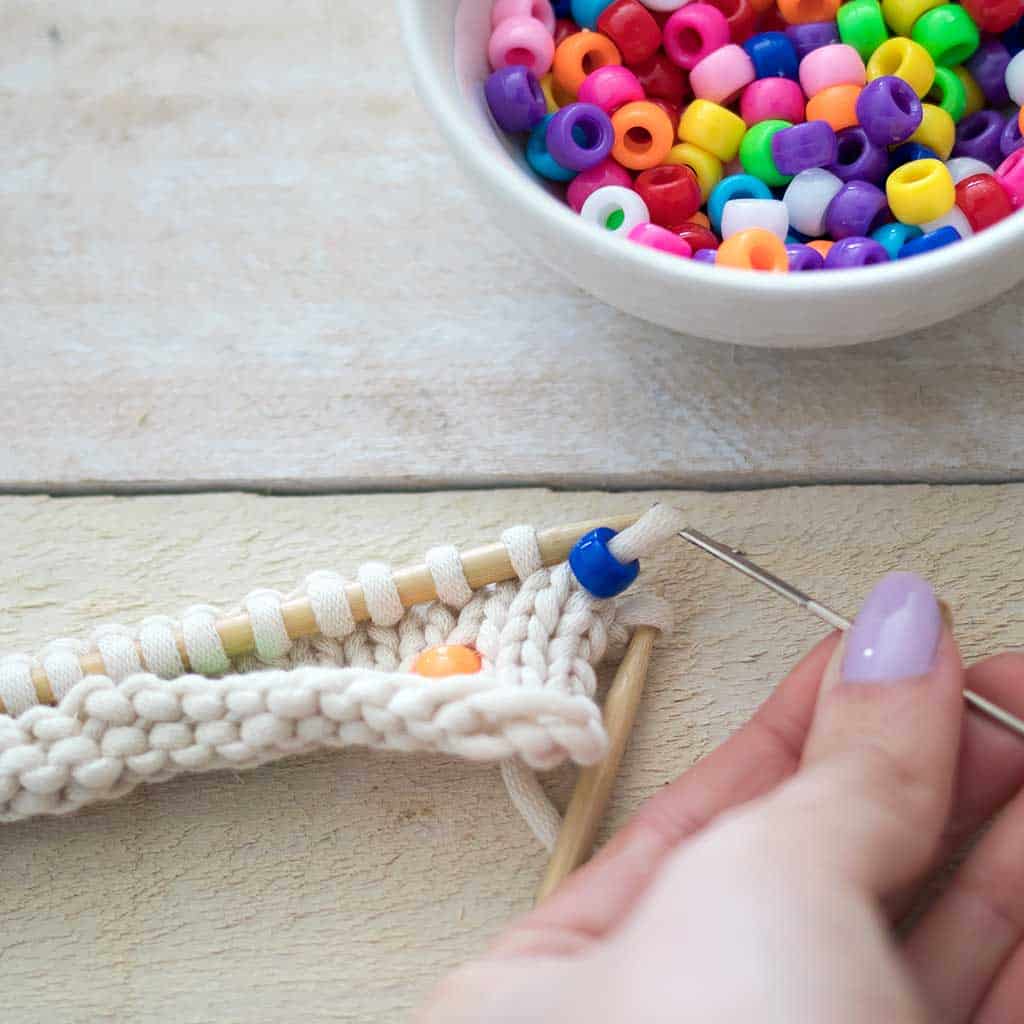
Slide the stitch through the bead.
More Knitting Patterns to Try Next
Once you’re comfortable with beads, try adding them to these beginner-friendly projects:
Easy Beaded Tote Knitting Pattern
21 Free One Skein Knitting Patterns You Can Make in a Day
10 Quick Summer Knitting Patterns
15 Easiest Free Knitting Patterns for Beginners (Quick Projects You Can Start Today)

Place the stitch with the bead back onto the left hand needle. Knit the stitch as normal.
Continue working in stockinette stitch, add new beads every few rows on the right (knit) side.
Best Projects for Adding Beads
If you’re just starting out, choose a project with simple stitches so you can focus on learning the technique.
Great beginner projects include:
Market bags
Simple scarves
Beginner hats
Flat-knit accessories
Once you’re comfortable, you can start incorporating beads into more detailed designs.
Tips for the Best Results
If this is your first time adding beads to knitting, these tips will help you get clean, professional results and make the process feel much easier:
Choose the right bead size
Make sure your yarn can fit through the bead hole, or use a crochet hook small enough to pull the stitch through smoothly. If the bead is too tight, it can slow you down and make the stitches look uneven.
Use smooth yarn
Smooth, non-fuzzy yarn works best because it slides through the beads easily and keeps your stitches looking neat. Heavily textured or fuzzy yarn can catch on the beads and make the process more difficult.
Keep your tension consistent
Try to maintain even tension as you knit. Loose stitches can cause beads to sag or shift out of place, while overly tight stitches can make the fabric look puckered.
Plan your placement
Think about where you want your beads to go before you start. Even spacing creates a clean, polished look, while random placement can feel messy unless it’s part of the design.
Work slowly at first
It might feel a little awkward the first few times you add beads, and that’s completely normal. Take your time in the beginning—once you get into a rhythm, it becomes much faster and more natural.
Common Mistakes to Avoid
Using beads that are too small
If the hole is too tight, it becomes frustrating to work with and can slow you down a lot. It may also stretch or split your yarn as you try to force it through, which affects both the look and durability of your project.
Forgetting to pre-plan placement
Adding beads without a plan can lead to uneven spacing or a design that feels unbalanced. Unless you’re going for a more random, decorative look, it’s helpful to map out where your beads will go before you start knitting.
Pulling stitches too tightly
Tight stitches can cause the fabric to pucker around the bead, making it stand awkwardly instead of sitting neatly on the surface. Keeping your tension relaxed and even will help the beads blend smoothly into your knitting.
Not checking bead consistency
Some beads can vary slightly in size or shape. Mixing uneven beads can make your finished piece look less polished, so it’s worth quickly checking them before you begin.

FAQ: How to Add Beads to Knitting
Do I need special tools to add beads to knitting?
Not necessarily. The most common tool is a small crochet hook, which helps pull your stitch through the bead. You can also use a beading tool or even a fine wire loop, but a crochet hook is usually the easiest and most beginner-friendly option.
What size beads should I use?
It depends on your yarn weight. The bead hole needs to be large enough to fit your yarn or allow a stitch to pass through comfortably. For most worsted weight yarns, medium-sized beads work best.
Can beginners add beads to knitting?
Yes! Adding beads is a great beginner-friendly technique. The crochet hook method is especially easy to learn and gives you more control over placement.
Will the beads stay secure?
Yes, when added correctly, beads are held in place by the stitches themselves. They won’t fall off or move around once your project is complete.
Can I wash beaded knitting projects?
You can, but hand washing is recommended. This helps protect both the yarn and the beads, especially if you’re using delicate materials like glass or decorative finishes.
Which projects are best for adding beads?
Simple projects like scarves, hats, and bags are perfect for beginners. They give you plenty of space to practice and show off the beaded details without complicated shaping.
Looking for more knitting tutorials like this accent beading?
How to Knit the Scallop Stitch
How to Knit the 3 Color Honeycomb Stitch
How to Knit the Drop Stitch

Adding beads to knitting is one of the easiest ways to make your projects look more detailed and professional—without adding a lot of extra work.
It’s a small technique that makes a big impact. Whether you’re adding subtle texture or bold decorative elements, beads give your projects a custom, finished look that really stands out.
Once you try it, you’ll start seeing opportunities to use beads in so many of your patterns—and it’s a skill that’s well worth learning.
I love seeing your finished projects! If you enjoyed making this post- How to Add Beads to any Knitting Project, or any of my other knitting tutorials, I’d love to see yours on Instagram, just tag me @ginamicheleny. Happy knitting!