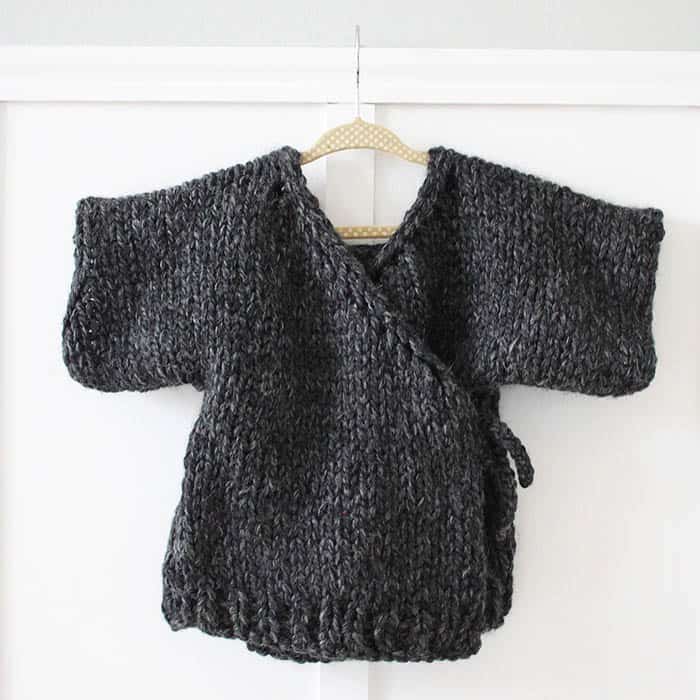
Easy Baby Hooded Sweater Knitting Pattern (Beginner-Friendly + Cozy Colorblock Design)
Easy baby hooded sweater knitting pattern for beginners. Cozy, colorblock baby sweater with simple stitches and step-by-step instructions.
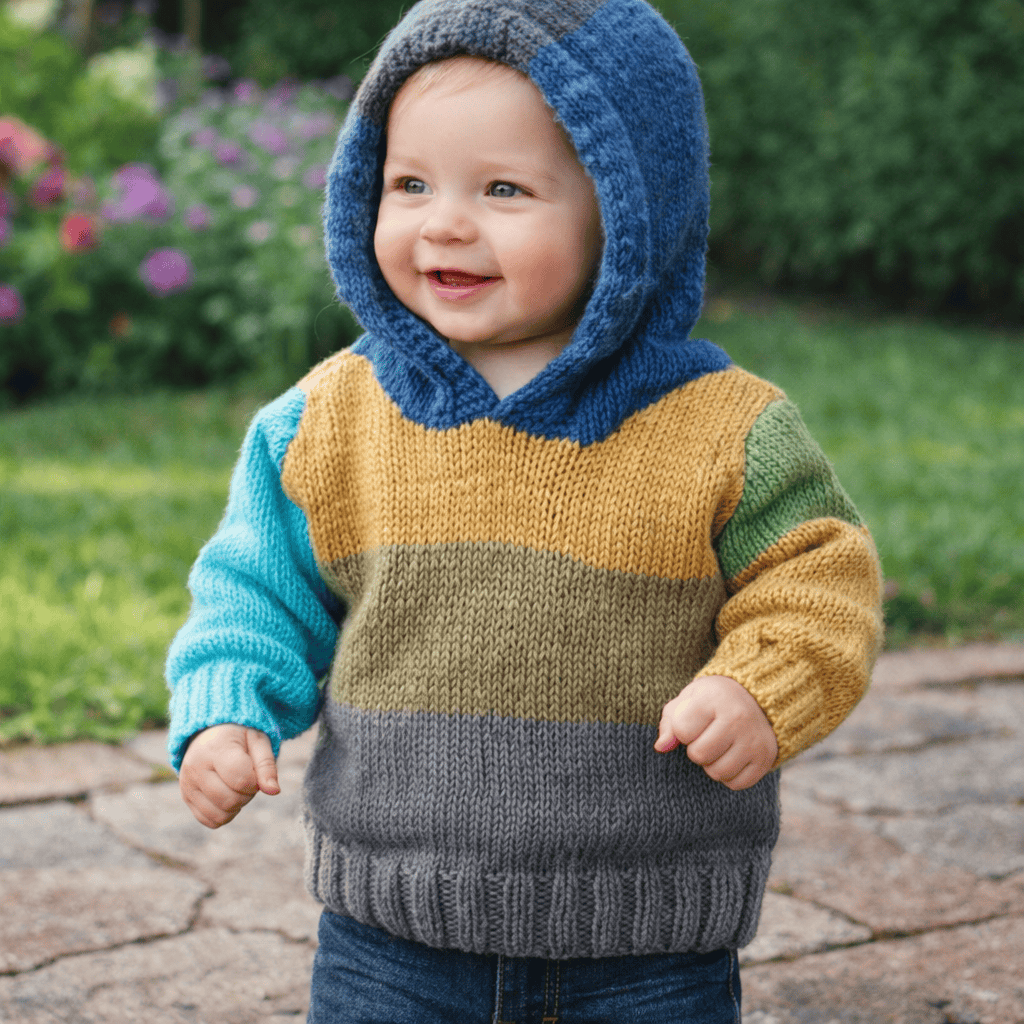
If you’re looking for a cozy, classic project that’s as practical as it is adorable, this easy baby hooded sweater knitting pattern is the perfect choice.
This beginner-friendly sweater features a simple construction, soft texture, and a playful colorblock design that makes it stand out while still being easy to knit. Designed with comfort in mind, it uses basic stitches and minimal shaping—making it a great first sweater project for knitters ready to move beyond scarves and hats.
Grab the printable version of this pattern and start knitting right away—no scrolling needed.
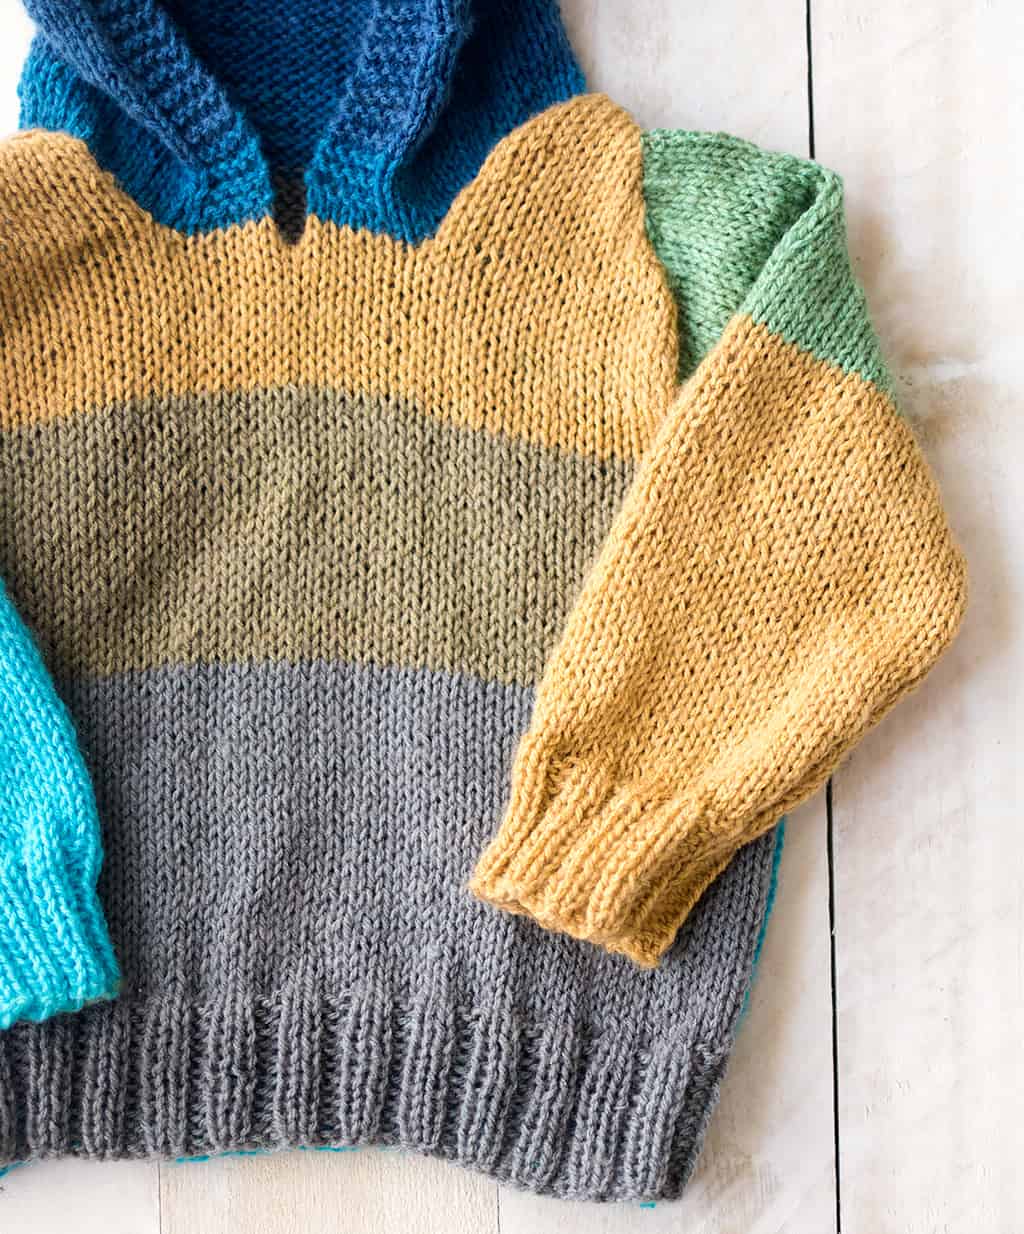
Get the Printable PatternAccording to the original pattern, this sweater is worked primarily in stockinette stitch with ribbed hems and cuffs, along with simple increases and decreases to shape the garment.
👉 Looking for more baby knitting patterns for beginners?:
30 Baby Knitting Patterns for Beginners
Why You’ll Love This Pattern
This is one of those projects that feels impressive—but is actually very approachable.
Beginner-friendly stitches
Cozy hooded design
Simple shaping techniques
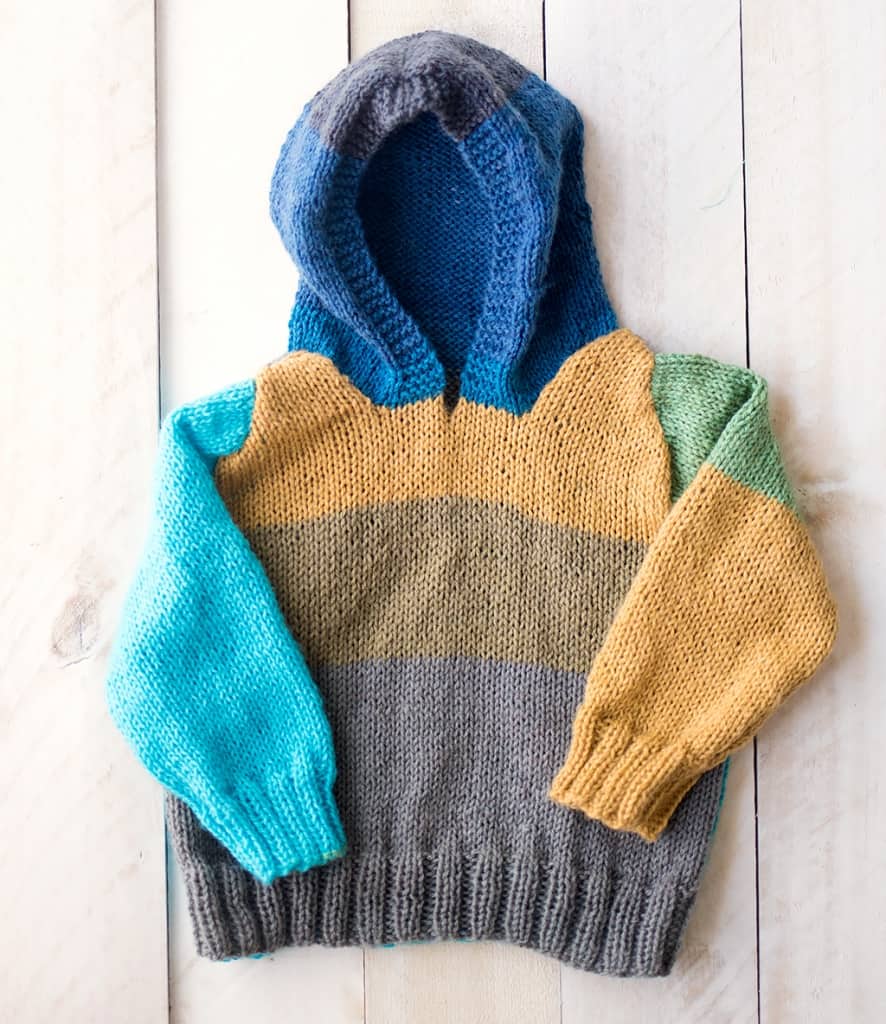
Modern colorblock style
Perfect for gifts
Baby sweaters are especially great knitting projects because they’re small, quick to finish, and incredibly rewarding to make.
Looking for free knitting patterns? Browse this full collection of easy knitting patterns you can start today:
50 Free Knitting Patterns You’ll Actually Want to Make (Beginner-Friendly)
Easy Baby Hooded Sweater Knitting Pattern (Beginner-Friendly + Cozy Colorblock Design)
✨ Ad-Free Printable Pattern Available! ✨
The ad-free, printable PDF of this pattern is now available for purchase at Shop Gina Michele—perfect for easy, distraction-free stitching.
Looking for more projects? Browse the Knitting Pattern Directory to explore all my knitting patterns in one place.
Yarn: Lion Brand Mandala in Sphinx (1 skein)
Needles: Size 5 single point needles, Size 5 circular 16-inch needles (for the hood)
Gauge: 24 sts + 32 rows = 4 inches
Size: 12 months, 24 months
You Might Also Like


Abbreviations:
M1 (make 1): An increase worked by lifting the horizontal strand lying between needles and placing it onto left needle. Knit this new stitch through the back loop – 1 st increased.
For the Back:
Cast on 62 (70) sts.
Work in K2, p2 Rib until piece measures 2 in. from beg.
Beginning with a RS row, work in Stockinette Stitch until piece measures about 8 1/2 (9) in. from beg, ending with a WS row.
Shape Armholes
Next 2 Rows: Continuing in Stockinette Stitch, bind off 3 (4) sts, work to end of row.
Next 2 Rows: Bind off 2 sts, work to end of row.
Next Row (RS): K2tog, work to end of row.
Next Row: P2tog, work to end of row.
Repeat the last 2 rows once more – 48 (54) sts
Continue in Stockinette Stitch until armholes measure about 4 (4 1/2) in. from beg, end with a WS row as the last row you work.
Shape Neck and Shoulders
Next Row (RS): K13 (16) sts, slip next 22 (22) sts to a stitch holder for back neck; join a second ball of yarn and k last 13 (16) sts.
Note: You will now be working both sides at the same time with separate balls of yarn.
Next 2 Rows: Continuing in St st as established, on first side, work to end of side; on second side, bind off 2 sts, work to end of side.
Next Row (WS): On first side, purl to last 2 sts, p2tog; on second side, p2tog, purl to end of side.
Next Row: On first side, knit to last 2 sts, k2tog; on second side, k2tog, knit to end of side.
Rep last 2 rows once more – 9 (12) sts on each side when all decreases have been completed.
Next 4 Rows: Continuing in St st as established, on first side, bind off 3 (4) sts, work to end of side; on second side, work to end of side.
Next Row: On first side, bind off rem sts; on second side, work to end of side. Bind off remaining sts of second side.
For the Front:
Work same as Back until armholes measure about 3 (3 1/2) in. from beginning, end with a WS row.
Shape Neck and Shoulders
Next Row (RS): K 18 (21) sts, (slip next 6 (6) to a stitch holder) twice; join a second ball of yarn and k last 18 (21) sts.
Note: You will now be working both sides at the same time with separate balls of yarn.
Next 2 Rows: Continuing in St st as established, on first side, work to end of side; on second side, bind off 4 (4) sts, work to end of side.
Next 2 Rows: On first side, work to end of side; on second side, bind off 2 (2) sts, work to end of side.
Next Row (WS): On first side, purl to end of side; on second side, p2tog, purl to end of side.
Next Row: On first side, knit to end of side; on second side, k2tog, knit to end of side.
Rep last 2 rows twice more – 9 (12) sts on each side when all decreases have been completed.
Continue in St st, working each side with separate balls of yarn until piece measures same as Back to shoulder shaping.
Next 4 Rows: Continuing in St st as established, on first side, bind off 3 (4) sts, work to end of side; on second side, work to end of side.
Next Row: On first side, bind off rem sts; on second side, work to end of side.
Bind off remaining sts of second side.
Sleeves
(make 2)
With smaller needles, cast on 38 (42) sts.
Work in K2, p2 Rib until piece measures 2 in. from beginning.
Change to larger straight needles and beg with a WS row, work in St st for 5 (7) rows.
Next Row (RS): K1, M1, k to last st, M1, k1 – 40 (44) sts.
Work in St st as established for 5 (7) rows.
Rep last 6 (8) rows 5 (6) more times – 50 (56) sts when all increases have been completed.
Work even in St st until sleeve measures 7 (10) in. from beg, end with a WS row.
Shape Cap:
Next 2 Rows: Bind off 3 (4) sts, work in Stockinette Stitch to end of row -44 (48) sts.
Next Row (RS): K2tog, k to last 2 sts, k2tog.
Purl 1 row.
Rep last 2 rows 8 (10) more times – 26 (26) sts when all decreases have been completed.
Next 4 Rows: Bind off 4 (4) sts, work in Stockinette Stitch to end of row.
Bind off remaining 10 (10) sts.
Finishing:
Sew shoulder seams.
Hood:
From RS with circular needle, and starting at center front, k across 6 (6) sts of right front holder, pick up and k21 (21) sts evenly spaced along right neck edge to holder, k across 22 (22) sts on holder for back neck, pick up and k21 (21) sts evenly spaced along left front neck edge then across 6 (6) sts on left front st holder – 76 (76) sts.
Note: Work back and forth on circular needle as if working on straight needles.
Next Row (WS): K5 (5), place marker, p to last 5 (5) sts, place marker, k to end of row.
Next Row (RS): Knit.
Rep last 2 rows, keeping first and last 5(5) sts in Garter st, while working rest of hood in St st.
Work even until hood measures 8 (8 1/2) in. from beginning, end with WS row.
Shape Top of Hood
Next Row (RS): K38 (38) sts for right side of hood, slip rem 38 sts for left side of hood to st holder.
Next Row (WS): Bind off 3 (3) sts, p to last 5 (5) sts, k to end of row.
Next Row (RS): Knit.
Rep last 2 rows 5 (5) more times – 20 (20) sts.
Bind off.
Slip rem 38 (38) sts of left side to needle ready to work a RS row, join yarn and knit to end of row.
Next Row (WS): K5 (5), purl to end.
Next Row (RS): Bind off 3 (3) sts, knit to end.
Rep last 2 rows 5 times – 20 (20) sts.
Bind off.
Sew top of hood.
Finishing
Sew sleeves and side seams. Sew in sleeves.
Grab the printable version of this pattern and start knitting right away—no scrolling needed.
Get the Printable PatternMore Baby Knitting Patterns You’ll Love
If you enjoyed this project, you’ll love these:
Newborn Hat Knitting Pattern
Baby Bear Hat Knitting Pattern
Kids Basic Beanie Knitting Pattern
15 Quick Baby Knitting Projects You Can Make in a Day
You can also browse my full collection here:
Free Knitting Patterns for Babies
Beginner Tips for Success
If this is your first sweater, these tips will help:
Always check your gauge before starting
Use stitch markers to keep track of shaping
Take your time with seaming for a polished look
Block your finished sweater to improve fit
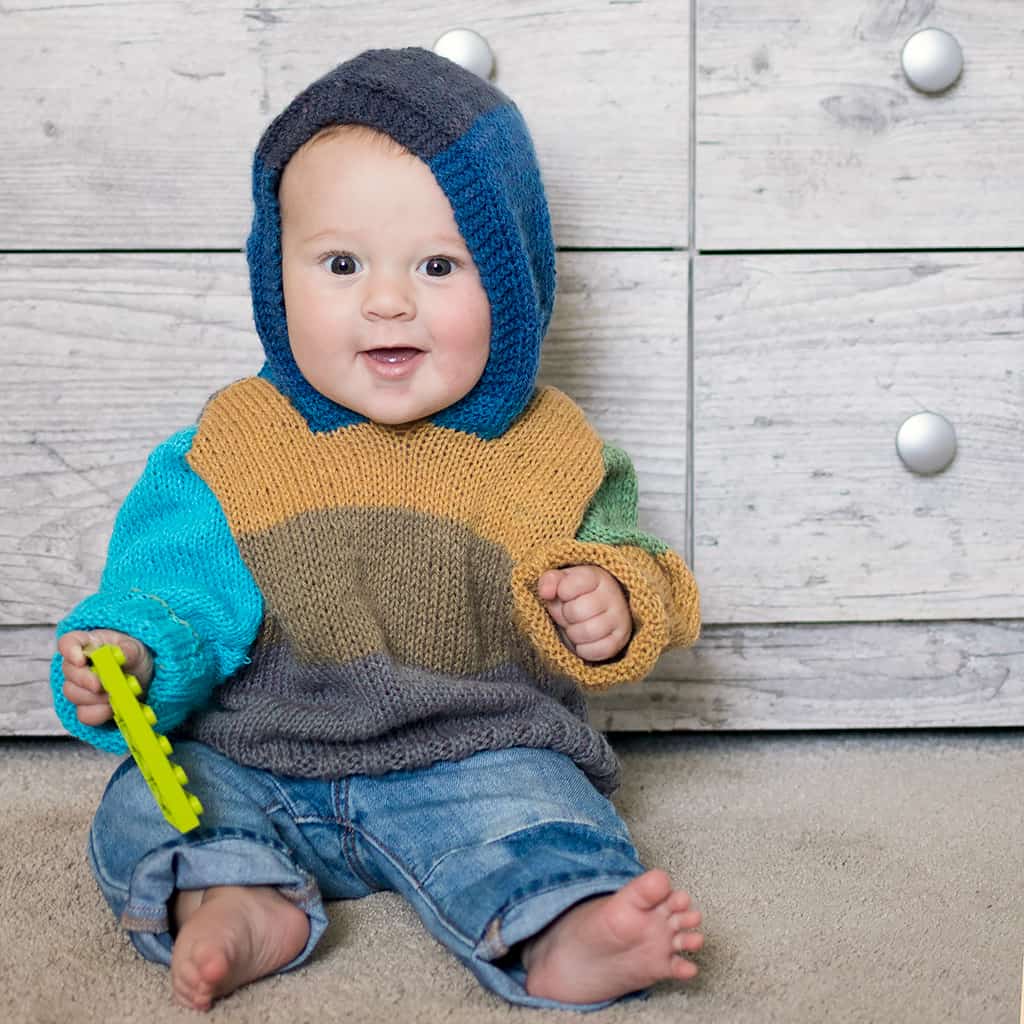
Why a Hooded Baby Sweater is So Practical
Unlike pullovers, hooded sweaters provide extra warmth and versatility.
They’re perfect for:
Outdoor walks
Layering in cooler weather
Everyday wear
Baby gifts
Classic baby sweater designs have been popular for decades because of their practicality and timeless appeal.
Make It Your Own
This pattern is easy to customize.
Try:
Different color combinations
Neutral tones for a minimalist look
Bright colors for a playful style
Adding buttons or toggles
The colorblock design makes it especially fun to experiment with yarn.
Get the Ad-Free Printable Pattern
Prefer a clean, printable version?
👉 Download the PDF here:
Shop Gina Michele
✔ Easy-to-read format
✔ No ads
✔ Perfect for on-the-go knitting
Looking for more Knitting Patterns for Babies?
Flat Knit Baby Bonnet
Straight Needle Baby Booties
Easiest Newborn Hat Knitting Pattern
Grab the printable version of this pattern and start knitting right away—no scrolling needed.
Get the Printable PatternFAQ about Easy Baby Hooded Sweater Knitting Pattern
Is this pattern beginner-friendly?
Yes! This sweater uses simple stitches like knit and purl, along with basic increases and decreases. It’s a great first sweater project.
Do I need circular needles?
Yes, but only for the hood. The rest of the sweater is knit flat on straight needles.
What yarn is best?
Soft, lightweight yarn that’s gentle on baby skin is ideal. Acrylic blends and cotton blends both work well.
How long does it take to knit?
Most knitters can complete this sweater in a few days to a week.
Can I adjust the size?
Yes, you can modify stitch counts and length to adjust the fit.
Is this a good baby gift?
Absolutely. Handmade baby sweaters are one of the most loved and practical gifts.
This easy baby hooded sweater knitting pattern is the perfect blend of cozy, classic, and beginner-friendly. It gives you the chance to create something truly special without complicated techniques—making it ideal for both new and experienced knitters.
The hood adds that extra layer of warmth and charm, while the colorblock design keeps it modern and fun. And because baby projects knit up quickly, you get that satisfying “finished project” feeling much faster than larger garments.
Whether you’re knitting for your own baby or creating a thoughtful handmade gift, this sweater is one you’ll come back to again and again.
👉 Grab the ad-free printable pattern here:
Easy Hooded Baby Sweater Knitting Pattern PDF
✨ I’d love to see what you’re making! ✨
If you’ve tried one of my knitting patterns, crochet projects, DIYs, or recipes, share your finished project on Instagram and tag me so I can see it 💛
There’s nothing better than seeing your creations come to life—from cozy knits to delicious recipes and everything in between. It truly makes my day!
Tag me @ginamicheleny so I can share your work and cheer you on!
Happy making!