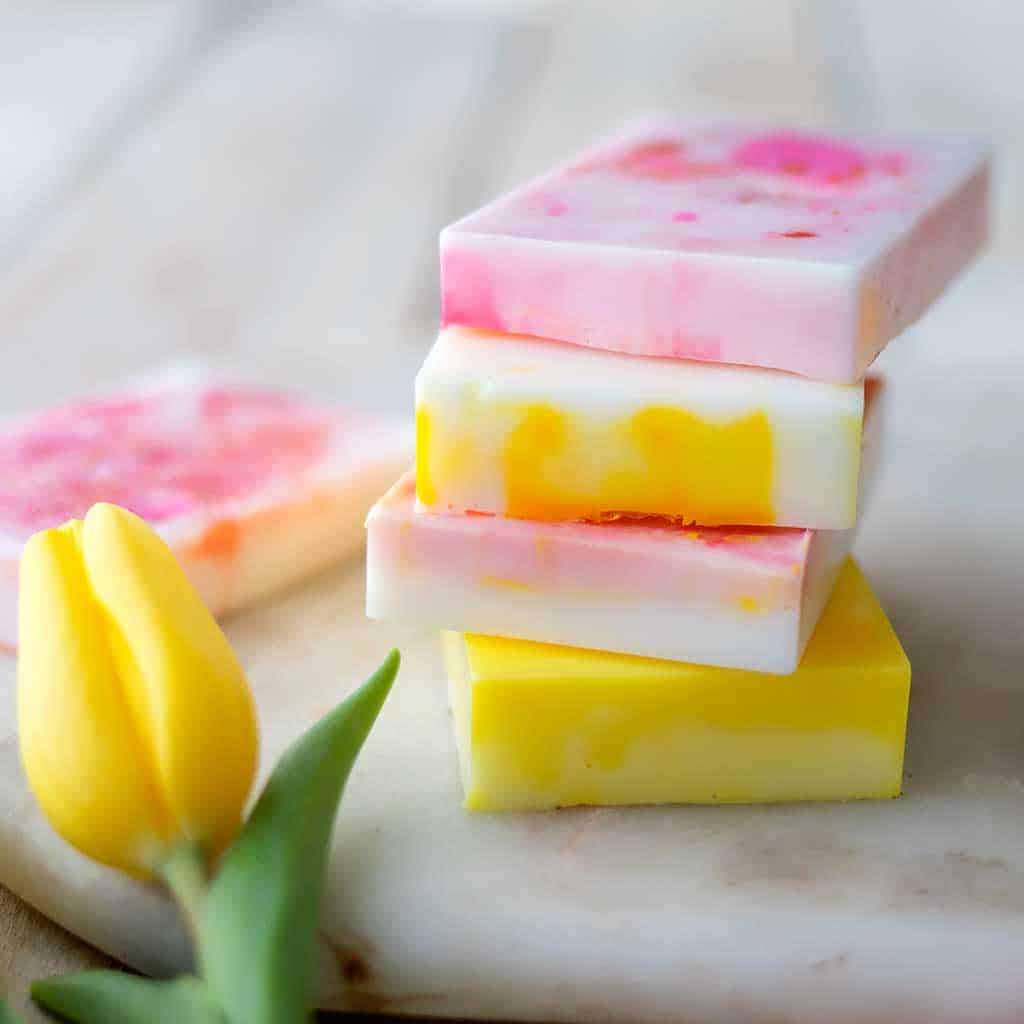
Beginners Guide to Melt and Pour Soap
Dive into the enchanting world of soap crafting with this Beginners Guide to Melt and Pour Soap, where simplicity meets creativity, offering aspiring artisans a delightful entry point into the art of making beautifully customized soap without the complexities of traditional methods.

Embarking on the journey of soap making opens up a world of creativity, personalization, and the satisfaction of crafting your own cleansing wonders. For beginners eager to dip their toes into the soapy realm, the Melt & Pour technique offers a fantastic starting point. In this beginner’s guide, we’ll unravel the art of Melt & Pour soap making, exploring the basics, essential ingredients, and simple steps to help you create beautifully crafted soaps without the complexities of traditional soap making methods.
KEEP IN TOUCH! FOR MORE INSPIRATIONS, TUTORIALS, AND FREE KNITTING PATTERNS, SIGN UP FOR MY WEEKLY NEWSLETTER:

Beginners Guide to Melt and Pour Soap
What is Melt & Pour Soap?
Melt & Pour soap crafting involves using pre-made soap bases that you simply melt, customize with additives, colors, and fragrances, and then pour into molds to set. This technique eliminates the need for handling lye, making it an ideal starting point for beginners.
Essential Ingredients and Tools:
1. Soap Base:
Choose a quality soap base, available in various formulations like glycerin, shea butter, or goat’s milk. These bases serve as the foundation for your soap.
2. Fragrances:
Select skin-safe fragrances or essential oils to add delightful scents to your soap. Be mindful of recommended usage rates.
3. Colorants:
Explore soap-safe colorants, such as micas or pigments, to infuse vibrant hues into your creations.
4. Molds:
Invest in silicone molds of different shapes and sizes to mold your soap into unique designs.
5. Heat-Safe Containers:
Use microwave-safe or heat-resistant containers for melting your soap base. Stainless steel or tempered glass work well.
6. Stirring Utensils:
Have silicone or stainless steel utensils for stirring and mixing your soap ingredients.
Step-by-Step Guide:
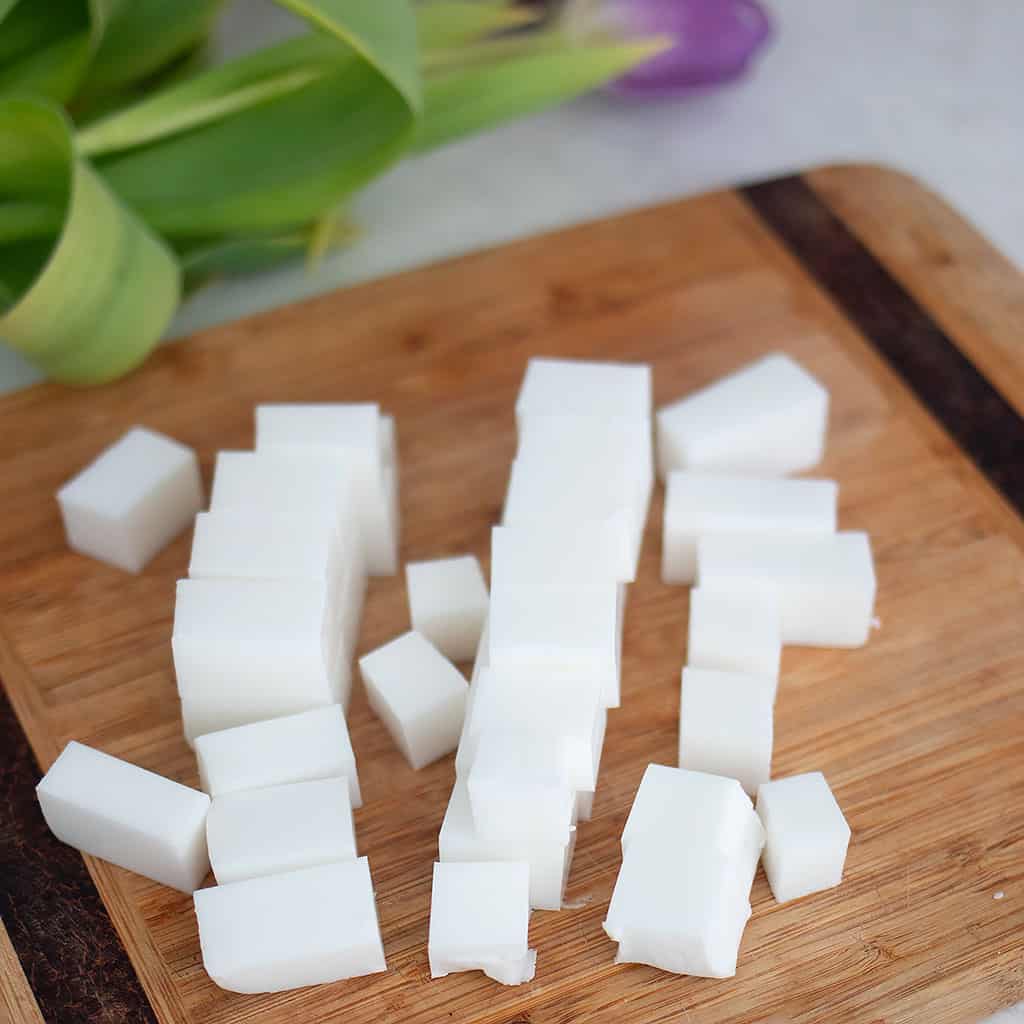
1. Cutting and Melting the Soap Base:
Start by cutting your soap base into smaller chunks for even melting. Melt the chunks in short bursts in the microwave or using a double boiler until smooth.
2. Adding Fragrance and Color:
Once melted, stir in your chosen fragrance and colorants. Mix thoroughly to ensure even distribution.
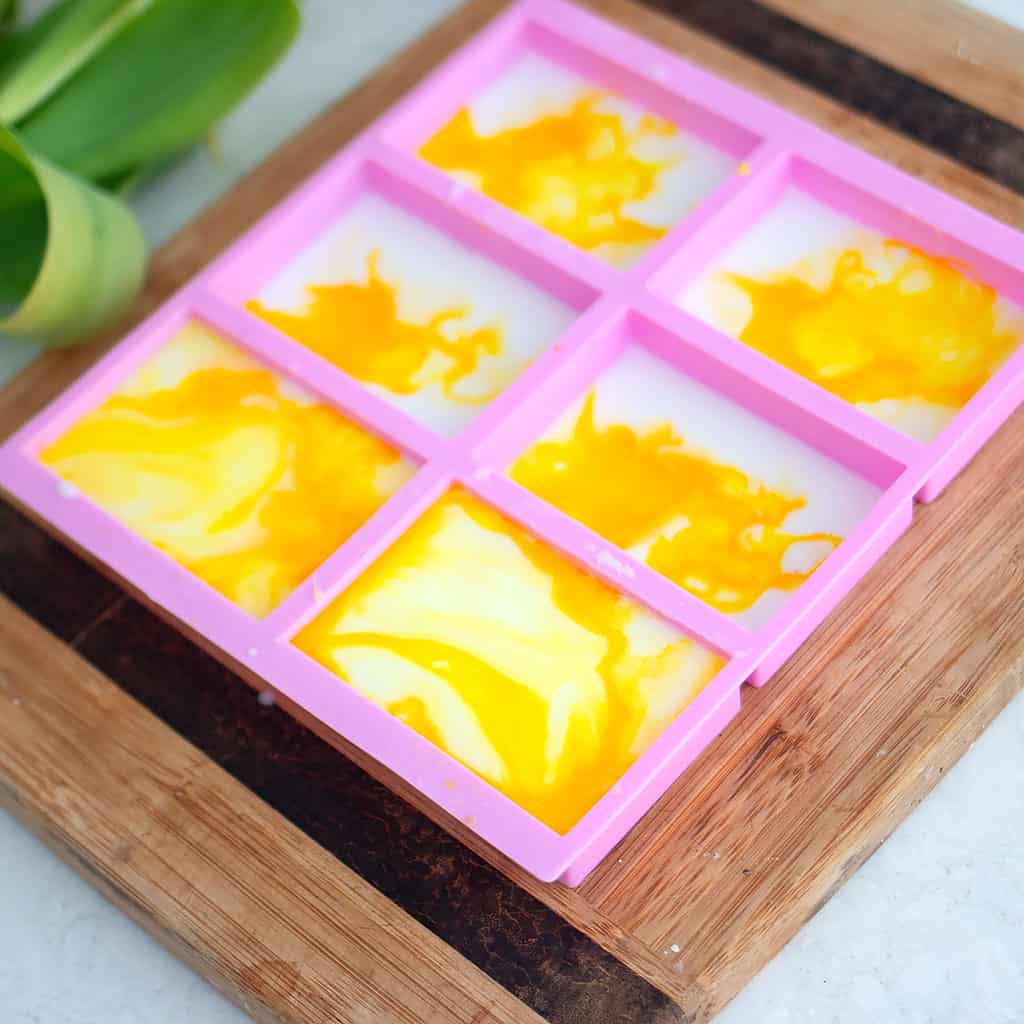
3. Pouring into Molds:
Carefully pour the melted soap into your chosen molds. Spritz the surface with rubbing alcohol to eliminate bubbles.
4. Cooling and Setting:
Allow the soap to cool and set completely in the molds. This typically takes a few hours.
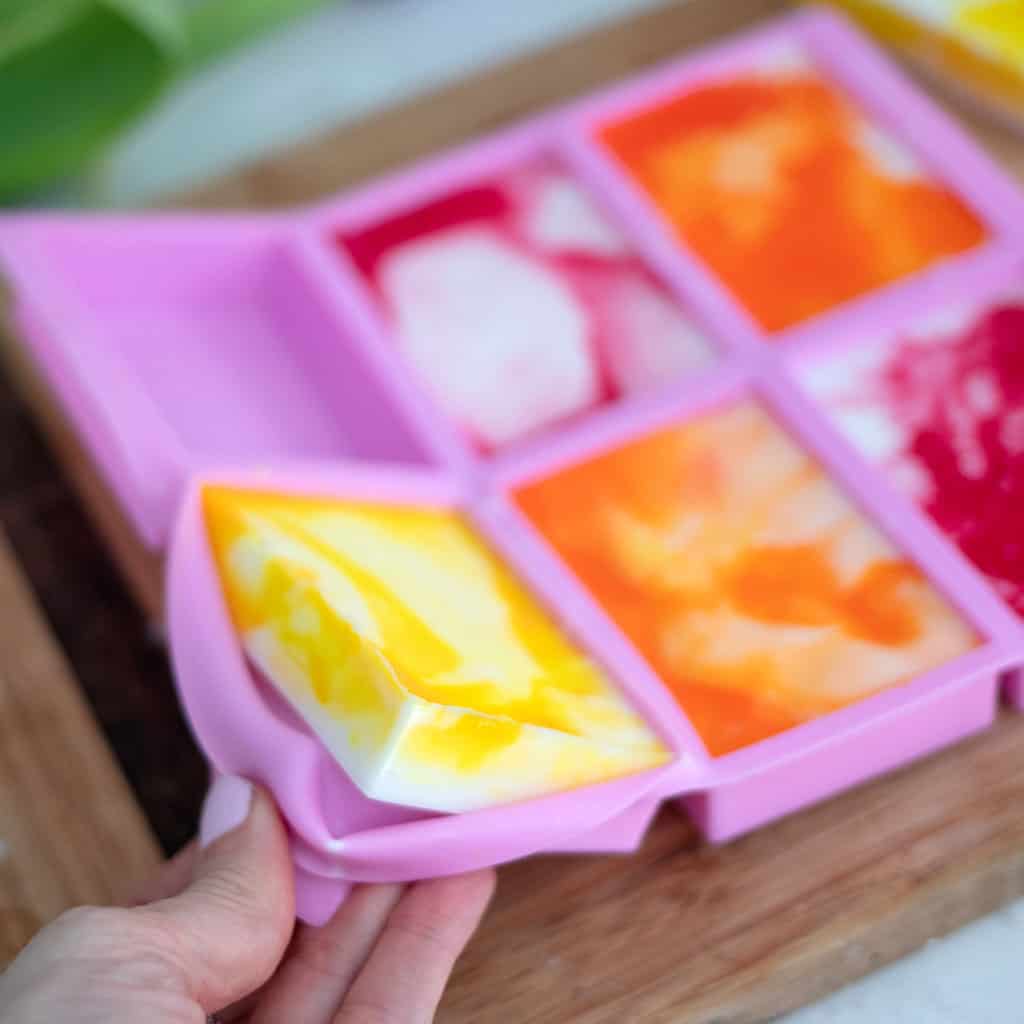
5. Demolding and Packaging:
Once set, gently demold your soap creations. Package them creatively for personal use or thoughtful gifts.
Tips for Success:
- Experiment with Layers and Embeds: Create visually appealing soaps by experimenting with layers and embedding small items like flower petals or herbs.
- Use Natural Additives: Enhance your soap with natural additives like oatmeal, coffee grounds, or dried herbs for texture and exfoliation.
- Mastering Temperature: Be cautious of overheating your soap base, as it may affect the final texture. Aim for a smooth, controlled melt.
With this beginner’s guide to Melt & Pour soap making, you’re equipped to embark on a soapy adventure that combines creativity with simplicity. Whether crafting for personal enjoyment or sharing your handmade creations with others, Melt & Pour soap making offers a delightful entry point into the world of DIY soap crafting. Let your imagination run wild as you experiment with colors, scents, and designs, transforming the ordinary into extraordinary bars of personalized luxury.
Looking for more craft projects like these Beginners Guide to Melt and Pour Soap?
Easy DIY Bath Bomb Recipe- Step by Step Tutorial
I love seeing your finished projects! If you enjoyed making these Beginners Guide to Melt and Pour Soap or any of my other craft projects, I’d love to see yours on Instagram, just tag me @ginamicheleblog. Happy crafting!