How to Crochet a Pumpkin in the Round
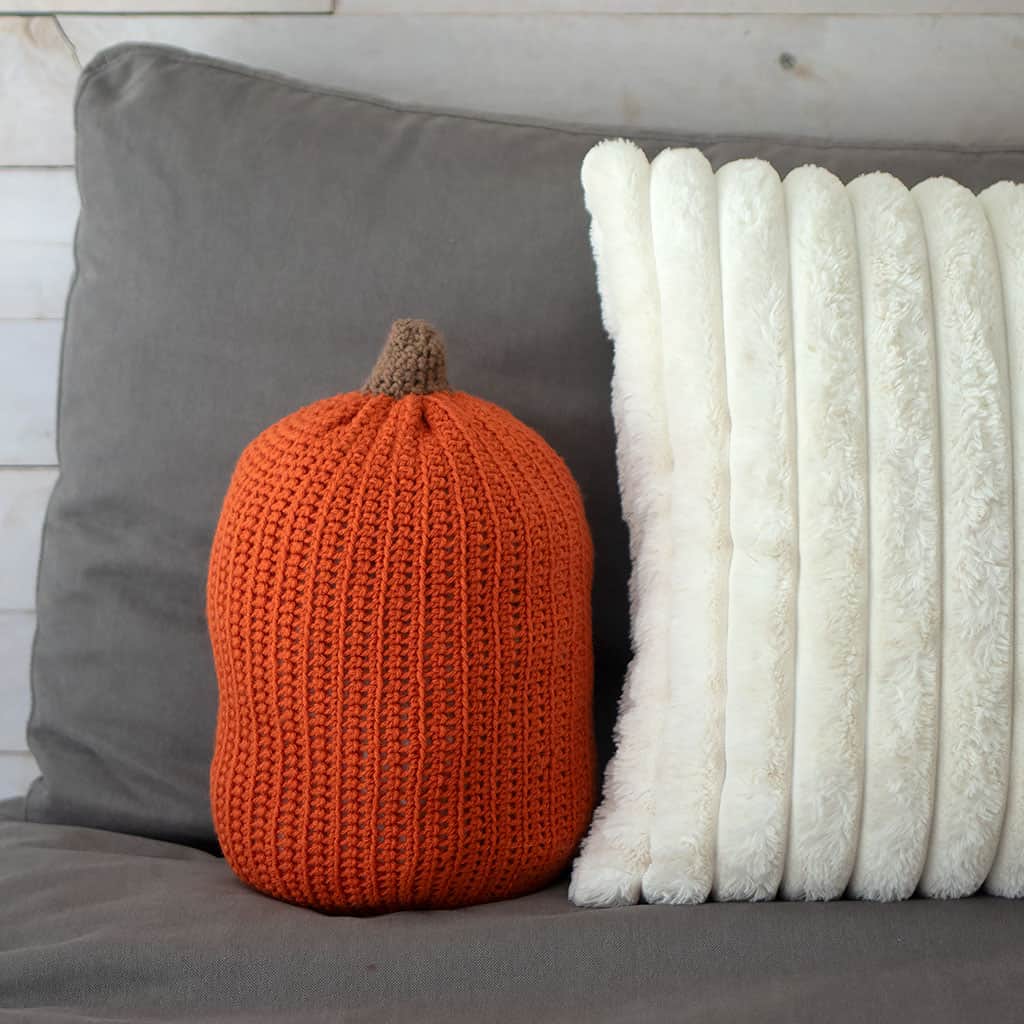
Get ready to add a touch of crochet charm to your fall decor with my step-by-step guide on how to crochet a pumpkin in the round.
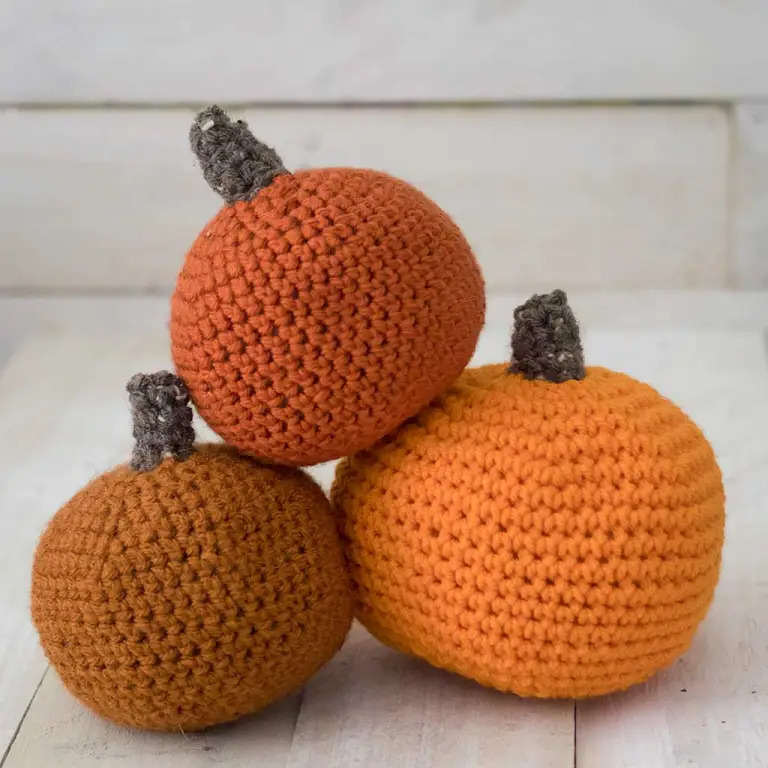
As autumn leaves begin to paint the landscape with rich hues of orange and gold, it’s the perfect time to infuse your home with the cozy charm of seasonal decorations. One of the most delightful and enduring symbols of fall is the humble pumpkin, and what better way to embrace the spirit of the season than by crafting your own crocheted pumpkins?
In this comprehensive guide, I’ll take you through the process of creating adorable crocheted pumpkins in the round, whether you’re a crochet enthusiast or a beginner. With a few simple stitches and a dash of creativity, you’ll soon have a collection of charming pumpkins to adorn your home and celebrate the beauty of autumn. So, grab your crochet hook and some yarn, and let’s get started on this fun and festive crochet project!
KEEP IN TOUCH! FOR MORE INSPIRATIONS, TUTORIALS, AND FREE KNITTING PATTERNS, SIGN UP FOR MY WEEKLY NEWSLETTER:

How to Crochet a Pumpkin in the Round
(As an Amazon associate, I earn from qualifying purchases)
Yarn: Any #4 worsted weight yarn (I used Lion Brand Vanna’s Choice and Red Heart Super Saver in Pumpkin)
Crochet Hook size: H
Gauge: Not necessary for this project
Pattern instructions:
Round 11: 8 single crochet (sc) into ring (8 sts).
Round 2: 2sc in each stitch around (16 st)
Round 3: *sc in next st, 2sc in next st, repeat from * around (24 st)
Round 4: *sc in next 2 st, 2sc in next st, repeat from * around (32 st)
Round 5: *sc in next 3 st, 2 sc in next st, repeat from * around (40 st)
Round 6: *sc in next 4 st, 2 sc in next st, repeat from * around (48 st)
Round 7: *sc in next 5 st, 2 sc in next st, repeat from * around (56 st)
Rounds 8-15: sc around (56 st) (If you would like to make a taller pumpkin, add some more rounds here)
Round 16: *sc in next 5 st, sc 2 tog, repeat from * around (48 st)
Round 17: *sc in next 4 st, sc 2 tog, repeat from * around (40 st)
Round 18: *sc in next 3 st, sc 2 tog, repeat from * around (32 st)
Round 19: *sc in next 2 st, sc 2 tog, repeat from * around (24 st)
Start stuffing the pumpkin. Add more stuffing as you complete the remaining rounds.
Round 20: *sc in next st, sc 2 tog, repeat from * around (16 st)
Round 21: *sc 2 tog, repeat from * around (8 st)
Round 22: *sc 2 tog, repeat from * around.
Break yarn and pull through remaining loop.
Finishing the crochet pumpkin:

Flip the pumpkin over. The bottom where you started will be the top. Pick up and crochet 9 stitches around the center to create a stem.

Single crochet around these stitches for 4 rows (add more if you’d like a longer stem). Break yarn, thread through a yarn needles and weave through the stitches. Pull to close the opening and weave in ends.
Crocheting your own pumpkins in the round is a delightful and rewarding craft project that allows you to bring the warmth and character of fall into your home. With a bit of practice, you can customize your pumpkins with different colors, sizes, and even textures to suit your personal style. Whether you use them as charming table centerpieces, part of a seasonal wreath, or as standalone decorations, these crocheted pumpkins are sure to add a touch of handmade beauty to your autumn decor.
So, gather your crochet supplies and let your creativity flow as you embark on this cozy and enjoyable journey of crafting pumpkins that will be cherished year after year.

Looking for more free crochet patterns like this post, How to Crochet a Pumpkin in the Round?
Easiest Large Pumpkin Crochet Pattern
Large Plush Candy Corn Crochet Pattern
How to Crochet a Pumpkin- the Easy Way!
I love seeing your finished projects! If you enjoyed making this post How to Crochet a Pumpkin in the Round, or any of my other beginner crochet patterns, I’d love to see yours on Instagram, just tag me @ginamicheleblog. Happy crocheting!


