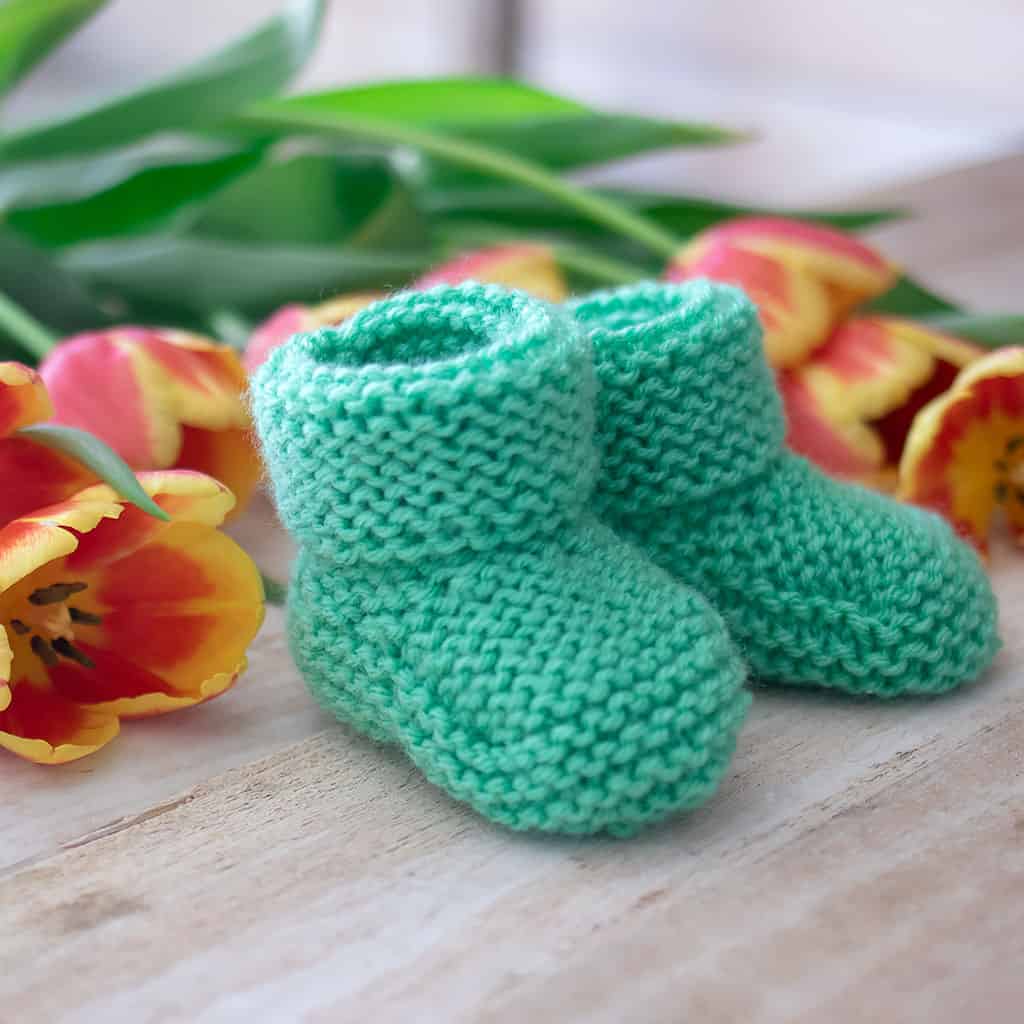
Garter Stitch Baby Booties Step-by-Step Pattern and Video Tutorial
Learn how to make the cutest little booties with my Garter Stitch Baby Booties Step-by-Step Pattern and Video Tutorial—a simple and cozy project perfect for tiny toes!
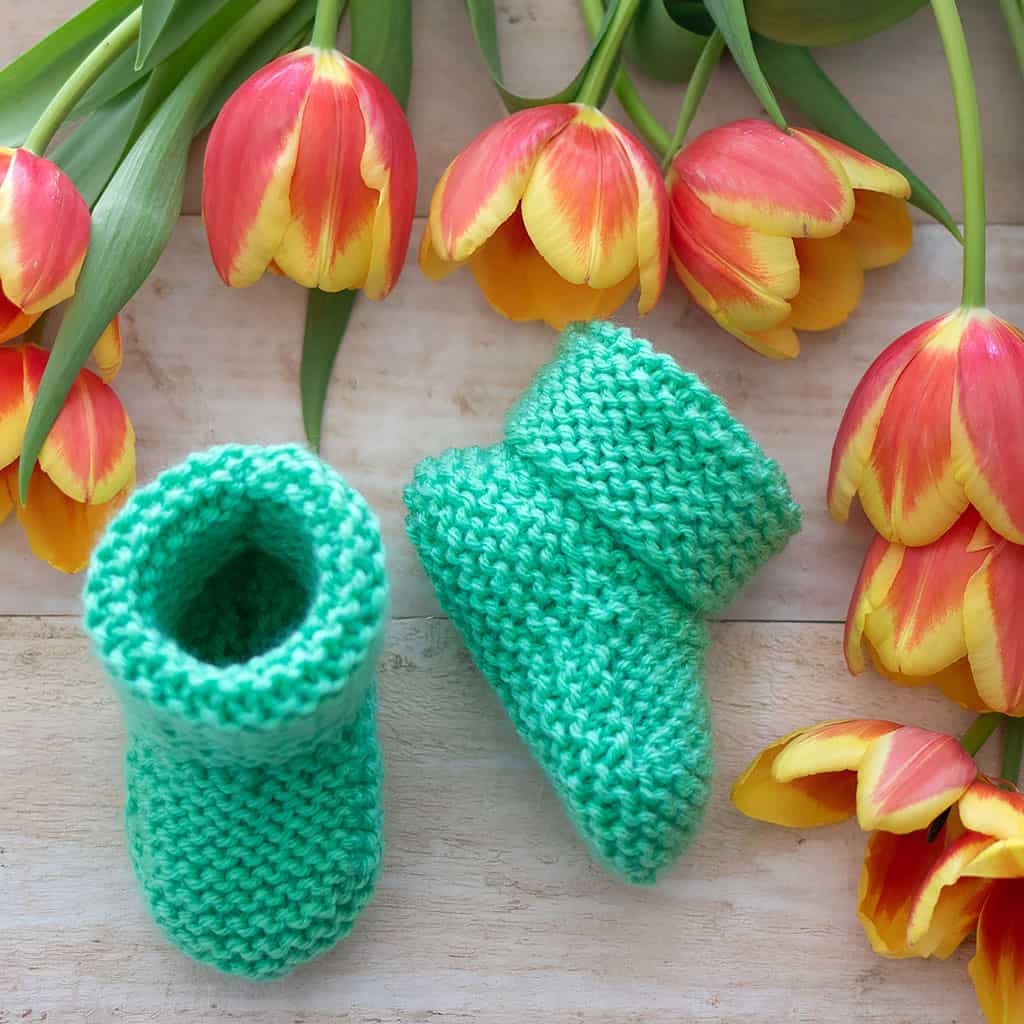
If you’re looking for a simple, adorable knitting project that works up quickly, these Garter Stitch Baby Booties are the perfect choice. This Garter Stitch Baby Booties Step-by-Step Pattern and Video Tutorial will walk you through everything you need to know to knit cozy little booties for newborns.
Baby knitting projects are some of the most rewarding things you can make. They’re small, quick to knit, and always appreciated as handmade gifts. These garter stitch baby booties are especially beginner-friendly because they use one of the simplest stitches in knitting: garter stitch.
Whether you’re knitting for a baby shower, a newborn gift, or a charity project, this Garter Stitch Baby Booties Step-by-Step Pattern and Video Tutorial will help you create a pair of sweet, soft booties in just a few hours.
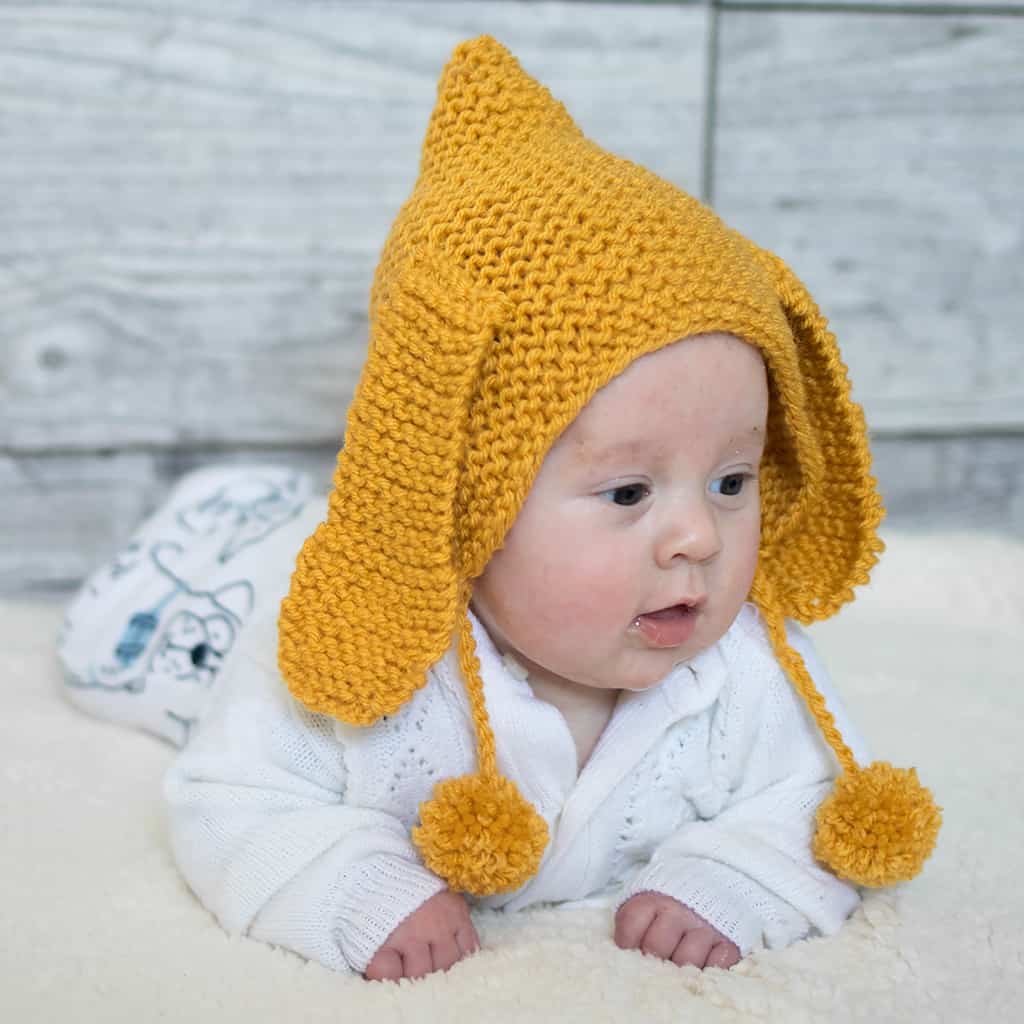
If you enjoy knitting baby projects, you may also love my Easiest Baby Booties Ever Knitting Pattern and the cozy Flat Knit Baby Hat Knitting Pattern — both beginner-friendly patterns that pair perfectly with these booties.
If you’d like a clean, ad-free printable version, you can purchase the Garter Stitch Baby Booties PDF pattern in my shop, which makes it easy to print or knit from your tablet while you work.
Why You’ll Love These Garter Stitch Baby Booties
These Garter Stitch Baby Booties are a favorite among beginner knitters because they are simple, quick, and incredibly cute.
Here are a few reasons knitters love this pattern:
• Beginner-friendly construction
• Uses basic garter stitch
• Quick project you can finish in a day
• Perfect handmade baby gift
• Great stash-busting project
Garter stitch is created by knitting every row, which produces a soft, stretchy texture that works beautifully for baby garments and accessories.
Because this pattern is so easy, it’s also perfect if you’re just learning to knit. If you’re new to knitting, you may also want to check out my guide How to Knit a Hat on Straight Needles for another beginner-friendly project.
Get the Printable PDF Pattern
While the free version of this Garter Stitch Baby Booties Step-by-Step Pattern is available on this page, many knitters prefer working from a printable pattern.
You can purchase the ad-free printable Garter Stitch Baby Booties PDF pattern in my shop for a clean, easy-to-follow version that’s perfect for printing or saving to your device.
The PDF version is great for:
• knitting offline
• printing for your project binder
• saving to your digital knitting library
You can download the printable Garter Stitch Baby Booties pattern here and start knitting today.
Looking for More Knitting Patterns?
If you enjoyed this pattern, be sure to explore my full Knitting Pattern Directory, where you’ll find dozens of cozy projects including baby knitting patterns, hat knitting patterns, beginner knitting projects, toy knitting patterns, and knitted accessories.
Video Tutorial for Garter Stitch Baby Booties
If you’re a visual learner, the Garter Stitch Baby Booties Step-by-Step Video Tutorial will guide you through the entire process.
The video shows how to:
• Knit garter stitch rows
• Shape the toe
• Assemble the booties
Following along with the tutorial can make the pattern even easier to understand, especially if you’re new to knitting baby projects.
Garter Stitch Baby Booties Step-by-Step Pattern and Video Tutorial
✨ Ad-Free Printable Pattern Available! ✨
The ad-free, printable PDF of this pattern is now available for purchase at Shop Gina Michele—perfect for easy, distraction-free stitching.
Looking for more projects? Browse the Knitting Pattern Directory to explore all my knitting patterns in one place.
(As an Amazon associate, I earn from qualifying purchases)
Yarn: Loops & Threads Impeccable in Jade
Needles: Size US 8 straight knitting needles
Also needed: stitch holders, 3rd knitting needle for the bind off
Gauge: 18 sts = 4 inches
Sizes: 6 months, 12 months
Finished sole: 4, (4 1/2) inches
Pattern instructions:
Booties (make 2)
For the cuff
Cast on 25 (28) sts.
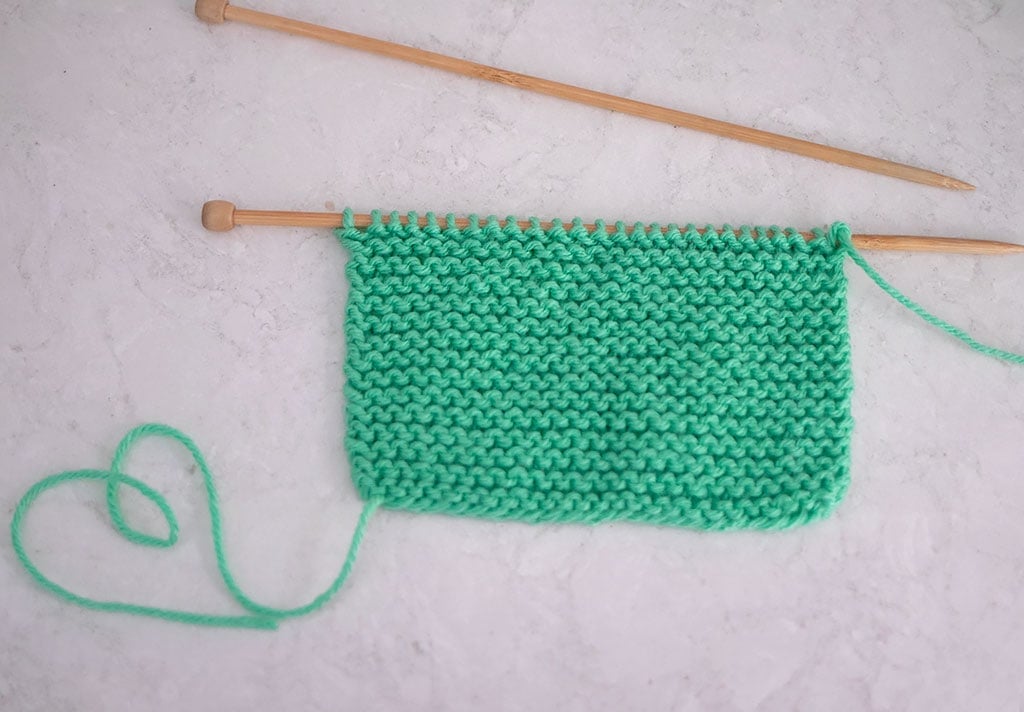
Work in Garter Stitch until the piece measures 3 1/2 (4) inches from the cast on edge.
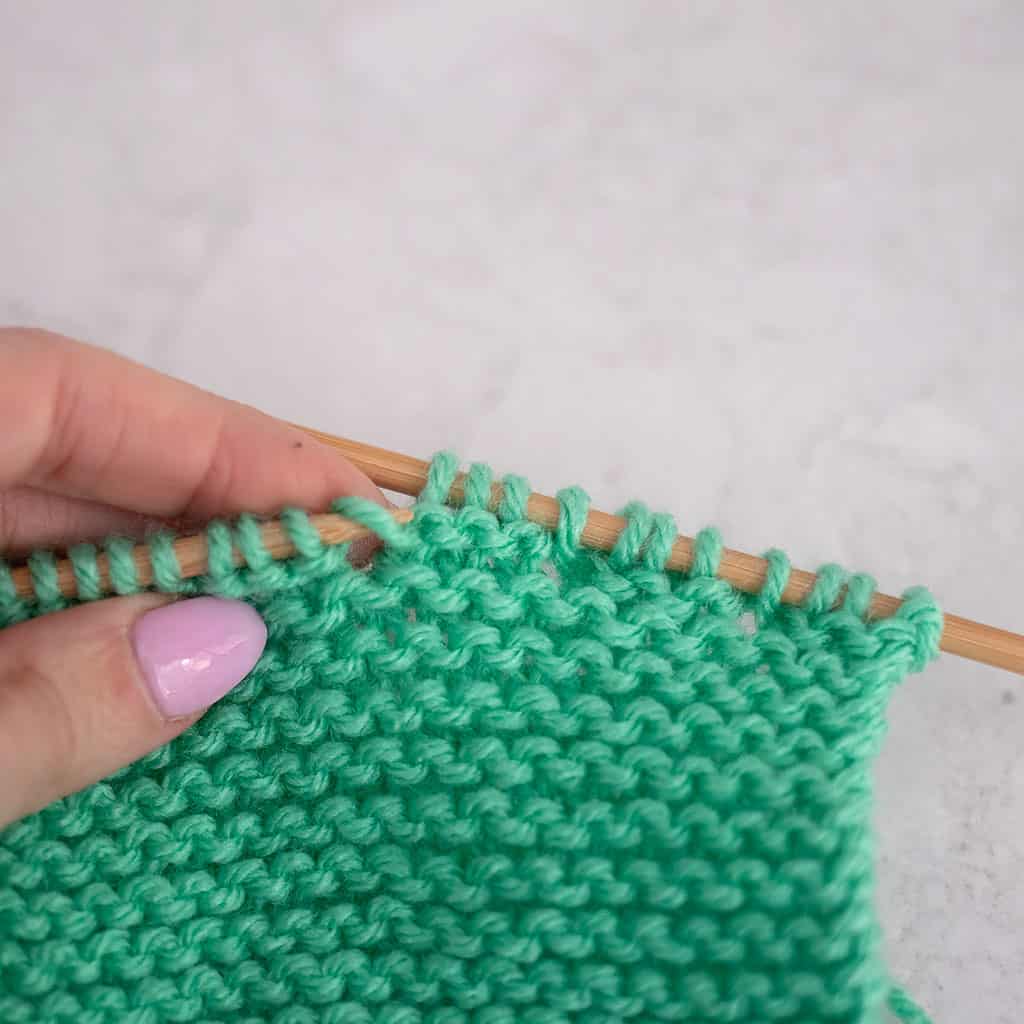
Next Row (Wrong Side) Increase: *K3, m1; repeat from * to last stitch, k1 33 (37) sts.
(Note: A Make 1 (M1) stitch is a way to increase stitches by lifting the bar between two stitches. This method creates a nearly invisible increase without leaving a hole. Here’s how to do it:
Steps for a Make 1 (M1) Increase:
Identify the Bar Between Stitches:
Look at your knitting and find the horizontal strand of yarn between the stitch on your left-hand needle and the stitch you just knit.
Lift the Bar onto Your Left Needle:
Using the tip of your left-hand needle, pick up this bar from front to back (this twists the stitch and prevents a hole).
Knit Through the Back Loop)
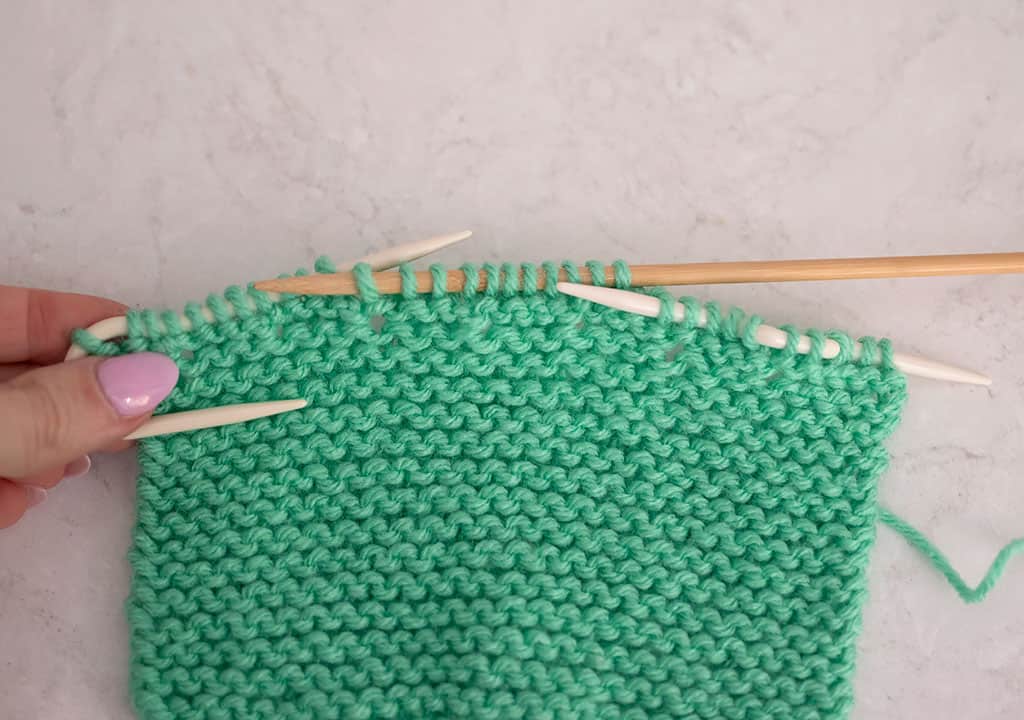
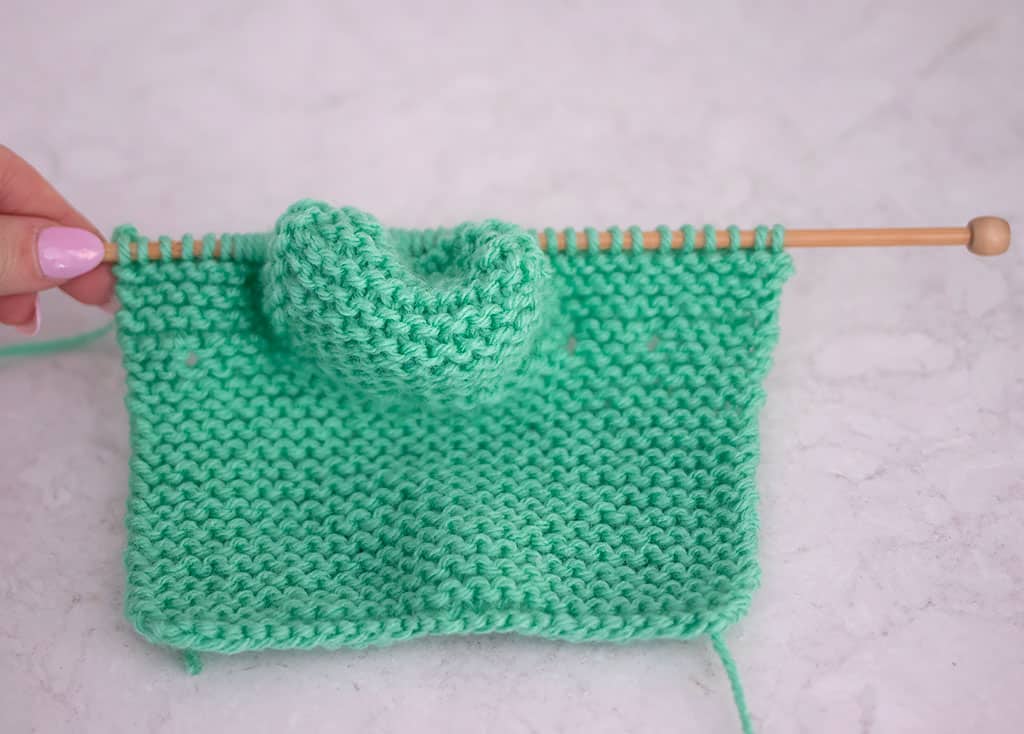
Shape the Top of the Foot
Row 1 (Right Side): K11 (12) sts and place on stitch holder, k11 (13) sts for top of foot, place remaining 11 (12) sts from left-hand needle on second stitch holder.
Next Rows: Work in Garter Stitch over remaining center 11 (13) sts for 13 (15) rows. Cut yarn.
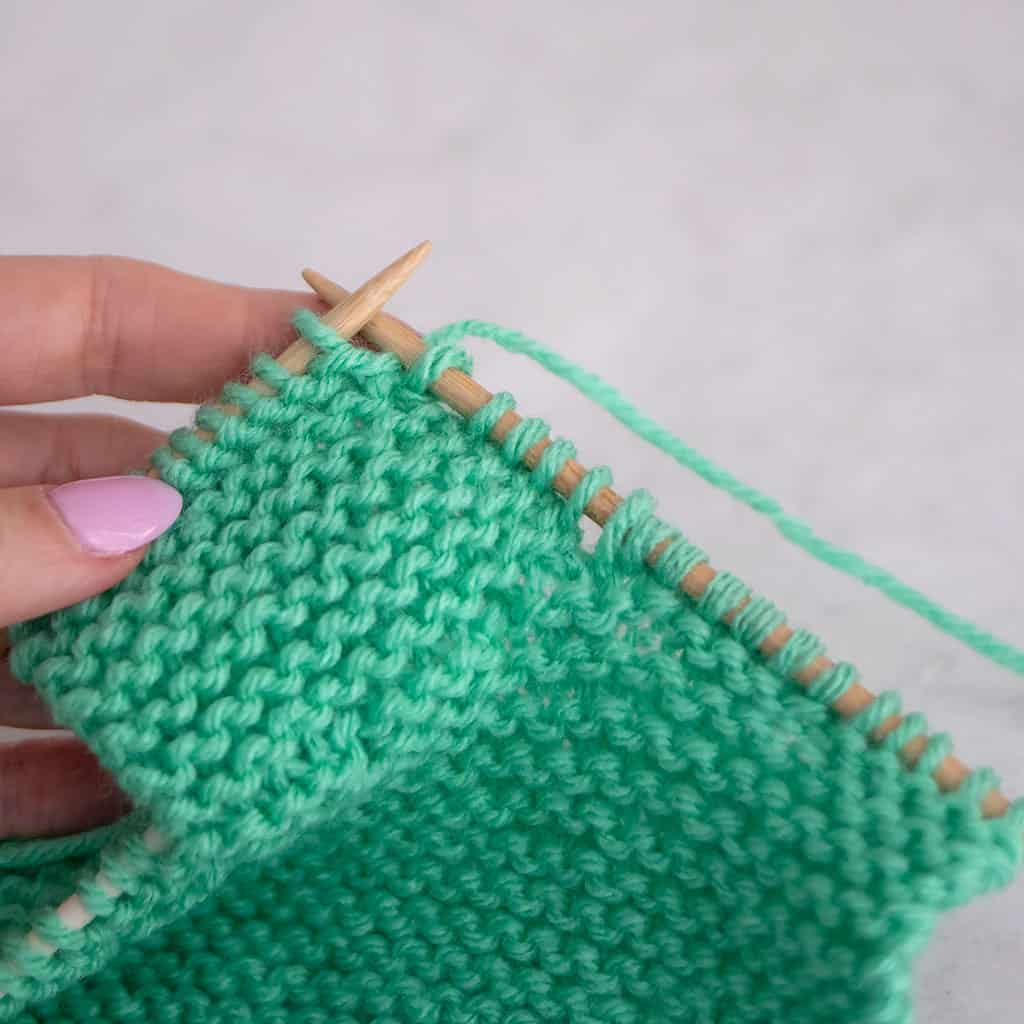
Next Row (Right Side): With the Right Side facing, place 11 (12) sts from first stitch holder back on right-hand needle, pick up and k6 (7) sts evenly spaced across right-hand edge of top of foot, k11 (13) top of foot sts from left-hand needle, pick up and k6 (7) sts evenly spaced across left-hand edge of top of foot, k11 (12) sts from second stitch holder 45 (51) sts.
Next Rows: Work in Garter stitch for 8 (10) rows.
Shape the Sole
Row 1 (Wrong Side): K2, k2tog, k16 (19), k2tog, k1, ssk, k16 (19), ssk, k2 41 (47) sts
Row 2: Knit across
Row 3: K2, K2tog, k14 (17), k2tog, k1, ssk, k14 (17), ssk, k2 37 (43) sts.
Row 4: Knit across
Row 5: K2, K2tog, k12 (15) , k2tog, k1, ssk, k12 (15), ssk, k2 33 (39) sts
Row 6: Knit across first 16 sts, k2tog, slip k2tog back to left-hand needle.
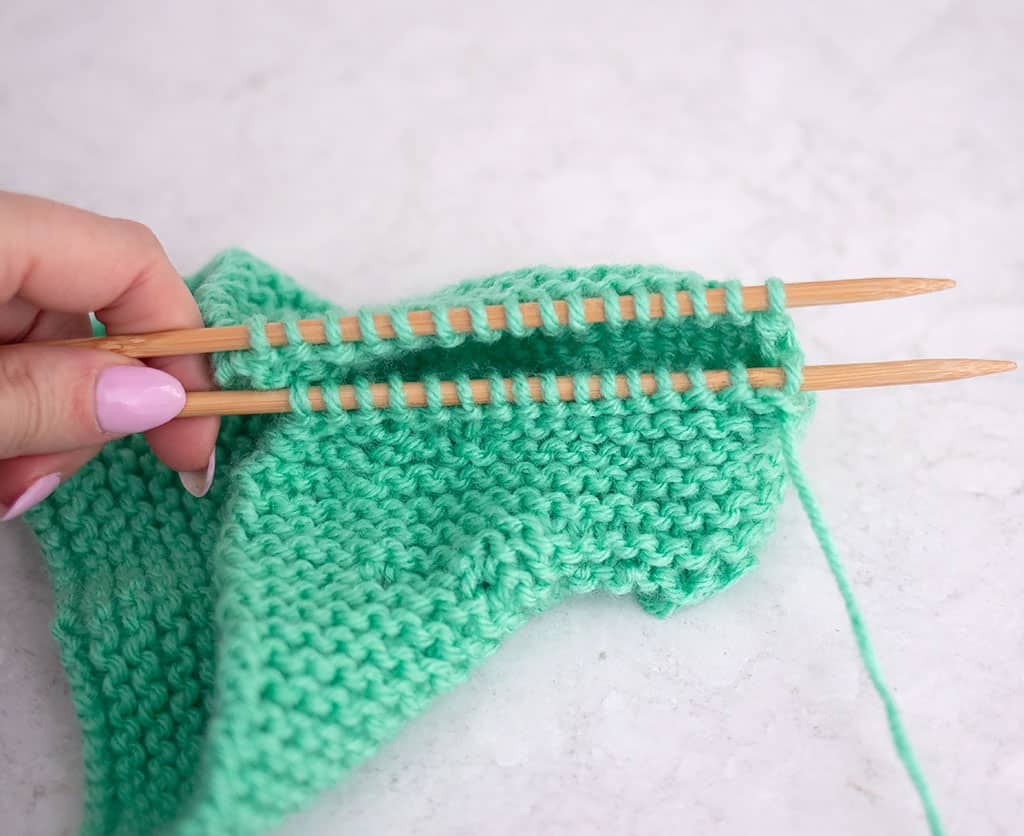
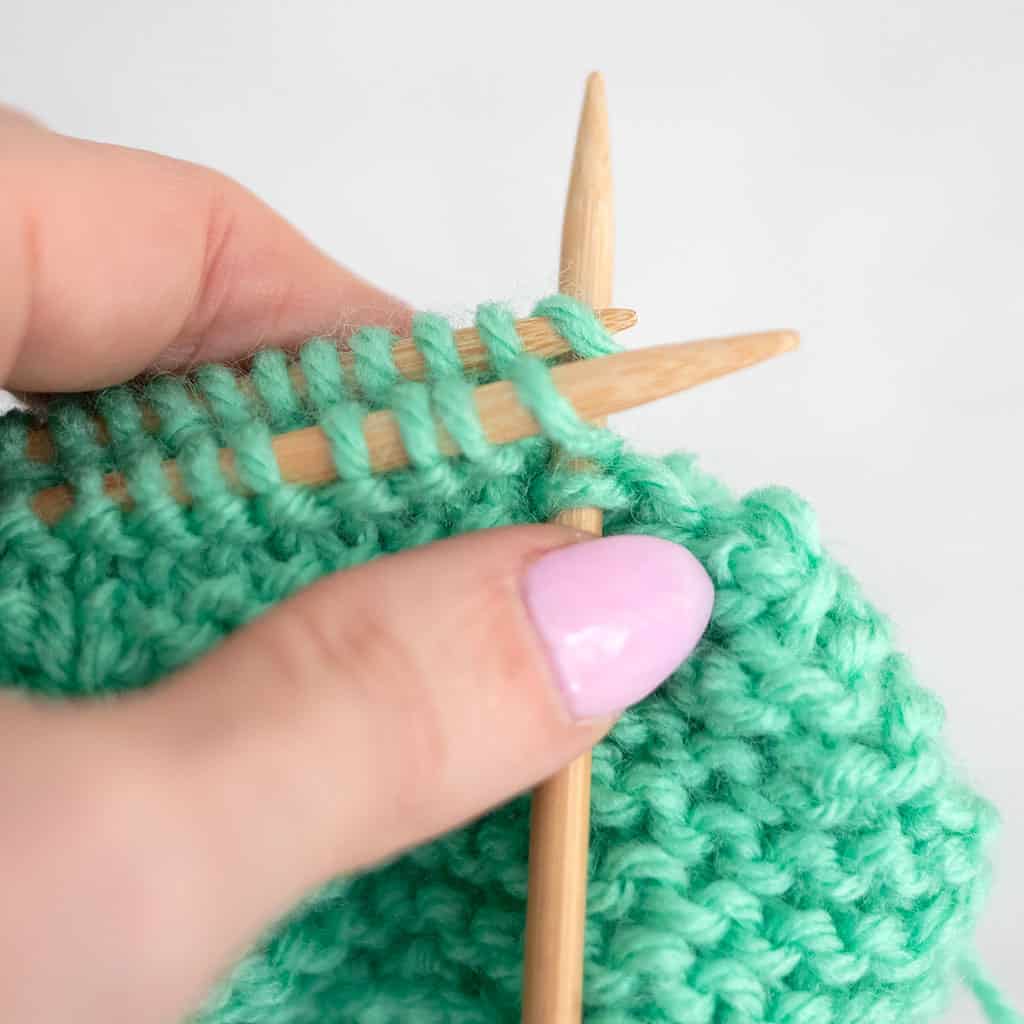
There should be 16 sts on each needle. Holding needles parallel, using 3-needle bind off method, bind off all stitches.
A three-needle bind off is a technique used to join two pieces of knitting with a sturdy, seamless edge. It’s especially useful for joining shoulders or other seams where extra stability is needed. Here’s how to do it
Steps:
- Hold the Pieces Together:
- Arrange the two knitted pieces with the right sides facing each other (wrong sides out).
- Hold one needle with live stitches in front and the other behind.
- Insert the Third Needle:
- Using a third needle, insert it knitwise into the first stitch on both needles at the same time.
- Knit the Stitches Together:
- Wrap the working yarn around the third needle and pull it through both stitches, creating a new stitch on the third needle.
- Slip the original stitches off the left-hand needles.
- Repeat:
- Continue knitting the first stitch from both front and back needles together until you have two stitches on the third needle.
- Bind Off:
- Pass the first stitch on the third needle over the second stitch, just like a regular bind off.
- Continue Binding Off:
- Repeat steps 4 and 5 until you’ve worked across all stitches and only one stitch remains.
- Finish Off:
- Cut the yarn, leaving a tail.
- Pull the tail through the last stitch to secure it.
- Weave in the ends.
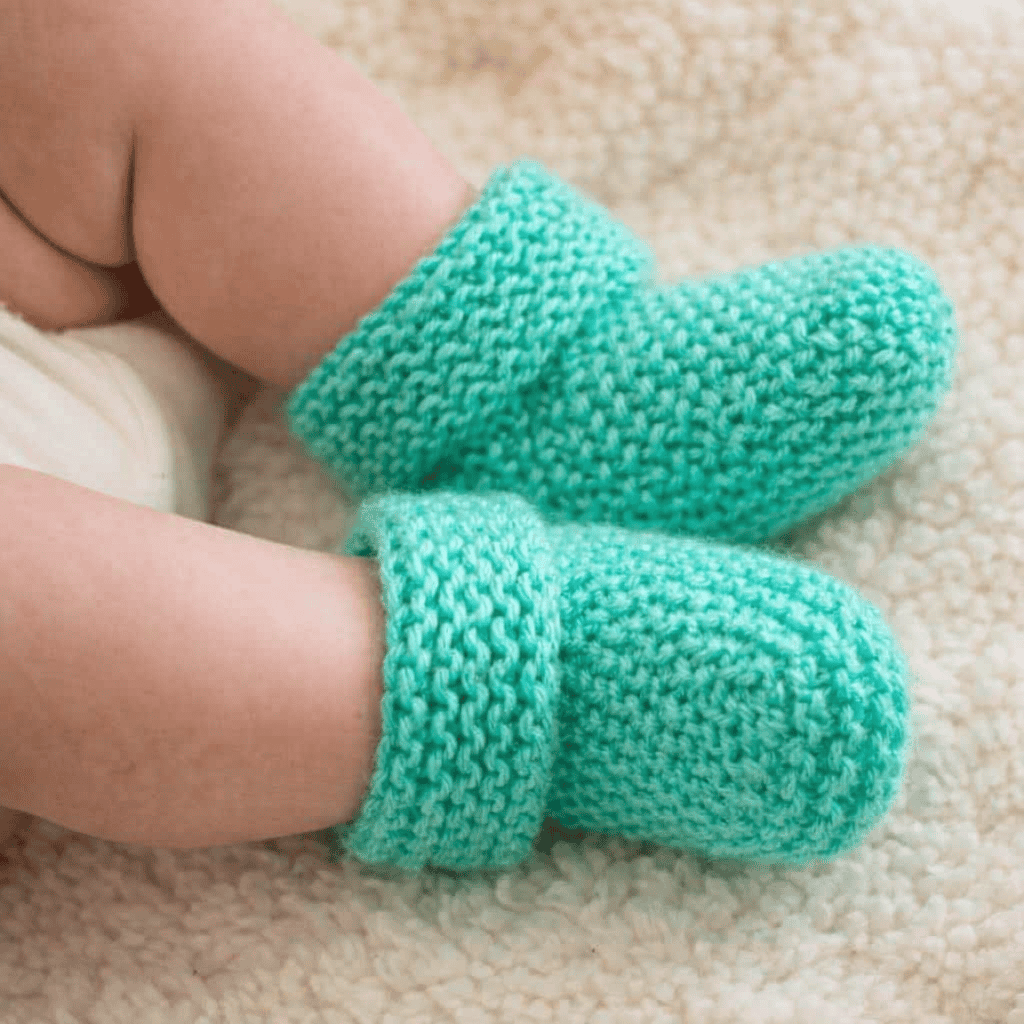
Finishing the Booties:
Cut yarn leaving an 20 inch tail. With yarn needle and yarn tail, sew heel and back seam closed. Weave in ends and turn the cuffs over.
Get the Printable PDF Pattern
While the free version of this Garter Stitch Baby Booties Step-by-Step Pattern is available on this page, many knitters prefer working from a printable pattern.
You can purchase the ad-free printable Garter Stitch Baby Booties PDF pattern in my shop for a clean, easy-to-follow version that’s perfect for printing or saving to your device.
The PDF version is great for:
• knitting offline
• printing for your project binder
• saving to your digital knitting library
You can download the printable Garter Stitch Baby Booties pattern here and start knitting today.
Perfect Handmade Gift for New Babies
One of the best things about this Garter Stitch Baby Booties Pattern is that it makes a wonderful handmade gift.
These cozy little booties are perfect for:
• baby showers
• newborn gifts
• hospital donations
• handmade holiday gifts
Because they knit up quickly, you can easily make several pairs in different colors.
If you’re looking for more gift ideas, check out 30 Quick Knitting Projects for Gifts (Fast Patterns You Can Knit in a Day) for more inspiration.
More Baby Knitting Patterns You’ll Love
If you enjoyed making these Garter Stitch Baby Booties, here are a few more beginner-friendly baby knitting patterns you might like:
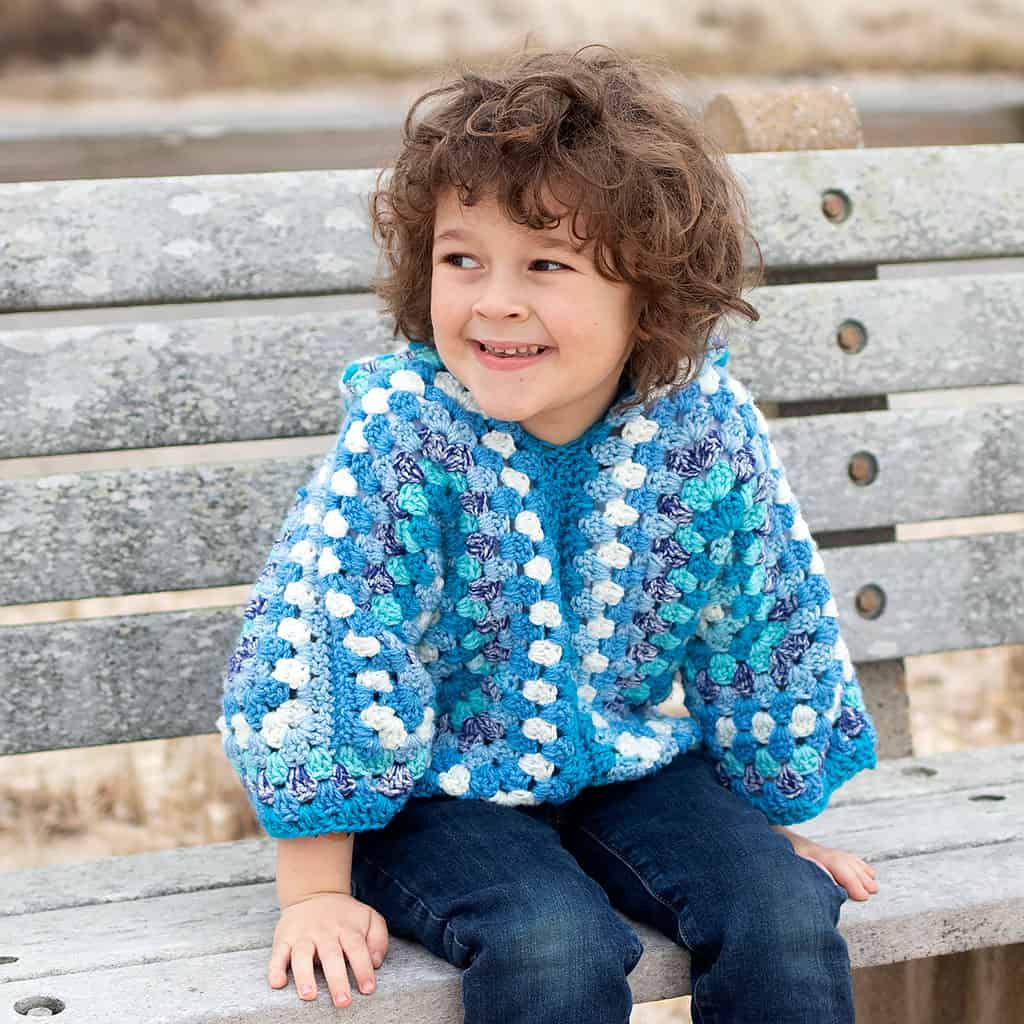
• Easiest Baby Booties Ever Knitting Pattern
• Flat Knit Baby Hat Knitting Pattern
• Flat Knit Baby Bonnet
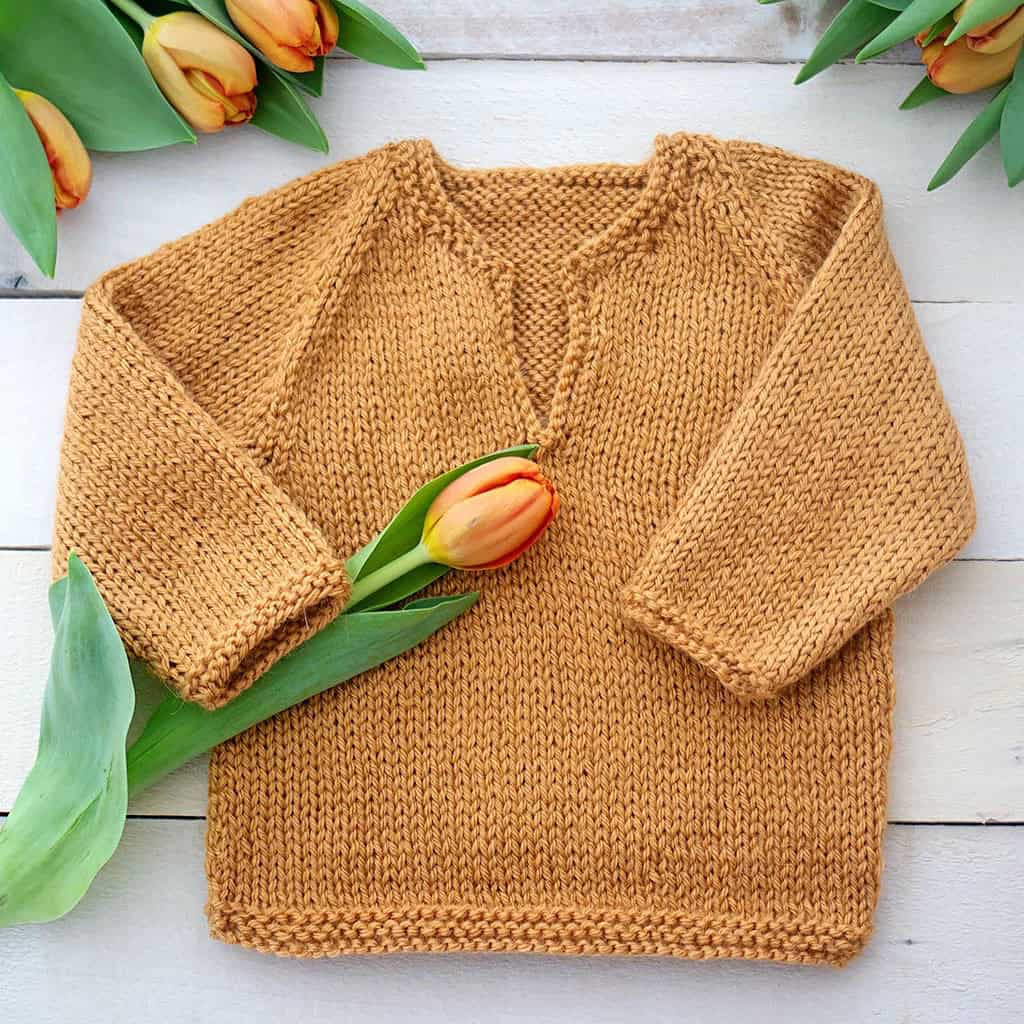
• One Piece Garter Stitch Baby Sweater
These patterns are all designed to be beginner-friendly and knit up quickly.
Looking for more beginner knitting patterns like these Garter Stitch Baby Booties Step-by-Step Pattern and Video Tutorial?
Bulky Cable Hat Knitting Pattern
Hurdle Stitch Hat Knitting Pattern
This Garter Stitch Baby Booties Step-by-Step Pattern and Video Tutorial is a wonderful project for knitters of all skill levels. With simple stitches and easy construction, these adorable baby booties are quick to knit and make a thoughtful handmade gift.
Whether you’re knitting for a new baby, building your knitting skills, or simply enjoying a relaxing project, these garter stitch baby booties are sure to become a favorite pattern.
If you’d like a printable version you can keep in your pattern collection, you can grab the ad-free Garter Stitch Baby Booties PDF in my shop and start knitting your own cozy baby booties today.
I love seeing your finished projects! If you enjoyed making these Garter Stitch Baby Booties Step-by-Step Pattern and Video Tutorial or any of my other free knitting patterns, I’d love to see yours on Instagram, just tag me @ginamicheleny. Happy knitting!