Flat Knit Leprechaun Knitting Pattern
Flat Knit Leprechaun Knitting Pattern- bring a touch of Irish magic to your knitting with this flat knit Leprechaun pattern – a fun and easy project for St. Patrick’s Day!
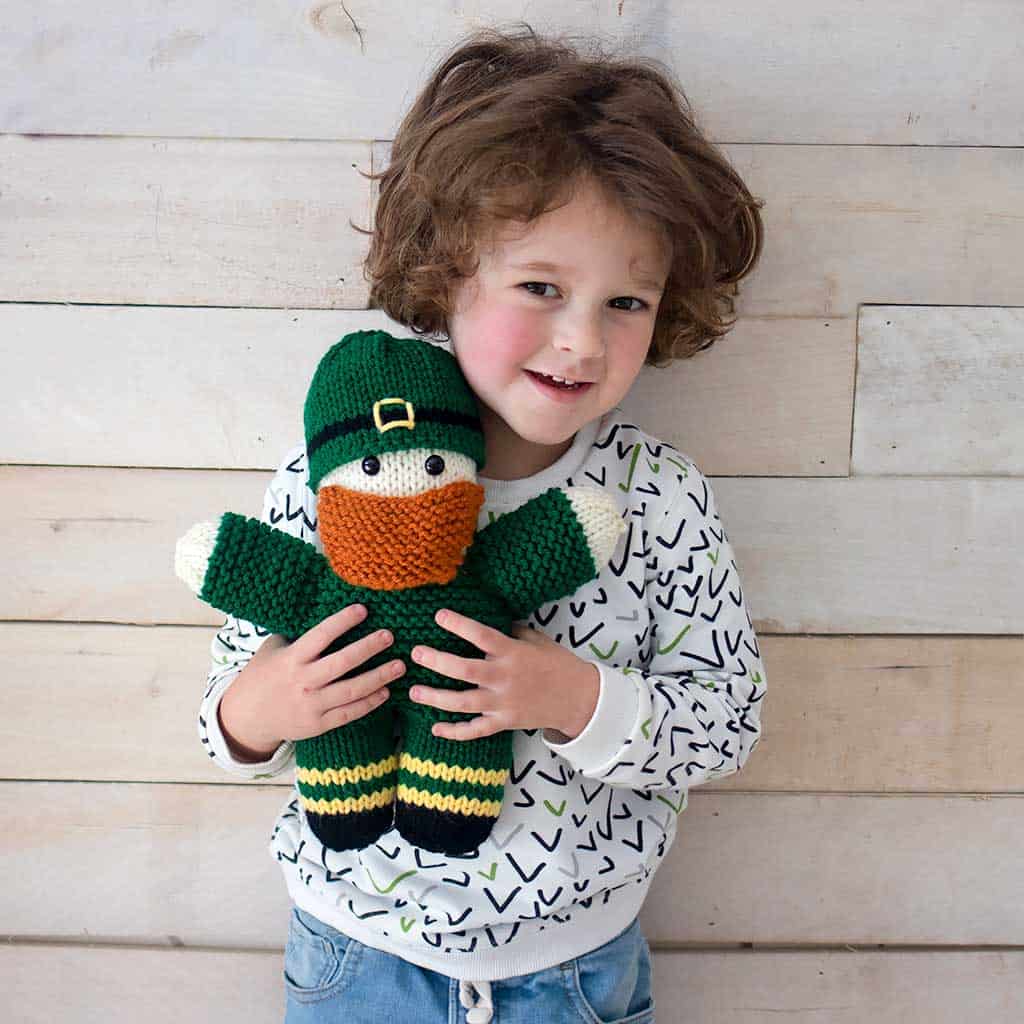
This flat knit Leprechaun knitting pattern is a delightful and charming way to add some St. Patrick’s Day flair to your home decor. With simple knitting techniques and easy-to-follow instructions, you can create your own adorable Leprechaun figure to display on a shelf or tabletop. The pattern includes instructions for knitting the Leprechaun’s hat and body, as well as details like his signature beard and buckle. Whether you’re an experienced knitter or just starting out, this pattern is a fun and festive way to celebrate the holiday!
KEEP IN TOUCH! FOR MORE INSPIRATIONS, TUTORIALS, AND FREE KNITTING PATTERNS, SIGN UP FOR MY WEEKLY NEWSLETTER:
The ad-free, printable version of this pattern is available at Shop Gina Michele for a small fee.

Flat Knit Leprechaun Knitting Pattern
Yarn: Lion Brand Basic Stitch in Ivy and in Ecru, small amount of yellow, black and orange yarn in #4 worsted weight
Needles: size US 7 single point knitting needles
Also needed: poly-fill, yarn needle, button eyes
Gauge: not necessary for this project
Size: 12 inches tall
Pattern instructions:
Left Leg:
With the black yarn, Cast on 10 sts.
1st row: (Kfb. K1) 5 times. 15 sts.
2nd row: Purl.
3rd row: (Kfb. K2) 5 times. 20 sts.
4th row: Purl.
5th row: Knit.
6th row: Purl. Cut the black yarn.
Switch to yellow yarn.
7th row: Knit.
8th row: Purl.
Switch to green yarn.
9th row: Knit.
10th row: Purl.
Switch to yellow yarn.
11th row: Knit.
12th row: Purl. Break the yellow yarn.
Switch to green yarn.
Work in Stockinette Stitch until work from the beginning measures 3 inches. End on a Purl side row.
Break yarn, leaving sts on a stitch holder.
Right Leg:
Work the same as the left leg, but do not break the yarn.
For the Body:
Row 1: (right side). Knit the 20 across the Right Leg.
Knit 20 stitches across the Left Leg. (40 sts)
Next Row (wrong side) Knit across.
Place marker at each end of the last row.
Work in garter st until work from marked row measures approximately 2 3/4 inches. End on a wrong side row.
For the Shoulders:
Row 1: K7. (K2tog) 4 times. K10. (K2tog) 4 times. K7. (32 sts)
Knit 5 rows.
Next row: K5. (K2tog) 4 times. K6. (K2tog) 4 times. K5. (24 sts)
Knit 1 row.
For the Head:
Switch to the ivory yarn.
Row 1: *K1. Kfb. Rep from * to end of row. (36 sts)
Knit 18 rows.
Shape Top of Head:
Row 1: K7. (K2tog) twice. K14. (K2tog) twice. K7. (32 sts)
Row 2 : Purl across.
Row 3: K6. (K2tog) twice. K12. (K2tog) twice. K6. (28 sts)
Row 4: Purl across.
Cast off.
For the Arms:
With the green yarn, cast on 20 sts.
Knit 18 rows.
Switch to ivory yarn.
Next row: Knit across.
Next row: Purl across.
Next row: *K1. K2tog. Rep from * to last 2 sts. K2. 14 sts.
Next row: Purl across.
Next row: *K2tog. Rep from * to end of row. 7 sts.
Break yarn and thread through the remaining stitches. Pull to tighten.
For the Hat:
With the green yarn, cast on 36 sts.
Row 1: Knit across.
Row 2: Purl across
Switch to black yarn.
Row 3: Knit across.
Row 4: Purl across.
Switch to green yarn.
Knit 10 rows in Stockinette Stitch, ending on a Purl row.
Decrease row: K3, k2tog to last stitch, Knit 3
Next row: Purl across.
Next decrease row: K2, k2tog to last stitch, Knit 3 (24 sts)
Next row: Purl across.
Next decrease row: K1, K2tog across row.
Next row: Purl.
Next decrease row: K2tog to last stitch, k1.
Break the yarn and pull through remaining stitches. Pull to tighten and sew the side seam.
For the beard:
Cast on 20 sts.
Rows 1 and 2: Knit across.
Row 3: K2tog, knit to last 2 sts, K2tog. (18 sts)
Rows 4-6: Knit across.
Row 7: K2tog, knit to last 2 sts, K2tog. (16 sts)
Row 8-10: Knit across.
Row 11: K2tog, knit to last 2 sts, K2tog. (14 sts)
Row 12-14: Knit across.
Row 15: K2tog, knit to the last 2 sts, k2tog. (12 sts)
Row 16: Bind off.
Finishing:
Turn the finished piece over and sew the back seam and the leg seams. Stuff the bear. Sew the arm seam. Stuff with poly fill and sew the arm to the side of the bear. Repeat on the other side.

Sew on the beard.
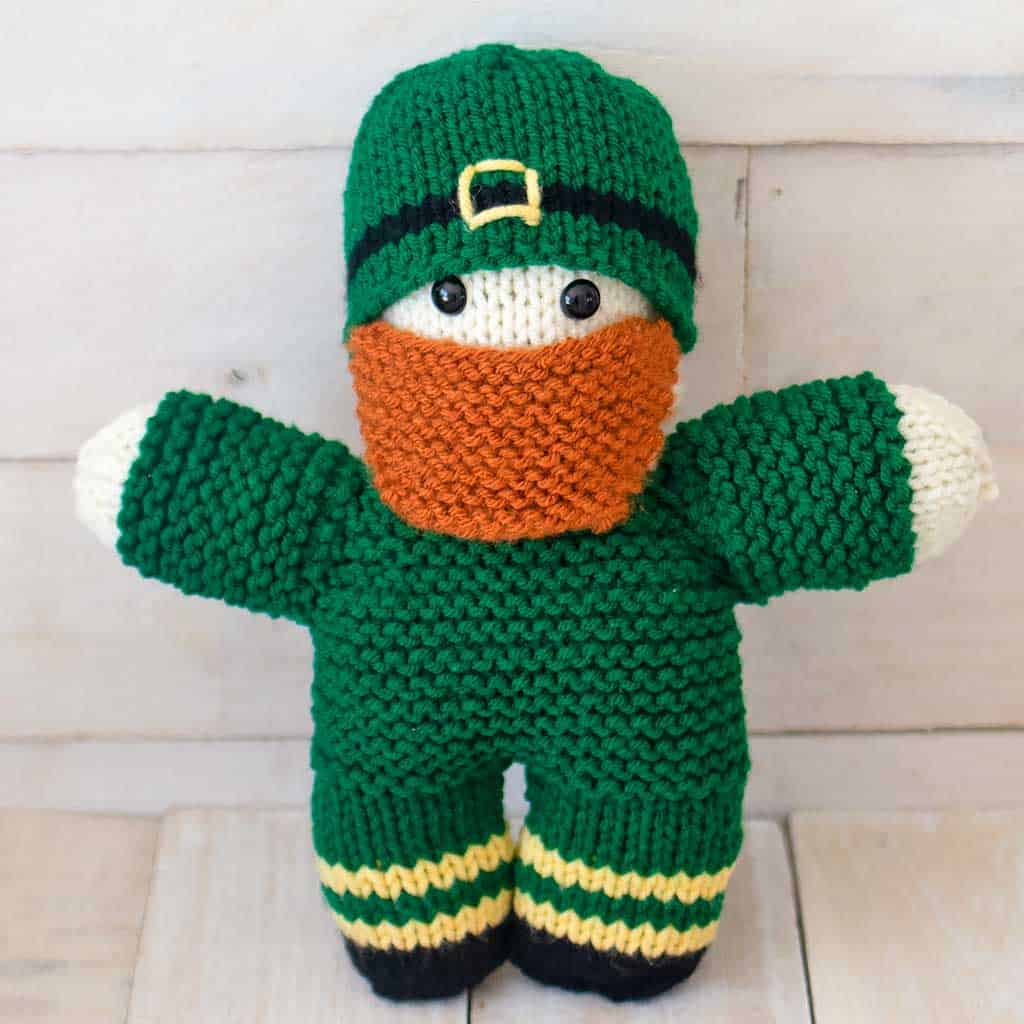
Add the eyes and sew on the hat.
Looking for more plush toy knitting patterns like this Flat Knit Leprechaun Knitting Pattern?
Easy Flat Knit Plush Cat Knitting Pattern
Easy Plush Owl Knitting Pattern
Easy Plush Cat Knitting Pattern
Flat Knit Plush Penguin Knitting Pattern
I love seeing your finished projects! If you enjoyed making this Flat Knit Leprechaun Knitting Pattern or any of my other free knitting patterns, I’d love to see yours on Instagram, just tag me @ginamicheleblog. Happy knitting!

