How to Steam Block Acrylic Yarn (Easy Step-by-Step Guide for Knitters & Crocheters)
Learn how to steam block acrylic yarn the right way. This beginner-friendly guide explains how to steam block knitting and crochet projects without melting your stitches.
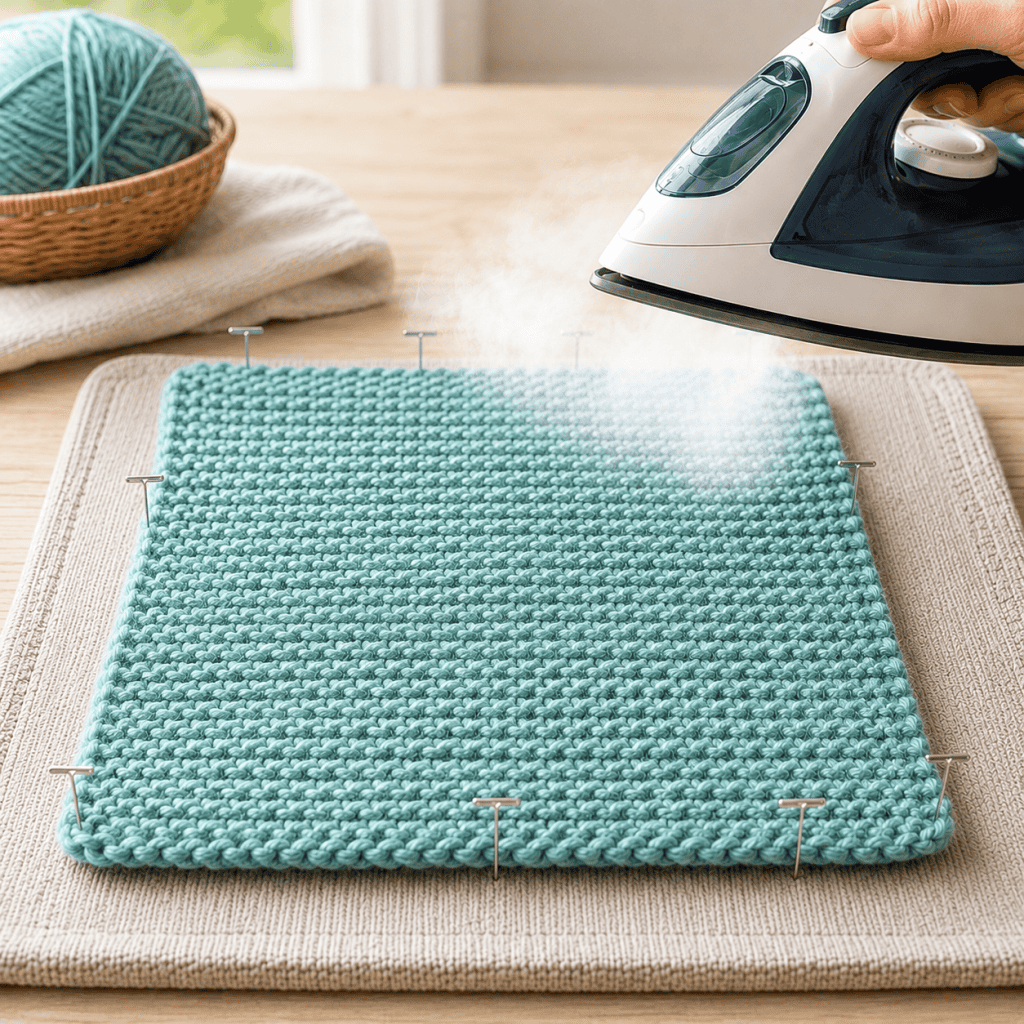
How to Steam Block Acrylic Yarn (Easy Step-by-Step Guide)
If you’ve ever finished a beautiful acrylic knitting or crochet project only to find that it curls, looks uneven, or doesn’t drape quite right, steam blocking can completely transform the finished piece.
Unlike natural fibers like wool, acrylic doesn’t respond well to traditional wet blocking. Instead, steam blocking is the preferred method because heat gently relaxes the fibers, helping your project lay flatter, improve its shape, and look much more polished.
Whether you’re finishing a cozy scarf, blanket, hat, or home décor project, this guide will walk you through exactly how to steam block acrylic yarn safely.
What Is Steam Blocking?
Steam blocking uses the heat and moisture from steam to relax the synthetic fibers in acrylic yarn.
The process helps:
Smooth uneven stitches
Reduce curling edges
Improve drape
Open textured stitch patterns
Help pieces match the correct measurements
Create a more professional-looking finish
Unlike wool, acrylic fibers don’t have memory. Once heat changes the fibers, the results are generally permanent, which is why it’s important to steam carefully.
Can You Steam Block Acrylic Yarn?
Yes!
In fact, steam blocking is one of the best finishing methods for acrylic yarn.
The key is using steam—not direct heat.
Never press a hot iron directly onto acrylic fabric. Acrylic is a type of plastic, and too much heat can melt or permanently flatten the fibers.
When done correctly, steam blocking is completely safe and produces beautiful results.
Why Steam Block Acrylic Instead of Wet Blocking?
Many knitters are surprised to learn that soaking acrylic in water doesn’t permanently reshape it the way it does with wool.
That’s because acrylic fibers don’t absorb water in the same way natural fibers do.
Steam provides gentle heat that relaxes the synthetic fibers, allowing your project to hold its finished shape much better.
Steam blocking is especially helpful for:
Scarves
Shawls
Blankets
Sweaters
Cardigans
Granny squares
Home décor projects
Garlands
Pillow covers
Supplies You’ll Need
You don’t need many tools.
Gather:
Steam iron with a steam setting
Blocking mat or thick towel
Rust-proof T-pins or blocking pins
Measuring tape
Spray bottle (optional)
Heat-resistant surface
Having everything ready before you begin makes the process much easier.
Looking for free knitting patterns? Browse this full collection of easy knitting patterns you can start today:
50 Free Knitting Patterns You’ll Actually Want to Make (Beginner-Friendly)
10 Easy Baby Knitting Patterns for Beginners
10 Quick Summer Knitting Patterns
15 Easiest Free Knitting Patterns
15 Easy Summer Knitting Patterns You Can Make This Weekend
10 Easy Baby Knitting Patterns That Look Impressive (But Are Actually Beginner-Friendly)
How to Steam Block Acrylic Yarn (Easy Step-by-Step Guide for Knitters & Crocheters)
✨ Ad-Free Printable Pattern Available! ✨
The ad-free, printable PDFs of these patterns are now available for purchase at Shop Gina Michele—perfect for easy, distraction-free stitching.
Looking for more projects? Browse the Knitting Pattern Directory to explore all my knitting patterns in one place.
(As an Amazon associate, I earn from qualifying purchases)
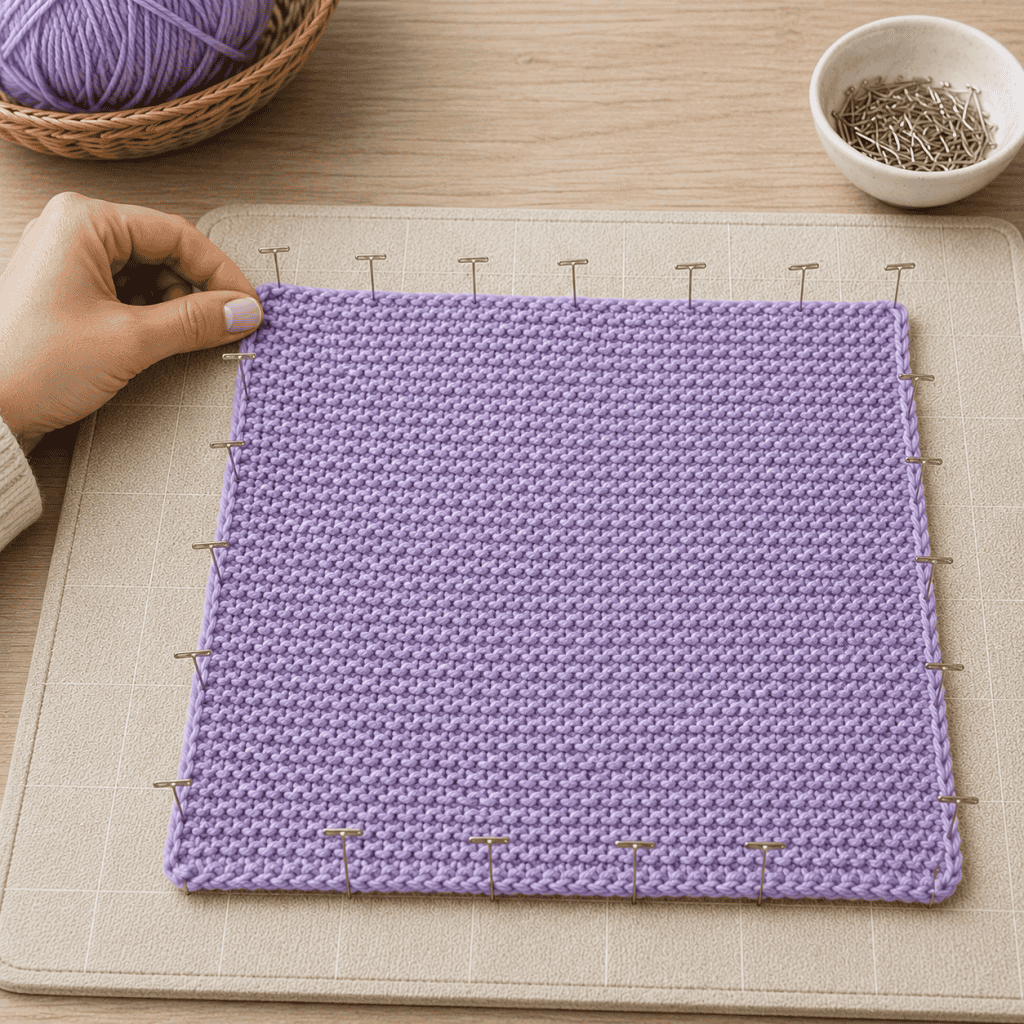
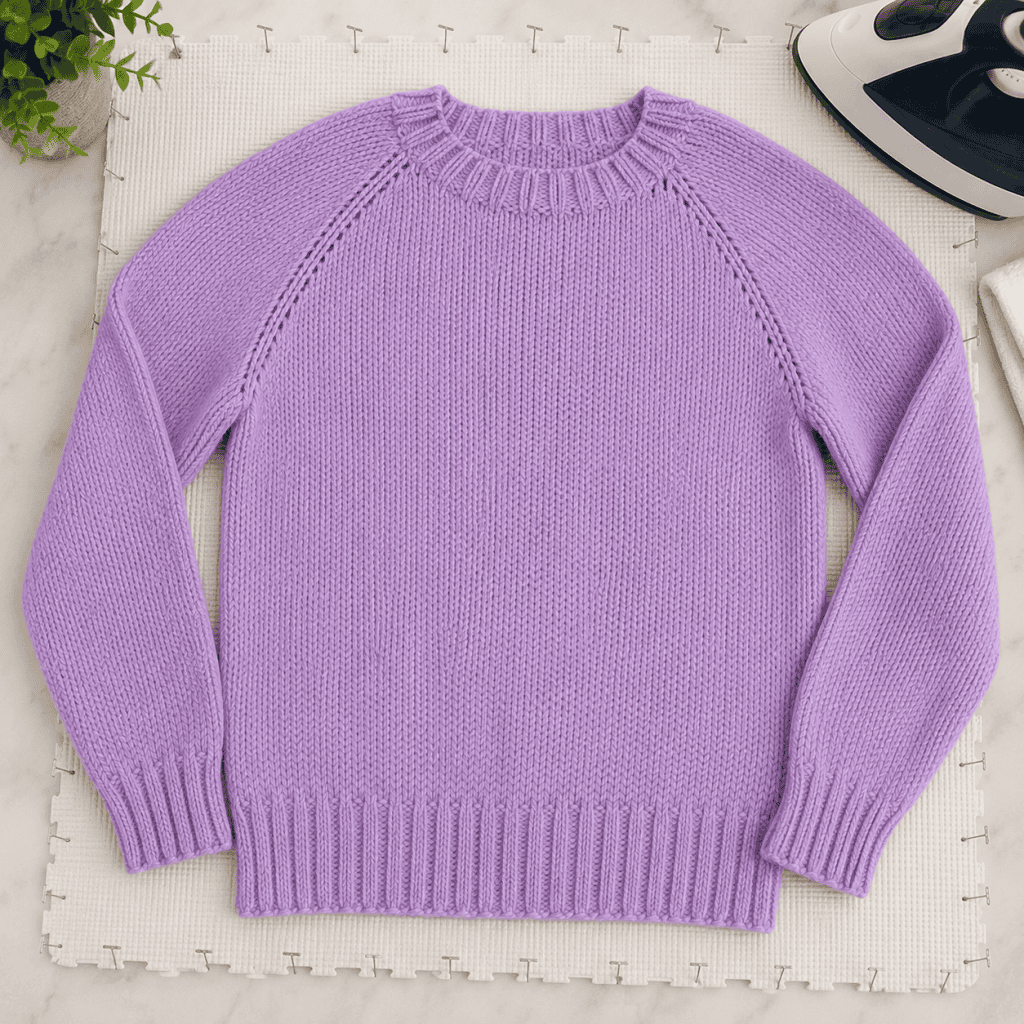
Step 1: Pin Your Project Into Shape
Start by laying your finished project on your blocking mat.
Gently stretch and shape it to the finished measurements listed in your pattern.
Use blocking pins to hold everything in place.
Don’t overstretch the fabric.
The goal is to help it relax—not force it into a different size.
Take your time making sure:
Edges are straight
Corners are square
Stitch patterns look even
Finished dimensions are correct
This step has the biggest impact on your final results.
Step 2: Fill Your Iron With Water
Fill your steam iron with clean distilled water if possible.
Turn it to the steam setting.
Most irons work well on the wool or medium setting.
Allow the iron to fully heat before you begin.
If your iron has adjustable steam levels, choose a moderate amount of steam.
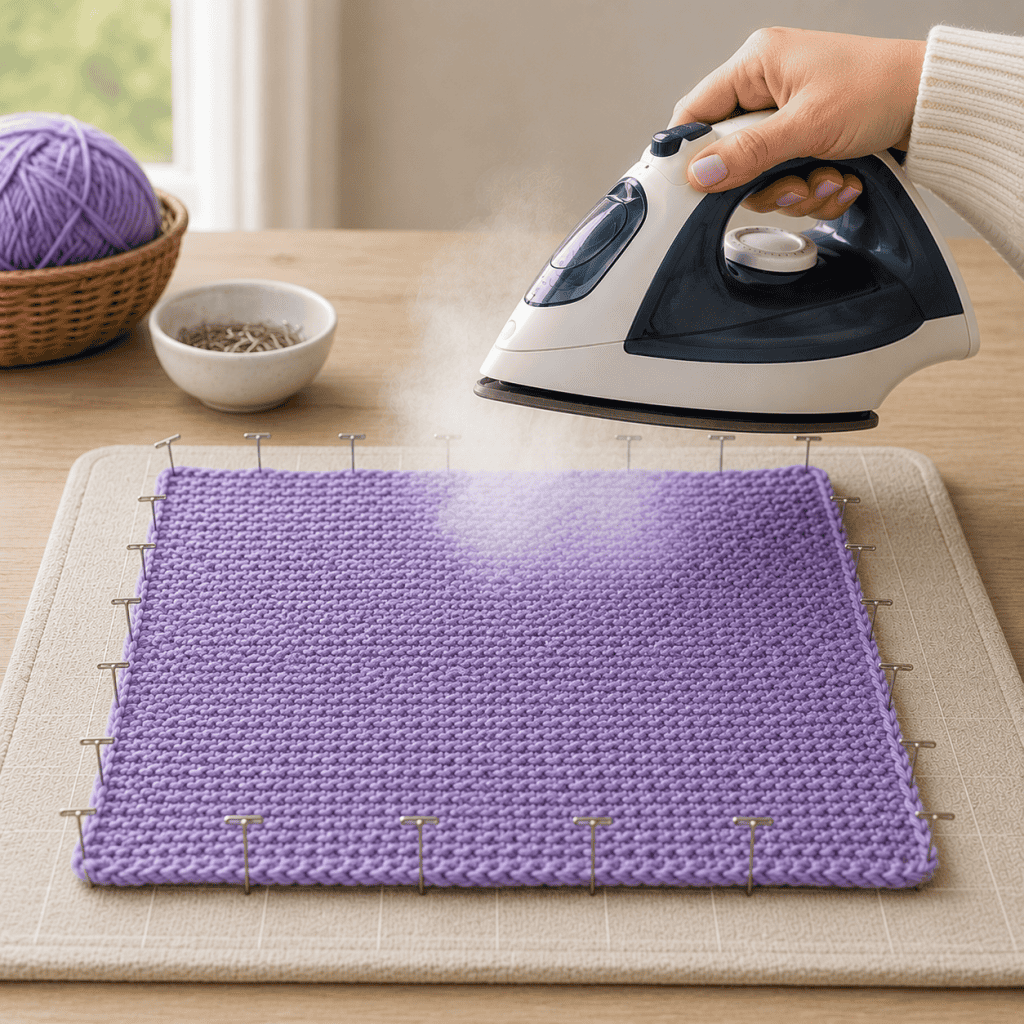
Step 3: Hold the Iron Above the Fabric
This is the most important step.
Never place the iron directly on acrylic yarn.
Instead, hold it about 1 to 2 inches above the project.
Slowly move the iron across the surface while allowing the steam to penetrate the fabric.
The steam—not the iron—is doing the work.
Work gradually across the entire project.
Spend a little extra time over curled edges or textured areas that need relaxing.
Step 4: Let the Steam Do the Work
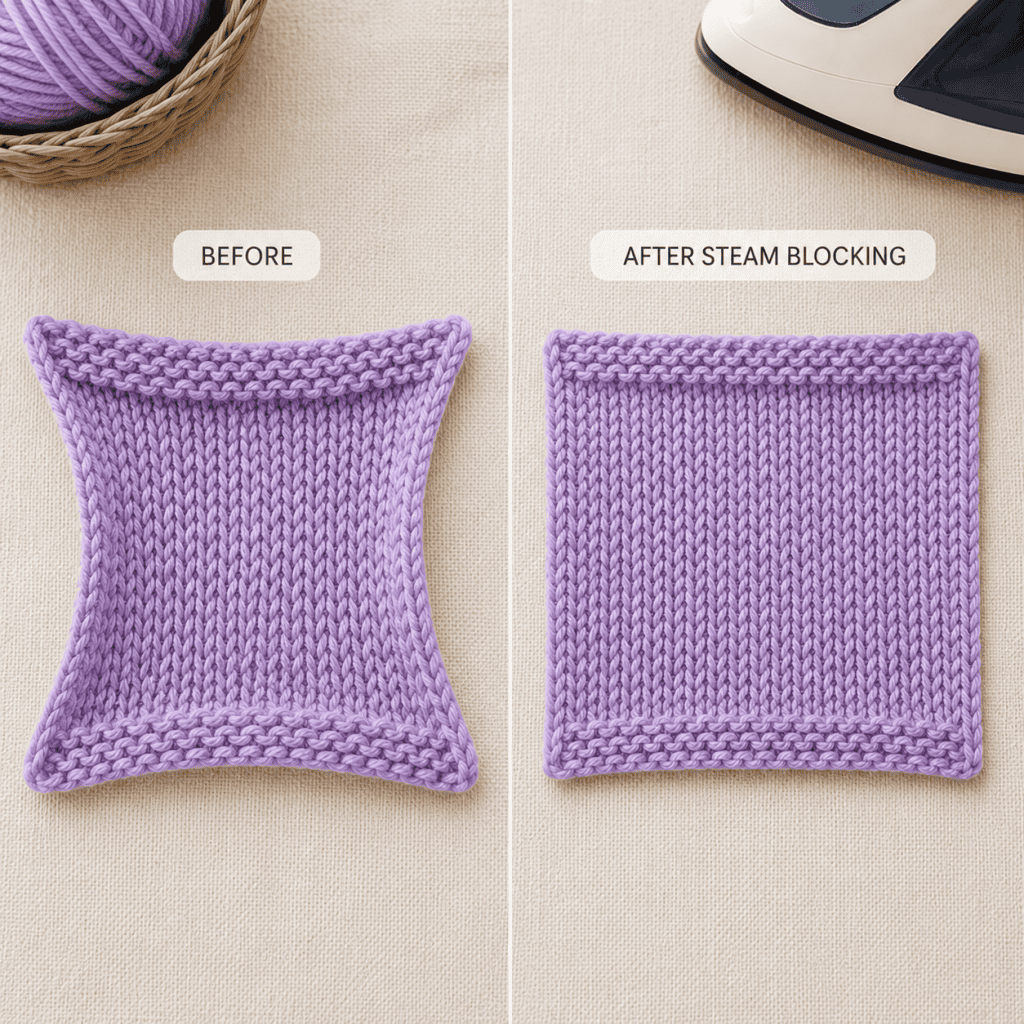
You’ll often notice the fabric relaxing almost immediately.
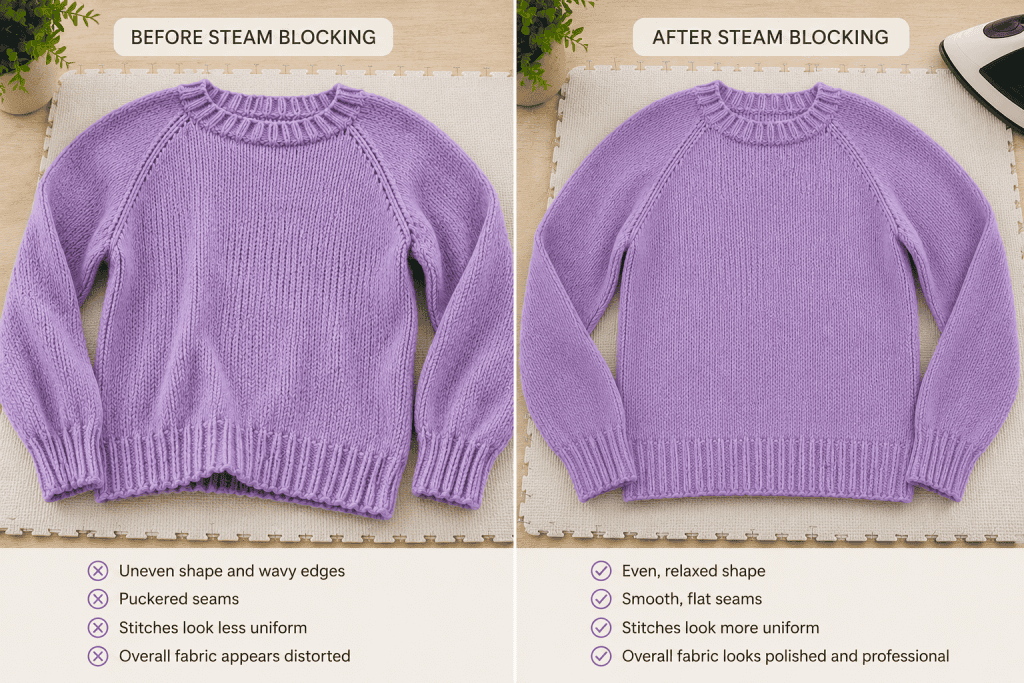
Edges begin laying flatter.
Texture becomes more defined.
The stitches even out.
Resist the temptation to press down with the iron.
Too much heat can flatten the yarn and remove its softness.
Less is more.
Step 5: Allow Everything to Cool Completely
Once you’ve steamed the entire project, leave it pinned in place.
Allow it to cool completely before removing the pins.
Cooling helps the acrylic fibers set into their new shape.
Depending on the size of your project, this usually takes anywhere from 20 minutes to an hour.
Once cool, remove the pins and enjoy your beautifully finished project.
How Close Should the Iron Be?
A good rule is to keep the iron approximately:
1–2 inches above the fabric
Never touching the yarn
Constantly moving
If you’re unsure, start farther away.
You can always add more steam.
You can’t undo melted acrylic.
What Happens If Acrylic Gets Too Hot?
Applying direct heat can permanently damage acrylic.
This process is often called “killing” acrylic.
When acrylic is over-heated:
Fibers become shiny
Texture disappears
Stretch is lost
Fabric becomes limp
Stitches flatten permanently
While some designers intentionally “kill” acrylic for lace shawls with dramatic drape, it usually isn’t desirable for scarves, hats, blankets, or garments.
For most projects, gentle steam is all you need.
Should You Steam Both Sides?
Usually, steaming one side is enough.
For thicker fabrics or heavily textured stitch patterns, you may choose to steam both sides lightly.
If you do, allow the first side to cool before flipping the project over.
Again, avoid excessive heat.
Does Steam Blocking Remove Curling?
Yes—in many cases.
Steam blocking is especially effective for:
Stockinette stitch scarves
Sweaters
Blanket edges
Lightweight garments
Keep in mind that some stitch patterns naturally curl because of how they’re constructed.
Steam blocking dramatically reduces curling but may not eliminate it completely if the fabric doesn’t include a border.
Can You Steam Block Ribbing?
Yes.
Steam blocking can help ribbing look neater and more even.
However, don’t overstretch ribbed fabric.
Pulling it too tightly can reduce its natural elasticity.
Pin it in its relaxed shape and apply light steam.
How Long Does Steam Blocking Last?
Unlike wet blocking acrylic, steam blocking is generally permanent.
Because heat changes the synthetic fibers, your project typically keeps its improved appearance through future use.
Most items won’t need to be blocked again unless they become heavily wrinkled after washing.
Tips for the Best Results
Keep these simple tips in mind:
Always test on a swatch first if using unfamiliar yarn.
Never let the iron touch the acrylic.
Move the iron continuously.
Use plenty of steam—not pressure.
Let projects cool completely before removing pins.
Avoid overstretching.
Work on a heat-safe surface.
Follow the yarn label if it includes blocking instructions.
These small details make a huge difference in the finished appearance.
Common Steam Blocking Mistakes
Pressing the Iron Onto the Fabric
This is the fastest way to damage acrylic.
Always let the steam do the work.
Stretching Too Much
Overstretching can distort stitch patterns and finished sizing.
Shape gently.
Removing Pins Too Early
The fibers need time to cool.
Be patient.
Using High Heat
More heat doesn’t mean better results.
Gentle steam creates the smoothest finish.
Looking for More Knitting Tutorials?
How to Make Perfect Tassels Every Time (Easy DIY Tassel Tutorial with Clover Tassel Maker)
How to Make Non-Slip Soles for Knit Slippers (Easy DIY That Actually Works)
9 Unique Knitting Stitches You’ll Want to Try (Easy, Beginner-Friendly + Beautiful Textures)
6 Easy Knitting Stitches Using Knit and Purl (Beginner-Friendly + Beautiful Texture)
How to Read a Colorwork Knitting Pattern
Cable Knitting for Beginners: A Step-by-Step Guide to Your First Cables
How to Make Perfect Pom Poms with a Clover Pom Pom Maker (Easy Step-by-Step Guide)
Frequently Asked Questions about How to Steam Block Acrylic Yarn
Can you steam block 100% acrylic yarn?
Yes. Steam blocking is one of the best finishing techniques for 100% acrylic yarn. Just keep the iron above the fabric and avoid direct contact.
Is steam blocking better than wet blocking for acrylic?
Yes. Acrylic responds much better to gentle heat than soaking in water. Steam helps relax the fibers and gives your project a smoother, more finished appearance.
Can I use a garment steamer instead of an iron?
Absolutely. A handheld garment steamer works wonderfully and is often easier to control since it doesn’t have a hot soleplate that could accidentally touch the fabric.
Will steam blocking remove curling completely?
It often greatly reduces curling, especially on stockinette stitch projects. However, stockinette naturally curls, so a border or edging may still be needed for perfectly flat edges.
Can you steam block crochet projects?
Yes. Steam blocking works beautifully for acrylic crochet projects including granny squares, blankets, garments, shawls, and home décor items.
Can I steam block acrylic more than once?
Yes. If your project becomes wrinkled after washing or storage, you can lightly steam block it again using the same careful method.
What if I accidentally touch the yarn with the iron?
Quick contact may not always cause damage, but prolonged contact can melt or permanently flatten the fibers. If this happens, stop immediately and inspect the area before continuing.
Should I block every acrylic project?
Not necessarily, but most finished pieces benefit from it. Steam blocking can make stitches look more even, improve drape, and give your project a polished, professional finish.
Steam blocking is one of the easiest ways to elevate the look of acrylic knitting and crochet projects. With just a little steam and a few simple tools, you can smooth uneven stitches, reduce curling, improve drape, and give your handmade pieces a beautifully finished appearance.
The most important thing to remember is to let the steam do the work—not the iron. Keep the iron just above the fabric, move it continuously, and allow the project to cool completely before removing the pins.
Whether you’ve just finished your first beginner scarf or a cozy blanket you’ll treasure for years, taking a few extra minutes to steam block your acrylic project is a simple finishing step that makes a noticeable difference.
✨ I’d love to see what you’re making! ✨
If you’ve tried one of my knitting patterns, crochet projects, DIYs, or recipes, share your finished project on Instagram and tag me so I can see it 💛
There’s nothing better than seeing your creations come to life—from cozy knits to delicious recipes and everything in between. It truly makes my day!
Tag me @ginamicheleny so I can share your work and cheer you on.
Happy making!