Easy DIY Stone Pumpkins
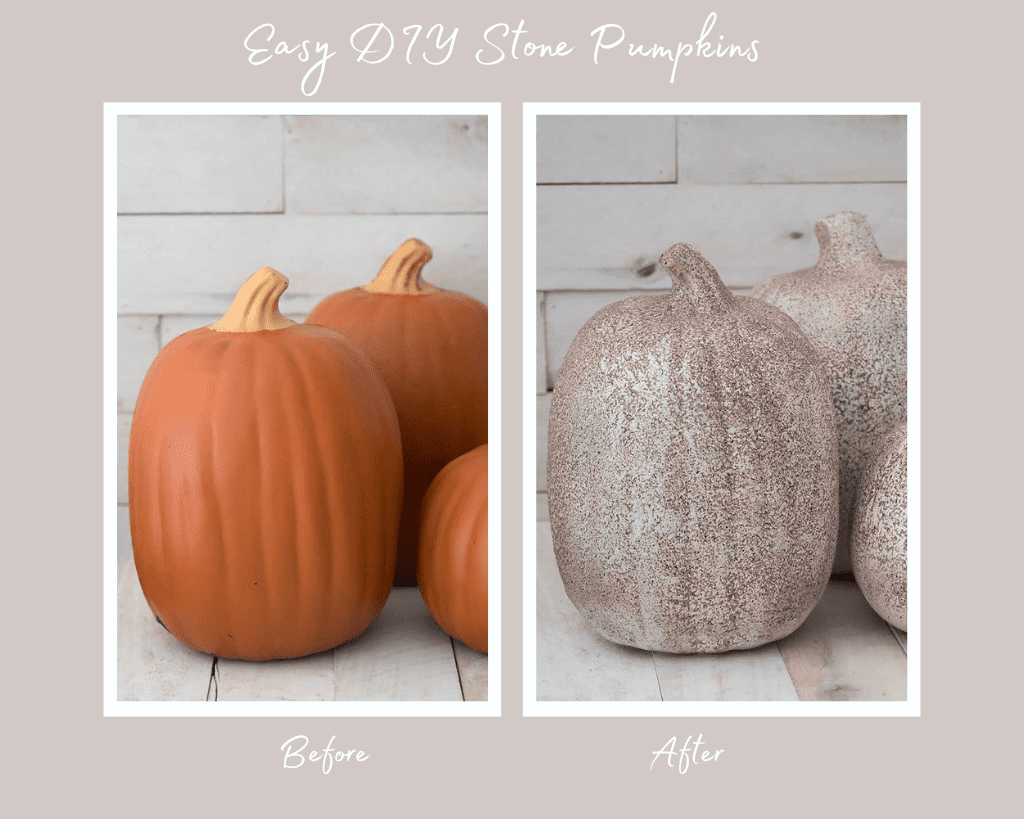
Easy DIY Stone Pumpkins- upgrade those fake-looking craft pumpkins using this easy technique! Get the look of stone for a fraction of the cost!

After Halloween last year, I purchased some craft pumpkins on clearance. They looked really fake and inexpensive, but for $3-5 a piece, I couldn’t leave them behind. I knew they would be great candidates for an upgrade!
KEEP IN TOUCH! FOR MORE INSPIRATIONS, TUTORIALS, AND FREE KNITTING PATTERNS, SIGN UP FOR OUR WEEKLY NEWSLETTER:
Easy DIY Stone Pumpkins
Since I had so many craft pumpkins, I decided to use two different colors of stone- Bleached Stone and Sienna Stone.
(As an Amazon associate, I earn from qualifying purchases)
Supplies needed:
Craft pumpkins
Rust-Oleum Stone Creations Spray in (I used Bleached Stone for some pumpkins and Sienna Stone for others)

The first step is to spray the pumpkins white. The Stone Creations Spray doesn’t leave an opaque color behind, so spraying the pumpkins white beforehand will make the stone really pop.
Be sure to use the spray paint in a well ventilated area. Let the pumpkins dry throughly.

Next, it’s time for the Stone Creations Spray. I’ve never used spray paint like this before. It’s really unique! Instead of being a flat color, it’s a textured, multi-toned finish. It really does resemble stone!
Keep moving the can while you are spraying so the paint doesn’t run. You can create a light stone finish or a more opaque one depending on how much paint you spray. If you are applying multiple coats, let the paint dry between each coat.

This is the Sienna Stone color up close.

This is the Bleached White up close.

Looking for more Autumn-themed crafts like these Easy DIY Stone Pumpkins?
Metallic Leaf Wreath DIY- Inspired by Pottery Barn
How to Sew Fabric Pumpkins- Fast & Easy!
I love seeing your finished projects! If you enjoyed making these Easy DIY Stone Pumpkins or any of my other beginner free patterns, I’d love to see yours on Instagram, just tag me @ginamicheleblog. Happy knitting!


