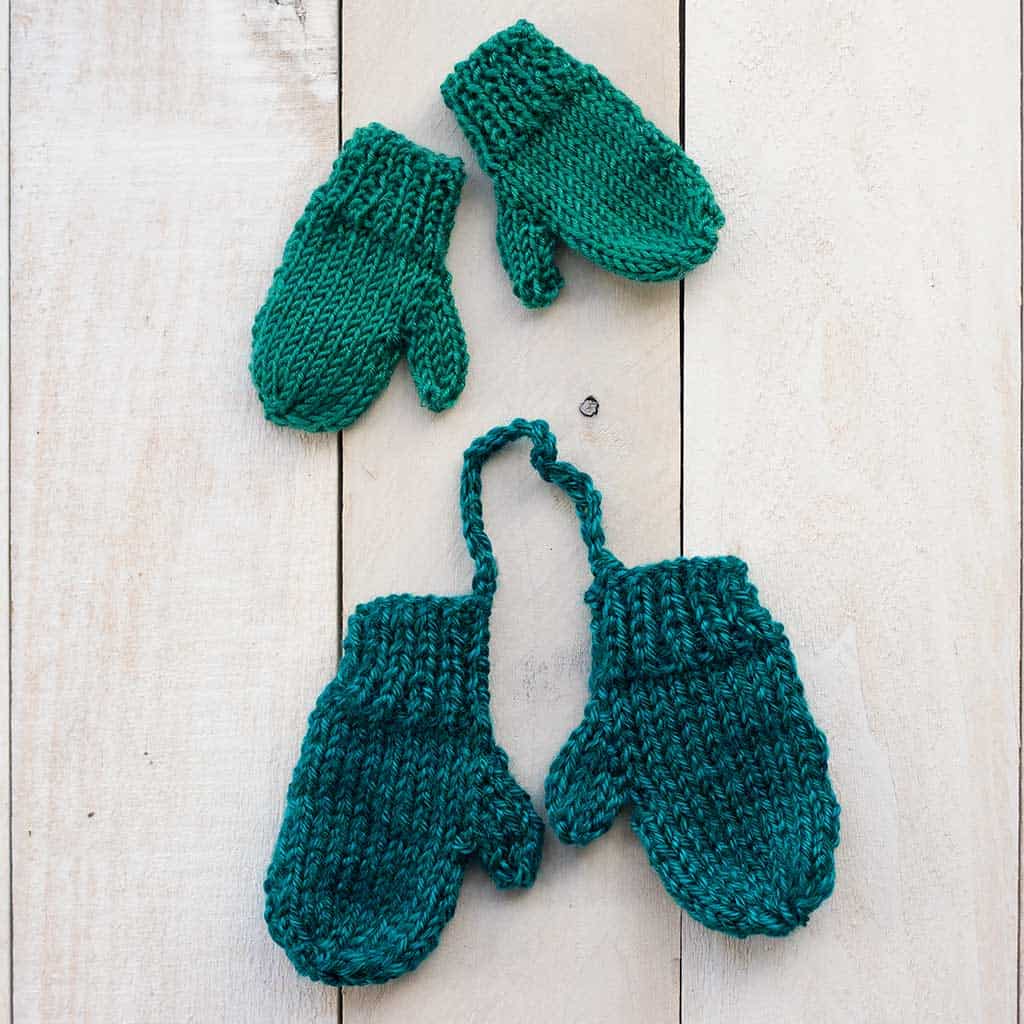
How to Knit Mini Mittens Christmas Ornaments
How to Knit Mini Mittens Christmas Ornaments- a beginner-friendly pattern for adorable mini mitten Christmas ornaments.
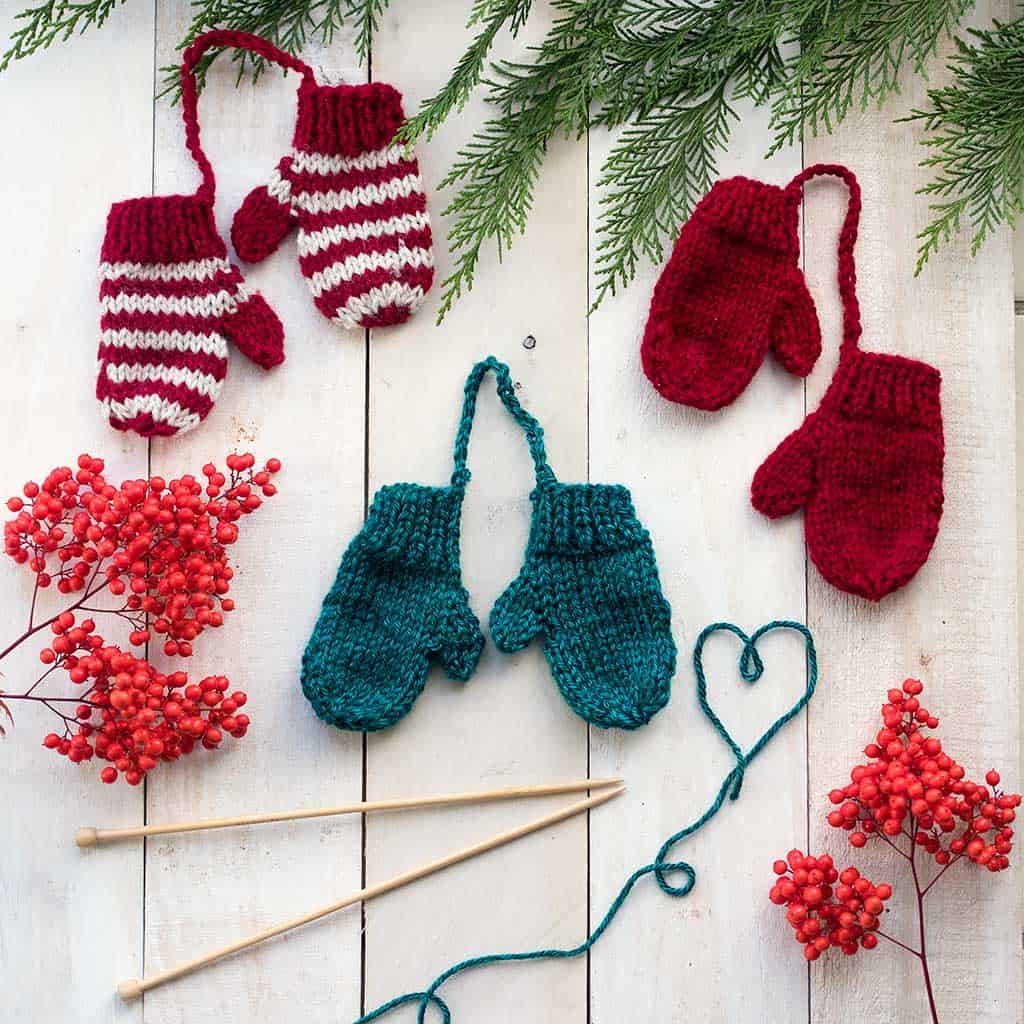
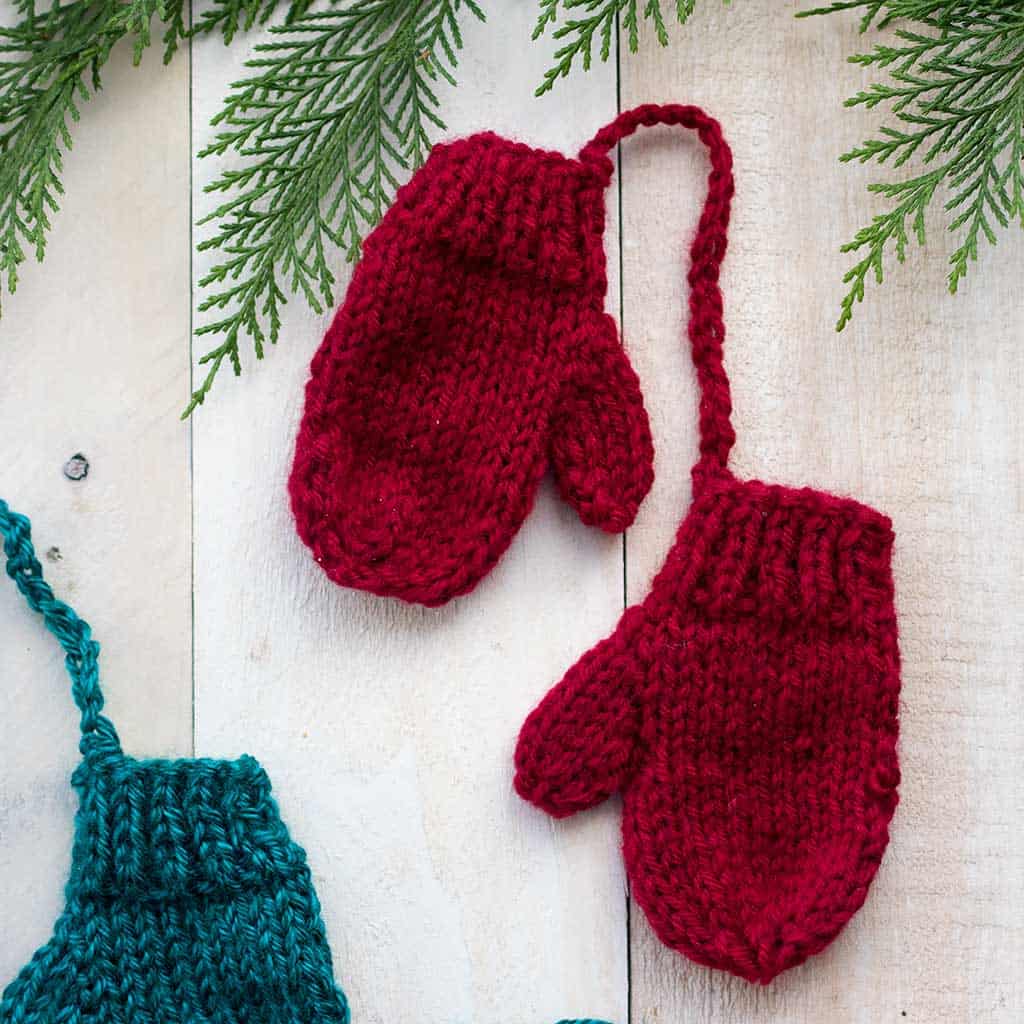
These mitten ornaments will look so cute on the Christmas tree! They can also be attached to garlands or gifts. They can be knit using either #3 weight yarn and Size US 5 straight needles or #4 weight yarn and size US 7 needles. The mittens knit on the larger needles will be approximately 1 inch longer.
For this knitting pattern I included both the written pattern and a video tutorial.
If you’re new to knitting there may be an abbreviation in this pattern that you’re unfamiliar with:
Kfb– knit in the front and the back of a stitch. This increases 1 stitch.
KEEP IN TOUCH! FOR MORE INSPIRATIONS, PROJECTS, AND FREE KNITTING PATTERNS, SIGN UP FOR OUR WEEKLY NEWSLETTER:
How to Knit Mini Mittens Christmas Ornaments
Yarn: #3 weight yarn for the smaller mittens and #4 worsted weight yarn for the larger mittens
Needles: Size US 5 single point knitting needles for the smaller mittens and size US 7 single point knitting needles for the larger mittens
Gauge: Not necessary for this project
Size: the smaller mittens measure 3 3/4 inches long and the larger ones measure 4 3/4 inches long)
Pattern Instructions:
(Note- both mittens sizes are knit using the pattern below. The smaller mittens are knit using size US 5 straight knitting needles and the larger mittens are knit using size US 7 knitting needles)
Cast on 22 sts.
For the Cuff:
Work in K1, P1 ribbing for 7 rows.
Row 1: Knit across
Row 2: Purl across.
Shape thumb:
Row 1: (right side) K10, KFB in next 2 sts, k10 (24 sts)
Row 2: Purl across.
Row 3: K10, KFB, k2, KFB, k10 (26 sts)
Row 4: Purl across.
Row 5: K10, KFB, k4, KFB, k10 (28 sts)
Row 6: Purl across.
Divide for Thumb:
Row 1 (right side): K10, cast on 2 sts, place next 8 sts on a stitch holder; k10 (22 sts.)
Rows 2-10- Work in Stockinette stitch.
Row 11 (right side): K2tog; repeat from * across (11 sts)
Row 12: P2tog: repeat from * across to last st, p1.
Thumb:
With right side facing, place the 8 stitches from the holder onto the knitting needle. Work in Stockinette stitch for 3 rows.
Next row: Knit 2 stitches together across row. Break yarn and pull through remaining stitches using a yarn or tapestry needle.
Finishing: Cut yarn, leaving a long end. Weave through the remaining 6 sts, pull tightly to secure. Sew the side seam and sew the thumb seam. Weave in ends.
Make a loop with yarn for hanging. If you would like to attach 2 mittens together, using a crochet hook, make a chain of 20 and secure it to each mitten on the thumb side.
Looking for more free Knitting Patterns like these Mini Mittens Ornaments??
Easy Flat Knit Slippers for Men
Easy Baby Sweater Knitting Pattern
Beginner Thick & Quick Hat Knitting Pattern
I love seeing your finished projects! If you enjoyed making this post, How to Knit Mini Mittens Christmas Ornaments, or any of my other free patterns, I’d love to see yours on Instagram, just tag me @ginamicheleblog. Happy holiday knitting!