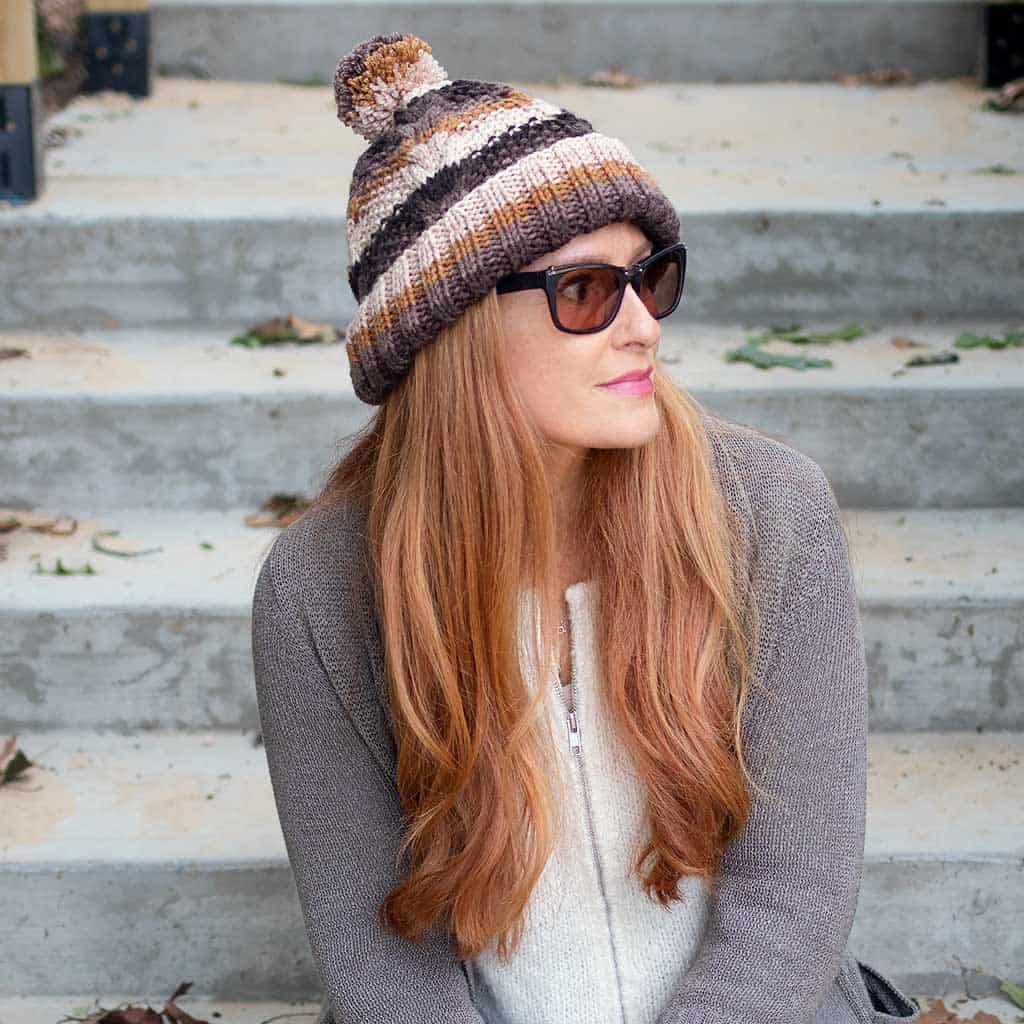
Easy Self-Striping Slouch Hat (Knit Flat) – Free Beginner Knitting Pattern
Learn how to knit an Easy Self-Striping Slouch Hat (Knit Flat) with this free beginner knitting pattern. Cozy, colorful, and simple for first-time hat makers!
There’s something so satisfying about knitting a cozy slouch hat, especially when it comes together in beautiful self-striping yarn. The color does all the work for you, creating soft transitions and bold stripes without any extra effort. If you’re looking for a beginner-friendly project that looks impressive but is actually simple to make, this Easy Self-Striping Slouch Hat (Knit Flat) is the perfect pattern.
This design is worked on straight needles, making it ideal for knitters who are not yet comfortable knitting in the round. Once the rectangle is complete, it’s simply seamed up the back for a relaxed, slouchy fit.
If you enjoy easy hat projects like this, you may also love:
Classic Ribbed Hat Knitting Pattern (Easy, Stretchy & Timeless)
Easy Ear Flap Hat Knitting Pattern (Cozy, Warm & Beginner-Friendly)
Easy Thick & Quick Hat Knitting Pattern (Beginner-Friendly One-Skein Beanie)
Easy Striped Hat Knitting Pattern for Beginners (Knit in the Round with Self-Striping Yarn)
Easy Stripe Hat Knitting Pattern (Beginner-Friendly Beanie Knit in the Round)
Get the Printable PDF Pattern
Want an easy-to-read, ad-free version of this pattern? The printable PDF includes the complete pattern in a convenient format you can save or print.
Buy the PDF PatternWhy You’ll Love This Slouch Hat Pattern
This is the kind of knitting project that checks all the boxes:
Beginner-friendly (knit flat on straight needles)
Uses simple knit and purl stitches
Perfect for self-striping yarn
Quick to complete
Great for gifts or craft fairs
Stylish, relaxed slouch fit
Self-striping yarn takes the pressure off color changes, making this a stress-free and relaxing knit. You simply knit and watch the colors evolve.
What is a Self-Striping Yarn?
Self-striping yarn is dyed in long color segments that automatically create stripes as you knit. This makes it perfect for beginners who want colorwork without the complexity.
In this pattern, the yarn creates:
Soft gradient stripes
Bold color transitions
A hand-dyed look without effort
This is what gives the hat its signature cozy, boutique-style finish.
Skill Level
This pattern is perfect for:
✔ Beginners
✔ Advanced beginners wanting a relaxing project
✔ Anyone learning how to knit flat garments
Skills used:
Knit stitch
Purl stitch
Basic decreasing
Seaming
If you’re brand new to knitting hats, you may also like this tutorial:
👉 How to Knit a Hat on Straight Needles
Looking for free knitting patterns? Browse this full collection of easy knitting patterns you can start today:
50 Free Knitting Patterns You’ll Actually Want to Make (Beginner-Friendly)
10 Easy Baby Knitting Patterns for Beginners
10 Quick Summer Knitting Patterns
15 Easiest Free Knitting Patterns
15 Easy Summer Knitting Patterns You Can Make This Weekend
10 Easy Baby Knitting Patterns That Look Impressive (But Are Actually Beginner-Friendly)
Easy Self-Striping Slouch Hat (Knit Flat) – Free Beginner Knitting Pattern
✨ Ad-Free Printable Pattern Available! ✨
The ad-free, printable PDF of this pattern is now available for purchase at Shop Gina Michele—perfect for easy, distraction-free stitching.
Looking for more projects? Browse the Knitting Pattern Directory to explore all my knitting patterns in one place.
(As an Amazon Associate, I earn from qualifying purchases.)
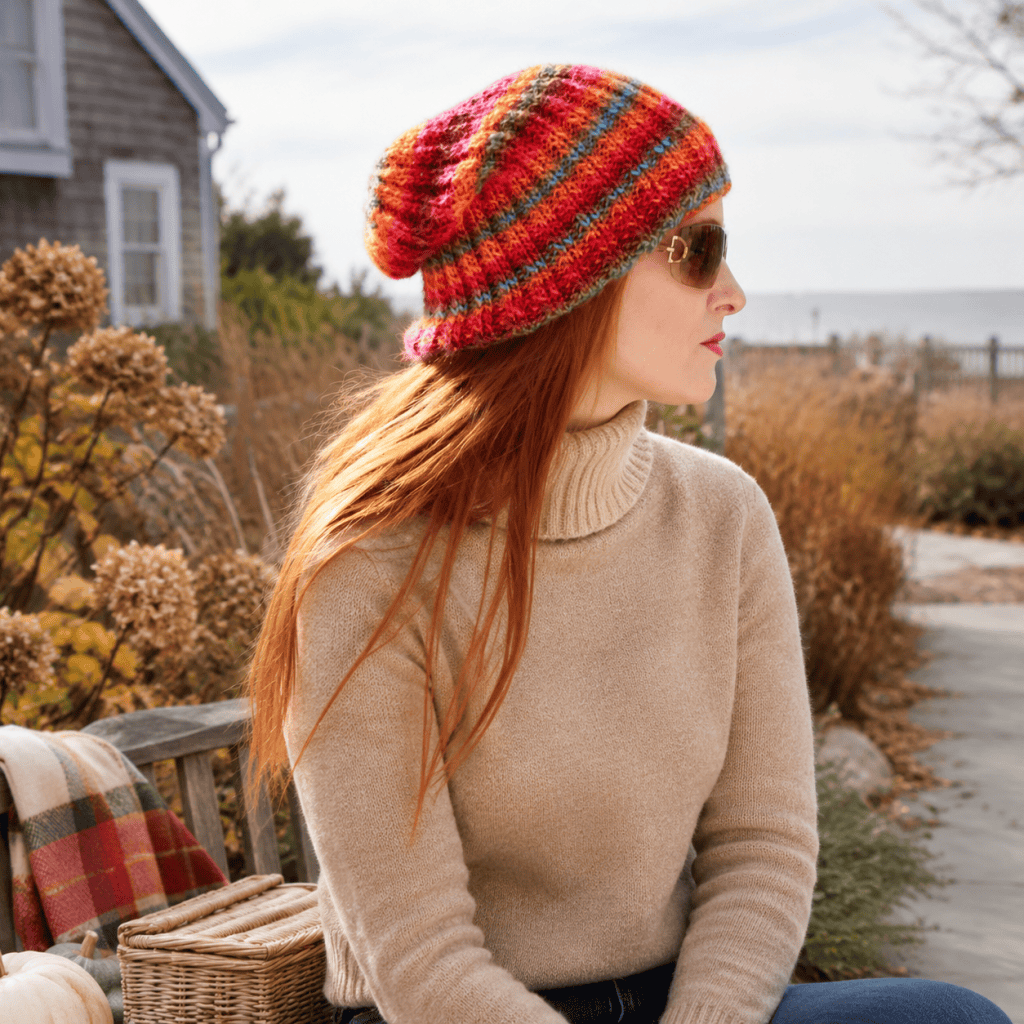
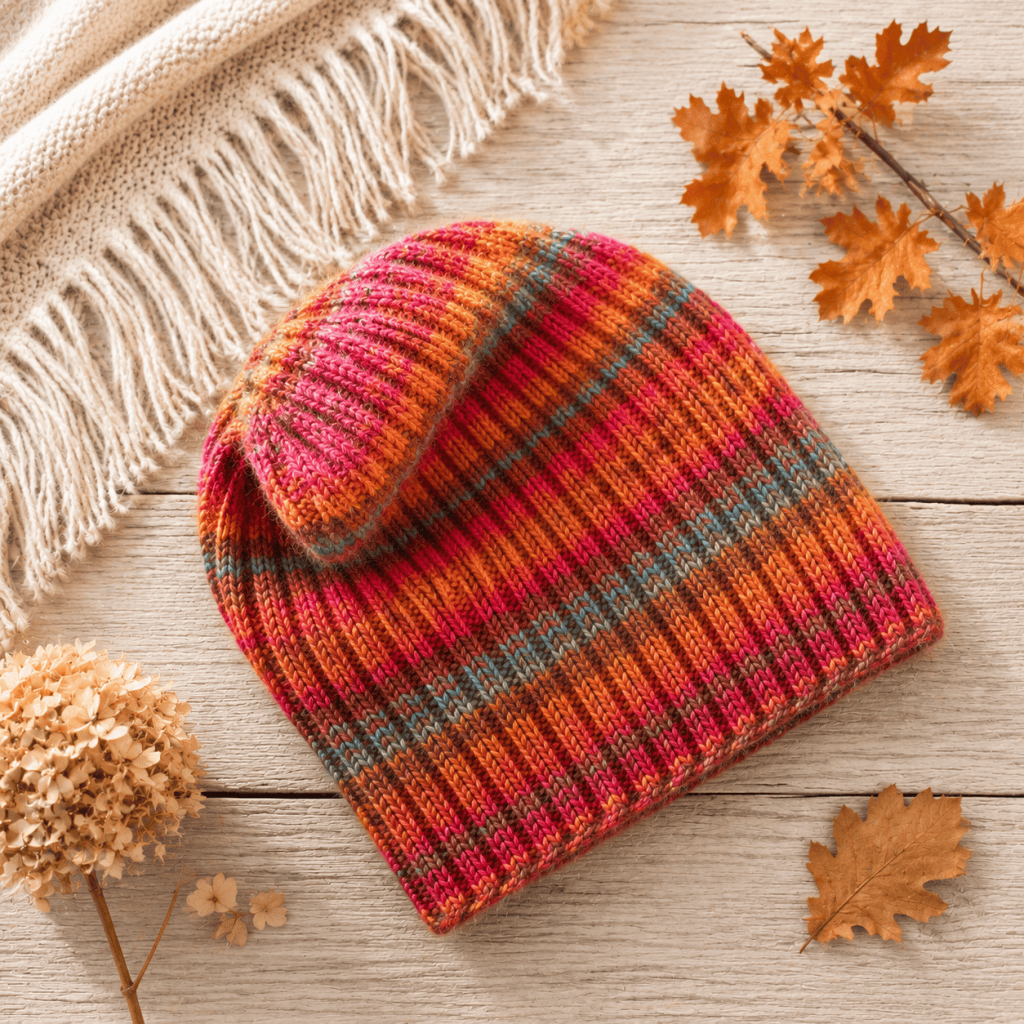
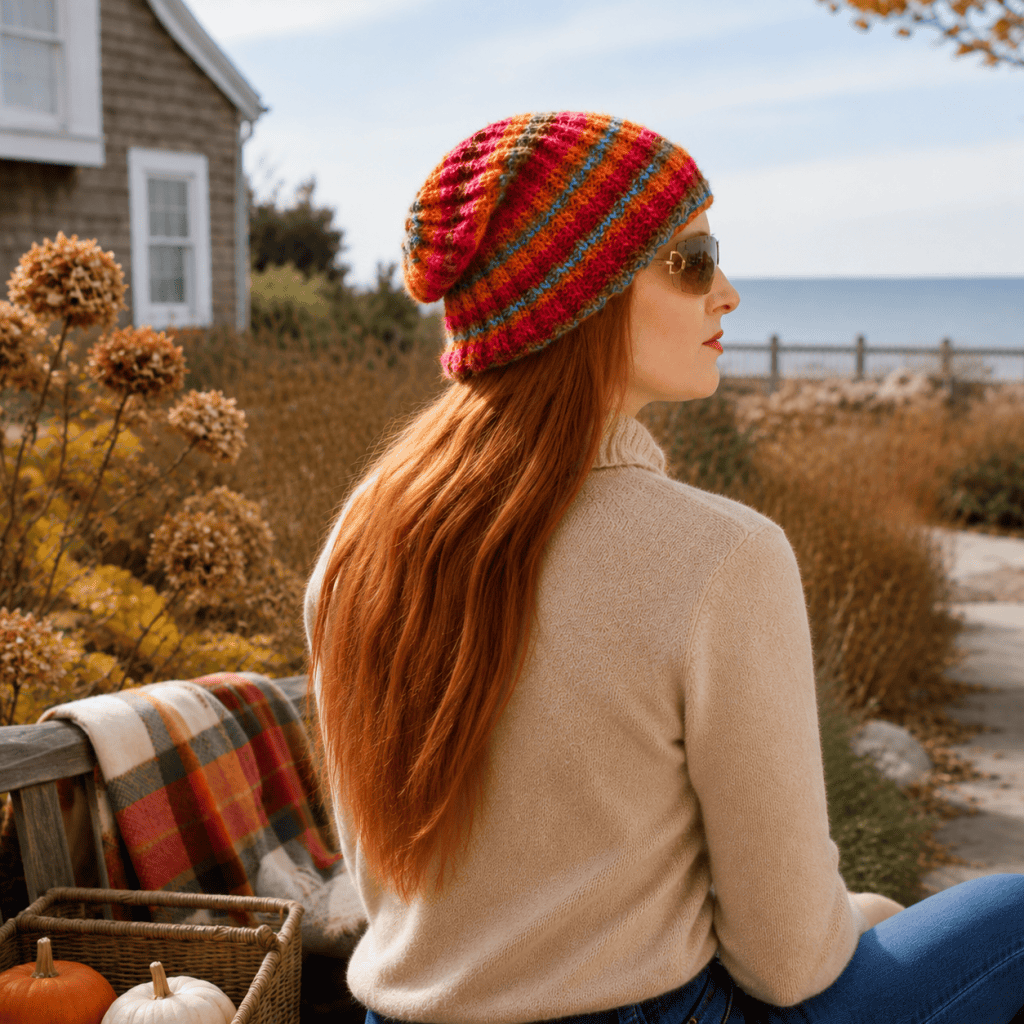
Yarn: Red Heart Boutique Unforgettable in Sunrise (#4 worsted weight yarn- 270 yards)
Needles: size US 8 single point knitting needles
Gauge: 20 sts and 28 rows = 4 inches (10 cm)
Size: women’s one size
You Might Also Like


Pattern instructions:
Cast on 100 sts.
Work in K2 P2 ribbing until the piece measures 10 inches.
Shape the crown:
Row 1: K2, P2, K2, P2tog, K2, P2tog across the row. (80 sts)
Row 2: K1, P2, K2, P2 across the row.
Row 3: K2, P2tog, K2, P1 across the row. (70 sts)
Row 4: K1, P2, K2 across the row.
Row 5: K2tog across the row. (35 sts)
Row 6: K2tog across until the last stitch, knit 1 (18 sts)
Row 7: K2tog across the row. (9 sts)
Cut yarn, leaving a 12 in. tail. Thread tail through stitches of the last row and pull to secure. Use the tail to sew the side seam together.
Get the Printable PDF Pattern
Want an easy-to-read, ad-free version of this pattern? The printable PDF includes the complete pattern in a convenient format you can save or print.
Buy the PDF PatternBrowse More Easy Hat Knitting Patterns
If you love this project, here are more cozy favorites you might enjoy:
Apple Hat Knitting Pattern (Easy Knit Hat for Kids + Fall Favorite)
Easy Knit Hat Hub: Beginner to Intermediate Hat Knitting Patterns (Cozy, Stylish Projects You’ll Actually Wear)
Easy Fox Hat Knitting Pattern with Ears (Free Circular Needle Knit) – Adorable Animal Beanie for Toddlers
Knot Top Baby Hat Knitting Pattern (Quick & Beginner-Friendly Baby Beanie on Double-Pointed Needles)
Seed Stitch Beanie Knitting Pattern (Easy + Classic Texture Hat You’ll Wear All Winter)
15 Cozy Women’s Knit Hat Patterns You’ll Want to Cast On Today
Why Knit Flat Instead of In the Round?
Knitting flat is ideal for beginners because:
No circular needles required
Easier to fix mistakes
Clear stitch structure
Less technical setup
If you’ve struggled with circular needles before, this pattern is a perfect confidence builder.
Want the Printable PDF Version?
✨ Upgrade your knitting experience with the ad-free printable PDF version of this pattern.
Perfect for:
Offline knitting
Gift knitting
Easy printing and notes
👉 Buy the Printable PDF Pattern Here
Tip for Seaming Flat Knit Hats (Clean, Professional Finish)
For the most polished result when finishing a flat knit hat, the seaming step is just as important as the knitting itself. A neat seam can completely elevate the look of your project and make it appear store-bought rather than handmade.
The best method is mattress stitch, which creates an invisible seam and keeps the fabric flexible and smooth.
How to get the best results:
- Use mattress stitch for an invisible join
This technique pulls the two edges together from the inside, creating a clean, nearly seamless finish on the outside. - Line up your rows carefully before sewing
Make sure:- Stripe patterns match (especially important for self-striping yarn)
- Edge stitches align evenly
- The tension on both sides looks consistent
- Work slowly and check your progress often
Pull the yarn gently every 1–2 inches rather than tightening all at once. This helps avoid puckering or uneven tension. - Don’t over-tighten the seam
A too-tight seam can:- Reduce stretch
- Create a visible ridge
- Distort the shape of the hat
- Leave a long enough yarn tail
Aim for at least 18–24 inches so you can comfortably seam the entire length without running out of yarn.
Taking your time with this final step will give your flat knit hat a smooth, flexible seam and a beautifully finished look that really highlights your knitting work.
Customization Ideas
Make this hat your own:
1. Add a Pom Pom
A faux fur pom pom instantly elevates the look.
2. Change Yarn Weight
Use bulky yarn for a chunkier winter version.
3. Adjust Length
Add extra rows for an oversized slouchy look.
4. Folded Brim Version
Double the ribbing section for extra warmth.
Get the Printable PDF Pattern
Want an easy-to-read, ad-free version of this pattern? The printable PDF includes the complete pattern in a convenient format you can save or print.
Buy the PDF PatternFAQ – Easy Self-Striping Slouch Hat (Knit Flat)
How difficult is this slouch hat pattern?
This pattern is designed specifically for beginners. It uses only basic knit and purl stitches and is worked flat on straight needles, making it a great first hat project for anyone new to knitting garments. If you can knit a rectangle, you can make this hat.
Can I use any type of yarn for this pattern?
Yes, but worsted weight self-striping yarn works best for achieving the signature striped effect. The color changes in the yarn create the visual interest, so you don’t need to switch colors manually. You can also experiment with bulky yarn for a chunkier, warmer version.
Do I need circular needles or double-pointed needles?
No. One of the best things about this pattern is that it is completely knit flat on straight needles. Once you finish knitting the rectangle, you simply seam it up the back to create the hat shape.
How long does it take to knit this hat?
Most knitters can complete this project in one to two evenings, depending on speed and experience. It’s a great quick project for gifts, craft fairs, or last-minute handmade accessories.
How do I get the slouchy shape?
The slouch comes from the length of the rectangle before seaming. The longer you knit the body, the more relaxed and slouchy the finished hat will be. You can customize the fit easily by adjusting length.
Can I make this hat more fitted instead of slouchy?
Yes. Simply reduce the length of the knitted rectangle by a few inches before seaming. This will give you a more traditional beanie-style fit instead of a loose slouch.
What kind of projects pair well with this hat?
This hat pairs beautifully with simple scarves, mittens, and other beginner-friendly accessories. You might also enjoy browsing other easy hat patterns or seasonal knit collections for coordinated sets.
Can I sell finished hats made from this pattern?
Yes, handmade items made from this pattern can typically be sold in small batches. Just be sure to credit the design if required on your shop listings.
This Easy Self-Striping Slouch Hat is the kind of project that reminds you why knitting is so enjoyable. It’s simple, relaxing, and incredibly satisfying to watch the colors change as you work.
Whether you’re making it for yourself, gifting it, or adding it to your fall collection, this hat is a timeless, cozy staple that you’ll come back to again and again.
Don’t forget to explore more beginner-friendly projects and printable patterns in the shop!
✨ I’d love to see what you’re making! ✨
If you’ve tried one of my knitting patterns, crochet projects, DIYs, or recipes, share your finished project on Instagram and tag me so I can see it 💛
There’s nothing better than seeing your creations come to life—from cozy knits to delicious recipes and everything in between. It truly makes my day!
Tag me @ginamicheleny so I can share your work and cheer you on!
Happy making!