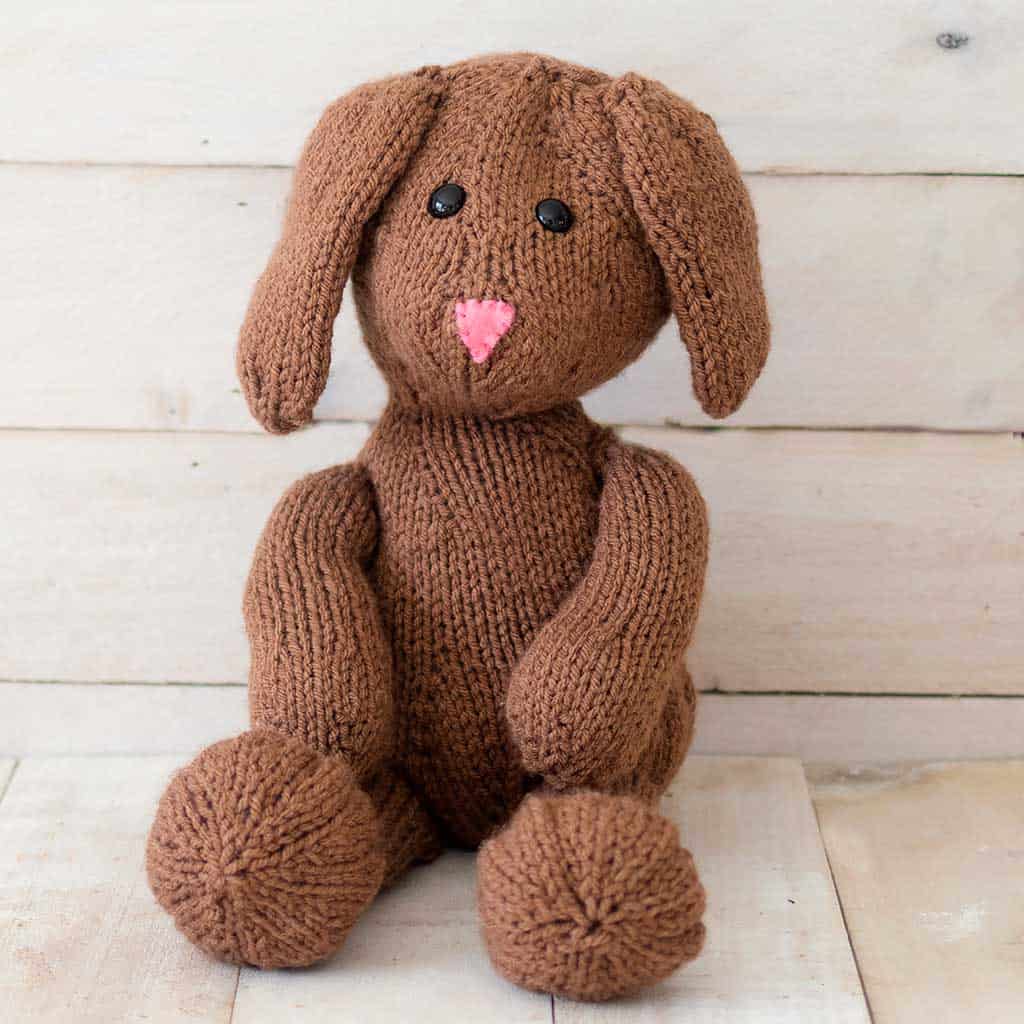
Flat Knit Bunny Knitting Pattern
Flat Knit Bunny Knitting Pattern- knit on straight needles, this cute plush bunny is sure to delight little ones!
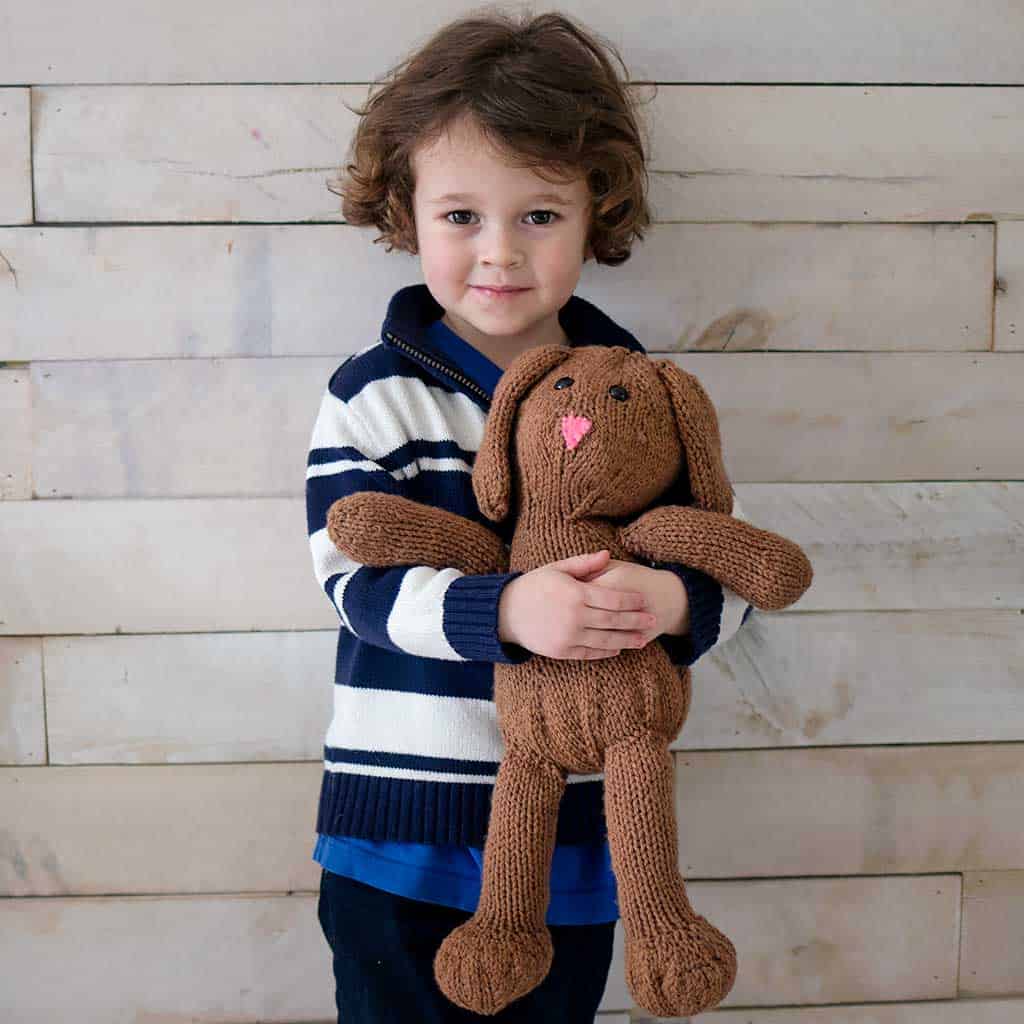
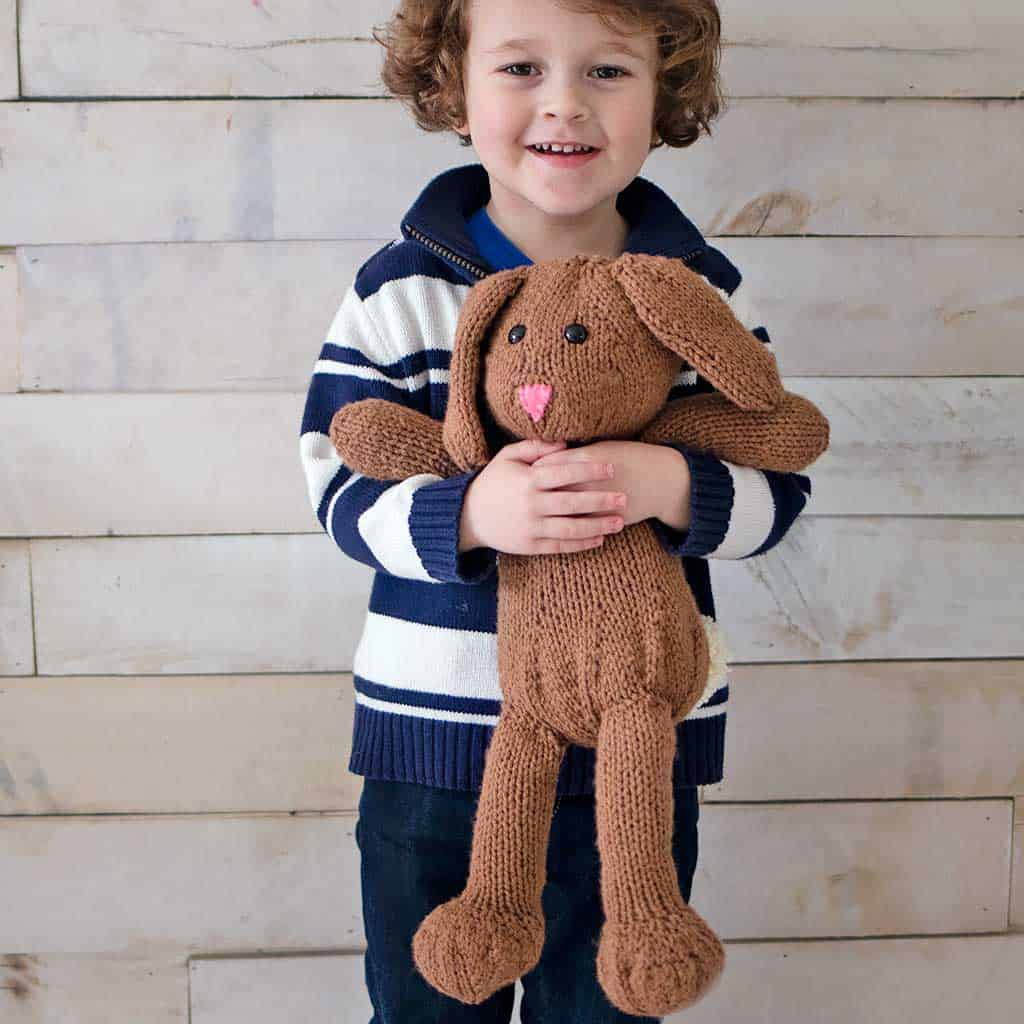
If you love knitting adorable handmade toys, this Flat Knit Bunny Knitting Pattern is the perfect project to try. Designed to be knit entirely on straight needles, this beginner-friendly bunny is simple, cozy, and irresistibly cute. Whether you’re creating a handmade gift, knitting something special for Easter, or adding a soft toy to a nursery, this plush bunny is guaranteed to bring smiles.
Unlike many stuffed animal knitting patterns that require complicated shaping or knitting in the round, this Flat Knit Bunny Knitting Pattern keeps things refreshingly simple. The bunny is created by knitting separate panels — including the body, arms, legs, and floppy ears — which are then sewn together and stuffed to create a cuddly finished toy. This construction makes the project approachable even for newer knitters who are comfortable with basic stitches like knit and purl.
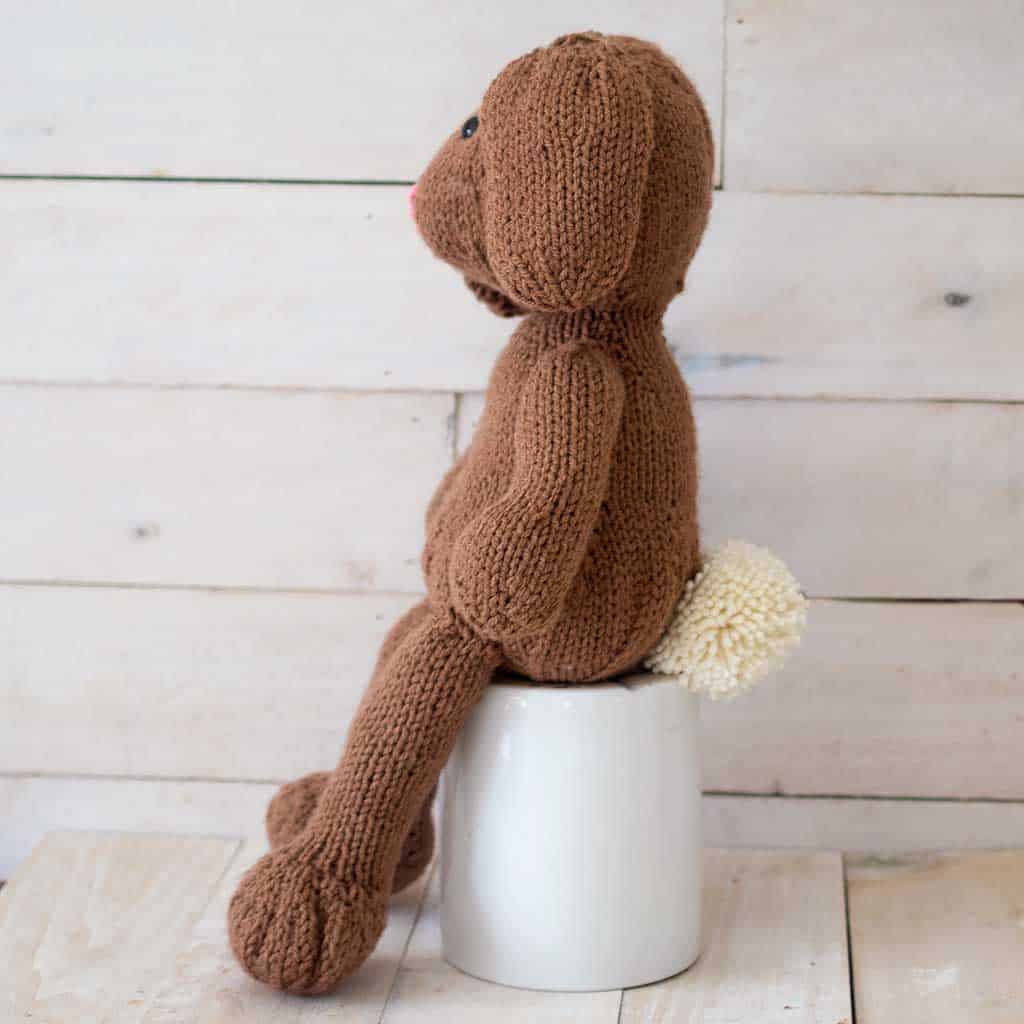
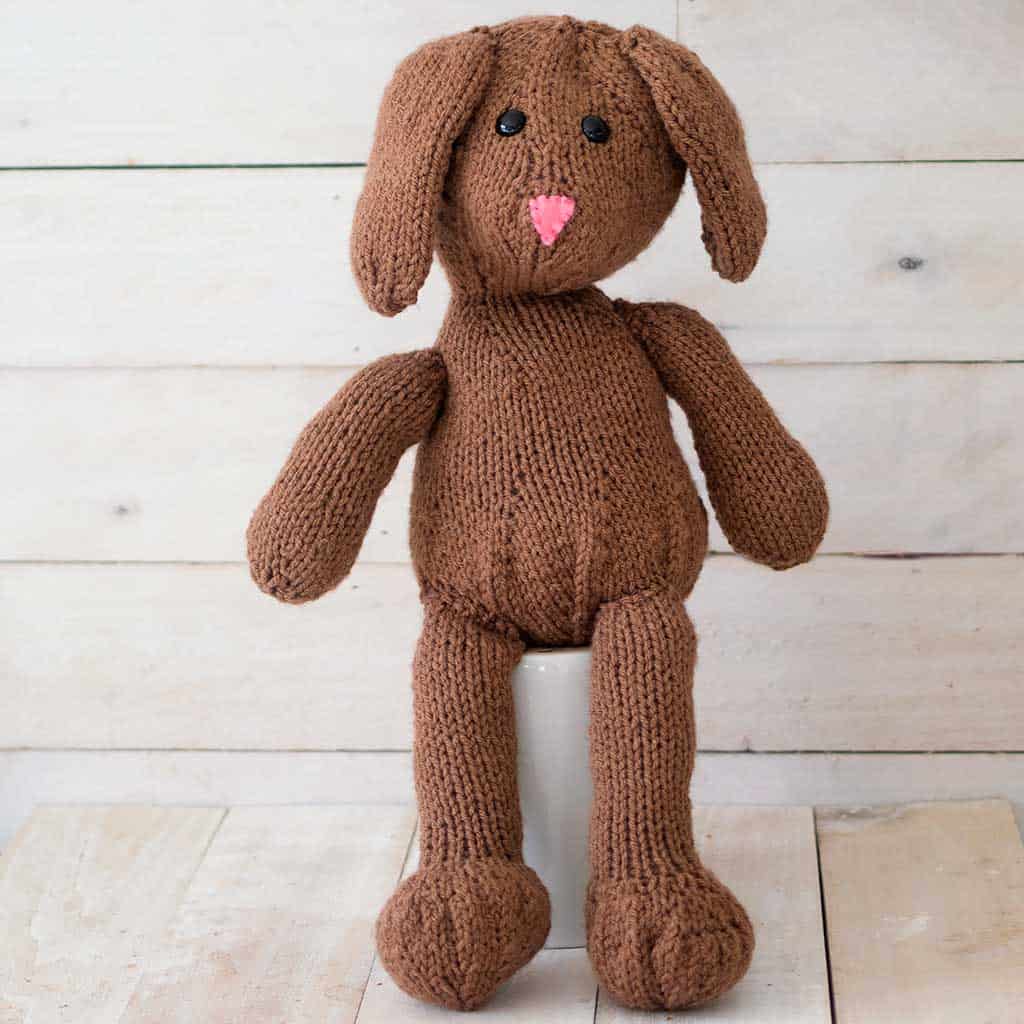
The finished bunny measures about 16 inches tall, making it a wonderfully huggable plush toy that’s perfect for kids, baby gifts, or seasonal spring decor. Knit it in soft neutral yarn for a modern heirloom look, or choose pastel shades for a classic Easter bunny feel. Either way, this cozy project works up surprisingly quickly and looks beautiful sitting in an Easter basket, nursery shelf, or cozy reading corner.
One of the best things about this Flat Knit Bunny Knitting Pattern is how versatile it is. You can customize the bunny with different yarn colors, embroidered details, or playful accessories like a tiny scarf or bow. Add safety eyes for a classic plush toy look, or embroider the eyes and nose if you’re making the bunny for a baby or toddler.
If you enjoy knitting soft toys, you might also like some of my other beginner-friendly plush patterns like:
• Easy Plush Bear Knitting Pattern
• Flat Knit Plush Cat Knitting Pattern
• Easy Plush Owl Knitting Pattern
• Flat Knit Plush Penguin Knitting Pattern
These patterns use the same simple construction style — knit flat pieces, seam, stuff, and enjoy — which makes them relaxing and satisfying projects for knitters of all skill levels.
Whether you’re knitting your first stuffed animal or adding another handmade toy to your collection, this Flat Knit Bunny Knitting Pattern is a fun and creative project that’s sure to become a favorite.
Is This Bunny Knitting Pattern Beginner Friendly?
This flat knit bunny knitting pattern is a great beginner project because the pieces are knit flat and then sewn together. If you can knit a rectangle and sew seams, you can make this bunny.
How to Knit a Hat on Straight Needles
KEEP IN TOUCH! FOR MORE INSPIRATIONS, TUTORIALS, AND FREE KNITTING PATTERNS, SIGN UP FOR MY WEEKLY NEWSLETTER:
Flat Knit Bunny Knitting Pattern
Why You’ll Love This Flat Knit Bunny Knitting Pattern
Why You’ll Love This Flat Knit Bunny Knitting Pattern
✔ Knit completely flat on straight needles
✔ Beginner friendly – only basic stitches
✔ Perfect Easter basket gift
✔ Great stash-buster project
✔ Makes an adorable nursery toy
(As an Amazon associate, I earn from qualfying purchases)
Yarn: Red Heart Soft Yarn in Toast (1 skein), #4 worsted weight white yarn for the pom pom tail
Needles: Size US 7 single point knitting needles
Also needed: yarn needle, safety eyes, fiberfill, pink felt (for the nose)
Gauge: not necessary for this project
Finished size: approximately 16 inches from the top of the head to the bottom of the feet
Pattern instructions:
For the head:
Row 1: Kfb in each st around—12 sts.
Row 2: Purl
Row 2: *K1, kfb; repeat from * around—18 sts.
Row 4: Purl
Row 5: *K2, kfb; repeat from * around—24 sts.
Row 6: Purl
Row 7: *k3, kfb; repeat from * around—30 sts.
Row 8: Purl
Row 9: *K4, kfb; repeat from * around—36 sts.
Row 10: Purl
Row 11: *k5, kfb; repeat from * around—42 sts.
Row 12: Purl
Row 13: K6, kfb; repeat from * around—48 sts.
Row 14: Purl
Row 15: k7, kfb; repeat from * around—54 sts.
Row 16: Purl
Row 17: *K8, kfb; repeat from * around—60 sts.
Row 18: Purl 8, P2tog; repeat from * around—54 sts.
Row 19: Knit
Row 20: Purl
Shape Muzzle:
Row 21: K20, [kfb in next 2 sts, k4] twice, kfb in next 2 sts, k20—60 sts.
Row 22: Purl
Row 23: K28, kfb in next 4 sts, k28—64 sts.
Rows 24-26: starting with a purl row, work in Stockinette Stitch
Row 27: (right side) K28, [k2tog] 4 times, k28—60 sts.
Row 28: Purl
Row 29: [K2tog, k8] twice, [k2tog] twice, *k4, [k2tog] twice; repeat from * once more, [k8, k2tog] twice—50 sts
Row 30: Knit
Row 31: Purl
Shape Neck:
Row 32: *K8, k2tog; repeat from * around- 45 sts
Row 33: *P7, p2tog; repeat from * around- 40 sts
Row 34: *K6, k2tog; repeat from * around- 35 sts
Row 35: *P5, p2tog; repeat from * around- 30 sts
Row 36: *K4, k2tog; repeat from * around- 25 sts
Row 37: Purl
Row 38:*K3, k2tog; repeat from * around—20 sts
Row 39: Purl
Row 40: *K3, kfb; repeat from * around—25 sts
Row 41: Purl
Row 42: *K4, kfb; repeat from * around—30 sts
Row 43: Purl
Row 44: *K5, kfb; repeat from * around—35 sts.
Row 45: Purl
Row 46: *K6, kfb; repeat from * around—40 sts.
Row 47: Purl
Row 48:*K7, kfb; repeat from * around—45 sts.
Row 49-62: Starting with a Purl row, work in Stockinette Stitch
For the Body:
Row 63: *Kfb, k4; repeat from * around—54 sts.
Row 64: Purl
Row 65: *Kfb,k5; repeat from * around—63 sts.
Row 66: Purl
Row 67: *Kfb, k6; repeat from * around—72 sts.
Row 68: Purl
Row 69: *Kfb, k7; repeat from * around—81 sts.
Row 70: Purl
Row 71: *K7, k2tog; repeat from * around—72 sts.
Row 72: Purl
Row 73: *K6, k2tog; repeat from * around—63 sts.
Row 74: Purl
Row 75: *K5, k2tog; repeat from * around—54 sts.
Row 76: Purl
Row 77: *K4, k2tog; repeat from * around—45 sts.
Row 78: Purl
Row 79: *K3, k2tog; repeat from * around—36 sts.
Row 80: Purl
Row 81: *K2, k2tog; repeat from * around—27 sts.
Row 82: Purl
Row 83: *K1, k2tog; repeat from * around—18 sts.
Row 84: Purl
Row 85: *K2tog; repeat from * around—9 sts.
Cut yarn, leaving a long tail. Thread tail through remaining sts and pull tight to gather. Securely weave in end. Sew the back seam, stuffing as you go. Add the eyes. Sew the top of the head closed and weave in ends.
For the Arms: (make 2)
Cast on 6 sts.
Row 1: Kfb in each st around—12 sts.
Row 2: Purl
Row 3: *K1, kfb; repeat from * around—18 sts.
Row 4: Purl
Row 5: *K2, kfb; repeat from * around—24 sts.
Rows 6-10: Starting on a Purl row, work in Stockinette Stitch.
Row 11: *K2, k2tog; repeat from * around—18 sts.
Work in stockinette stitch until the pieces measures approximately 5 inches, ending on a Purl side row.
Next row: *K1, k2tog; repeat from * around—12 sts.
Bind off, leaving a long tail. Sew the side seam and stuff the arms.
For the Legs: (Make 2)
Cast on 18 sts.
Work in Stockinette Stitch until pieces measures 5 inches from the cast-on edge, ending on a Purl row.
To shape the foot:
Row 1: K4, kfb in next 10 sts, k4—28 sts.
Row 2: Purl
Row 3: K4, [K1, kfb] 10 times, k4—38 sts.
Row 4: Purl
Row 5: K8, [k2, kfb] 7 times, kfb, k8—46 sts.
Row 6: Purl
Row 7: K2tog, k2, k2tog, k14, kfb in next 6 sts, k14, k2tog, k2, k2tog—48 sts.
Row 8: Purl
Row 9: *K2tog, k2; repeat from * around—36 sts
Row 10: Purl
Row 11: *K2tog, k2; repeat from * around—27 sts.
Row 12: Purl
Row 13: *K2tog, k1; repeat from * around—12 sts.
Bind off. Sew the side seam and stuff the legs.
For the Ears: (make 2)
Cast on 6 sts.
Row 1: Kfb in each st around—12 sts.
Row 2: Purl
Row 3: *K1, kfb; repeat from * around—18 sts.
Row 4: Purl
Row 5: *K2, kfb; repeat from * around—24 sts.
Row 6: Purl
Row 7: *K3, kfb; repeat from * around—30 sts.
Row 8: Purl
Row 9: Knit
Row 10: Purl
Row 11: Knit
Row 12: Purl
Row 13: *K2tog, k13; repeat from * around—28 sts.
Row 14: Purl
Row 15: *K2tog, k5; repeat from * around—24 sts.
Starting on a Purl row, work in Stockinette Stitch until the ear measures 5 inches from the cast-on edge. End on a Purl side row.
Next row: *K2tog; repeat from * around—12 sts.
Next row: Purl
Next row: *K2tog; repeat from * around—6 sts.
Fold the ear over and sew the side seam.
Finishing:
Using the pictures as a guide, sew on the arms, legs and ears. Make a Pom Pom and attach it to the back of the bunny. Cut a triangle out of pink felt and sew it on to the bunny’s face.
Flat Knit Bunny Knitting Pattern FAQ
Can beginners knit this bunny?
Yes! The pattern is knit flat using basic stitches.
What yarn should I use for a knit bunny?
Worsted weight yarn works best for plush toys.
Can I knit this bunny on straight needles?
Yes, this bunny is designed specifically for straight needles.
Is this bunny safe for babies?
Use embroidered eyes instead of safety eyes.
How big is the finished bunny?
Approximately 16 inches tall.
More Bunny Knitting Patterns
If you love this Flat Knit Bunny Knitting Pattern, you might also enjoy:
- Easy Bunny Egg Knitting Pattern
- Bunny Basket Knitting Pattern
- One Square Bunny Pattern
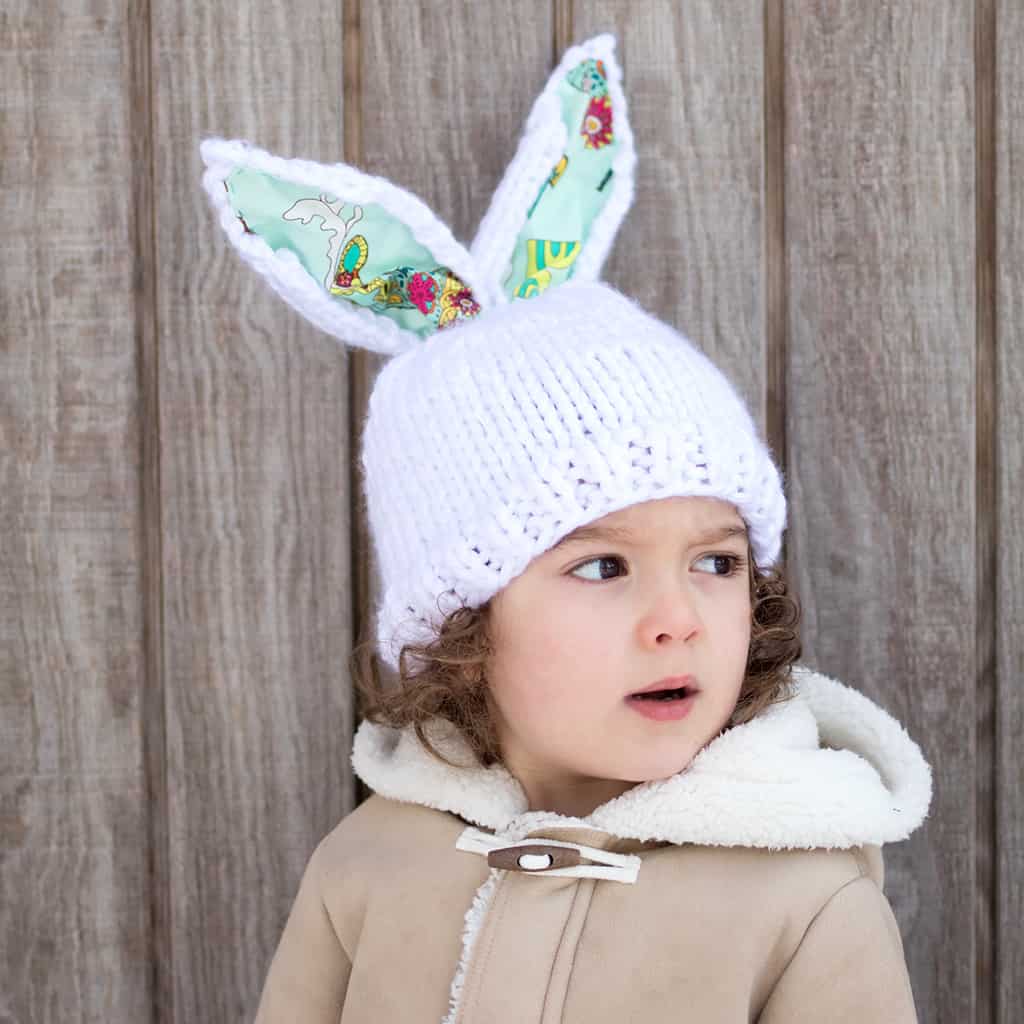
- Bunny Hat Knitting Pattern
This Flat Knit Bunny Knitting Pattern is the perfect beginner toy knitting project. Knit flat on straight needles and assembled with simple seams, it’s a relaxing pattern that creates an adorable handmade bunny.
Looking for more softie knitting patterns like this Flat Knit Bunny Knitting Pattern?
Easy Plush Bear Knitting Pattern
Easy Flat Knit Plush Octopus Knitting Pattern
Easy Plush Owl Knitting Pattern
Easy Plush Cat Knitting Pattern
Flat Knit Plush Penguin Knitting Pattern
I love seeing your finished projects! If you enjoyed making this Flat Knit Bunny Knitting Pattern or any of my other free knitting patterns, I’d love to see yours on Instagram, just tag me @ginamicheleny. Happy knitting!