Easy DIY Printed Halloween Candles (5-Minute Halloween Decor)
Make Easy DIY Printed Halloween Candles in just 5 minutes! This quick, budget-friendly Halloween craft creates spooky vintage-inspired decor with minimal supplies.
Easy DIY Printed Halloween Candles in Just 5 Minutes
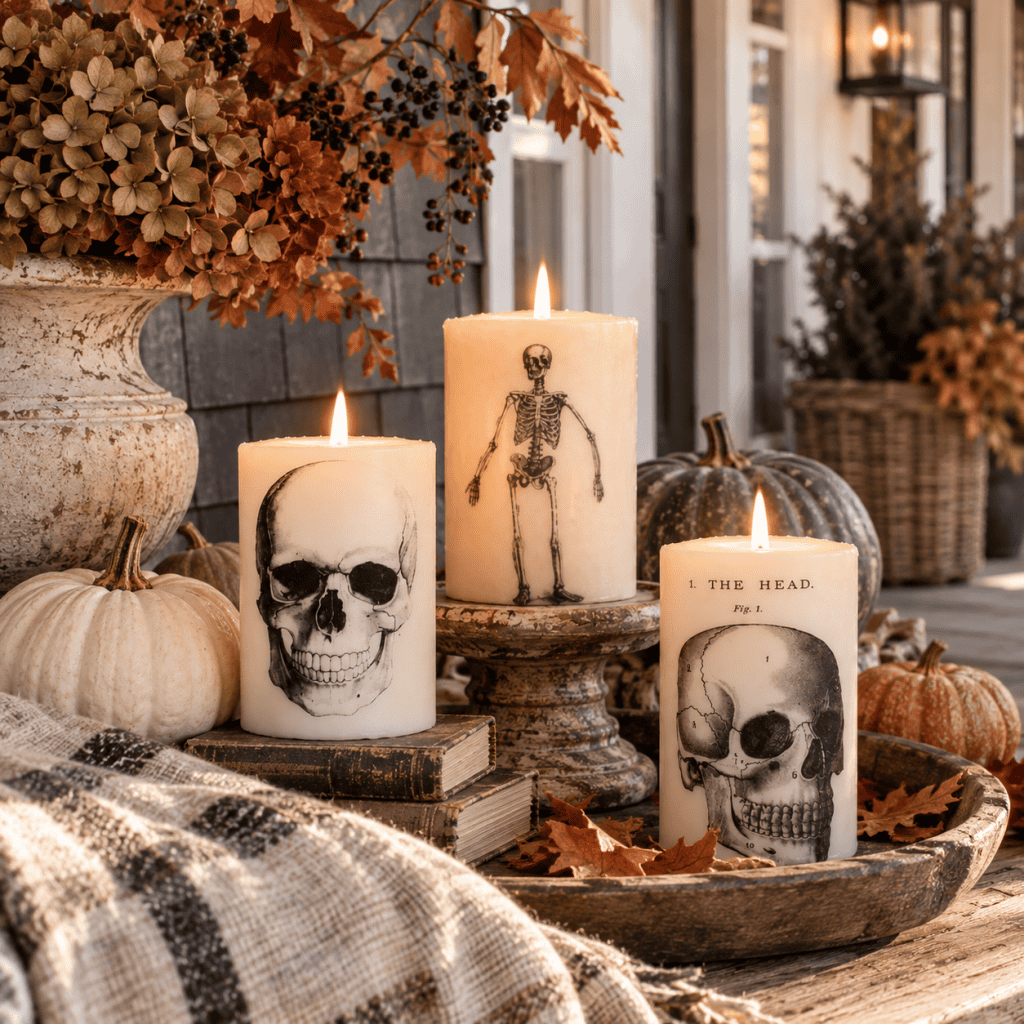
Looking for a quick Halloween craft that makes a big impact? These Easy DIY Printed Halloween Candles take only about five minutes to make and instantly transform plain pillar candles into spooky Halloween decor. Vintage skull and skeleton images give inexpensive candles an antique-inspired look that’s perfect for decorating mantels, shelves, entryway tables, or Halloween tablescapes.
An Easy 5-Minute Halloween Craft
One of the best things about these DIY Halloween candles is how simple they are to make. You don’t need any complicated craft supplies or special skills, and the project can easily be completed in a few minutes. Start with basic white or ivory pillar candles and customize them with your favorite spooky printed images.
These Halloween candles are perfect for:
Creating inexpensive Halloween decor
Decorating plain pillar candles
Using vintage skull, skeleton, or anatomy prints
Making last-minute Halloween decorations
Adding spooky decor to mantels and tables
Creating Halloween centerpieces
Making several candles for a coordinated display
Adding a handmade touch to your fall decor
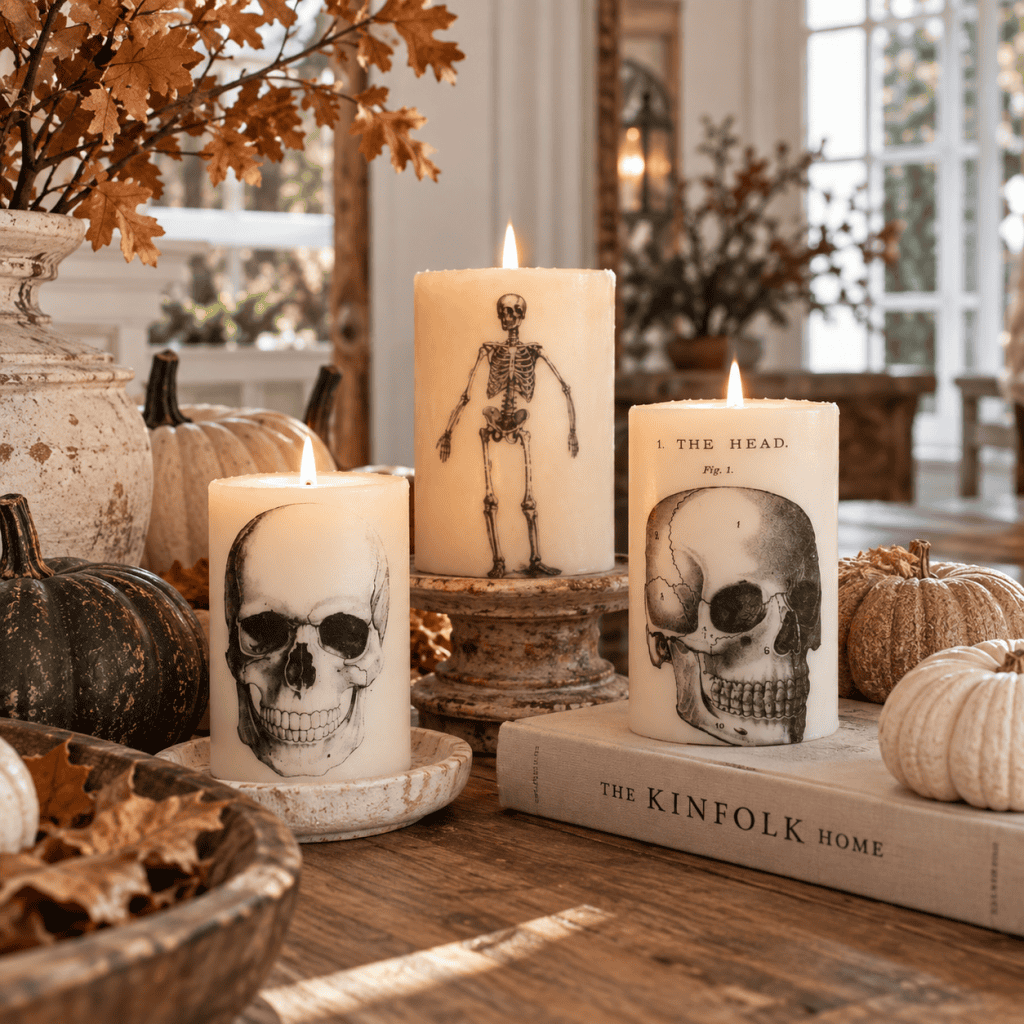
Group candles in different heights and sizes together for an especially dramatic display.
Vintage-Inspired Halloween Decor on a Budget
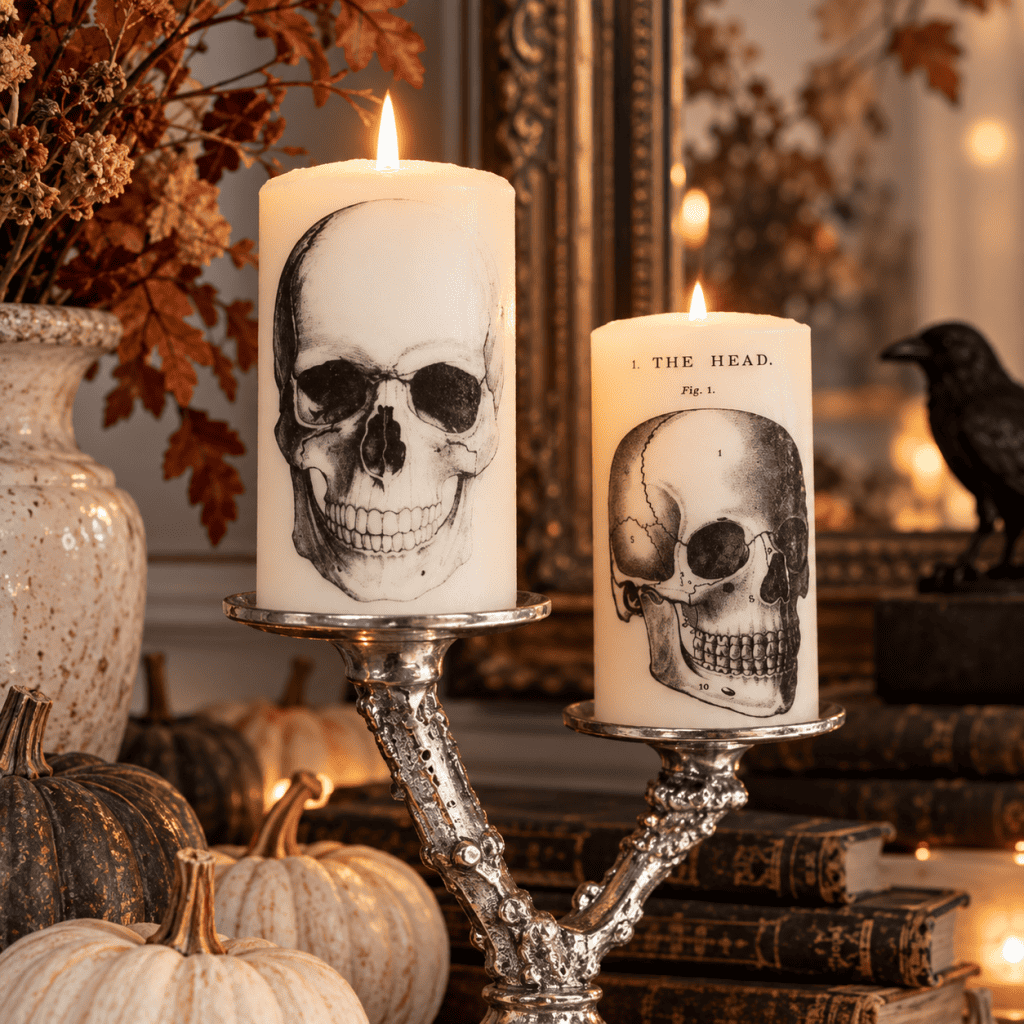
These printed Halloween candles have a slightly spooky, vintage look that works beautifully with pumpkins, antique books, dried flowers, brass candlesticks, and other fall decorations. The black-and-white images against ivory candles create an elevated Halloween look without requiring a lot of colorful or overly themed decorations.
Display a few together on a mantel or console table, or mix them into an existing fall arrangement for a subtle Halloween update. Because this project is so fast and affordable, you can easily make an entire collection in one afternoon. These Easy DIY Printed Halloween Candles are proof that some of the best Halloween decorations are also the simplest to make.
these 12 beginner-friendly fall knitting patterns are a great place to start.
Looking for free knitting patterns? Browse this full collection of easy knitting patterns you can start today:
50 Free Knitting Patterns You’ll Actually Want to Make (Beginner-Friendly)
31 Free Hat Knitting Patterns for Everyone (Women, Men, Kids & Babies)
Fall Knitting Hub: Cozy Autumn Knitting Patterns for Beginners
Easy Scarf Knitting Patterns Hub: Cozy Beginner-Friendly Scarves You’ll Love to Make
Straight Needle Knitting Hub: Easy Flat Knitting Patterns for Beginners
Kids Knitting Pattern Hub: Easy & Fun Knitting Patterns for Babies, Toddlers & Kids
Easy DIY Printed Halloween Candles (5-Minute Halloween Decor)
Looking for more projects? Browse the Knitting Pattern Directory to explore all my knitting patterns in one place.
(As an Amazon Associate, I earn from qualifying purchases.)
Supplies for DIY Printed Halloween Candle:
Pillar candles
Tissue paper
Ink jet printer and paper
Glue stick
Scotch Tape
Hair dryer
Step 1: Prepare and Print the Image
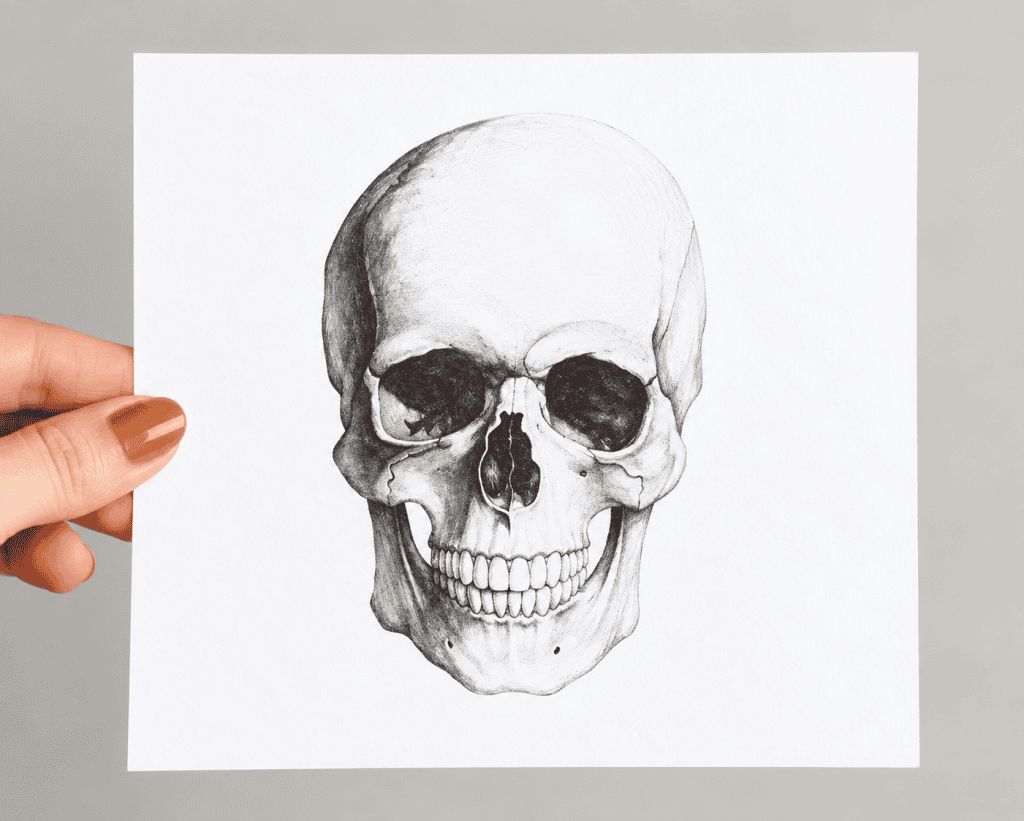
The first step is to print your Halloween image onto tissue paper. Because tissue paper is so thin and delicate, you don’t want to run it through your printer by itself—it can easily wrinkle, tear, or get caught inside the printer. The easiest solution is to temporarily attach the tissue paper to a regular sheet of printer paper.
Cut a piece of white tissue paper a few inches smaller than a standard sheet of printer paper. Lay the tissue paper flat on top of the printer paper, smoothing out as many wrinkles as possible. Use Scotch tape around the entire border of the tissue paper to secure it firmly to the sheet. Make sure there aren’t any loose corners or edges that could catch as the paper moves through the printer.
Once the tissue paper is securely attached, set an iron to its lowest heat setting. Gently run the iron over the paper a few times until the tissue paper is completely smooth and flat. Avoid using steam.
Let the paper cool, then place it in your printer and print your chosen skull, skeleton, or other Halloween image directly onto the tissue paper. Once printed, carefully remove the tape and separate the tissue paper from the printer paper.
Step 2: Cut Out the Image
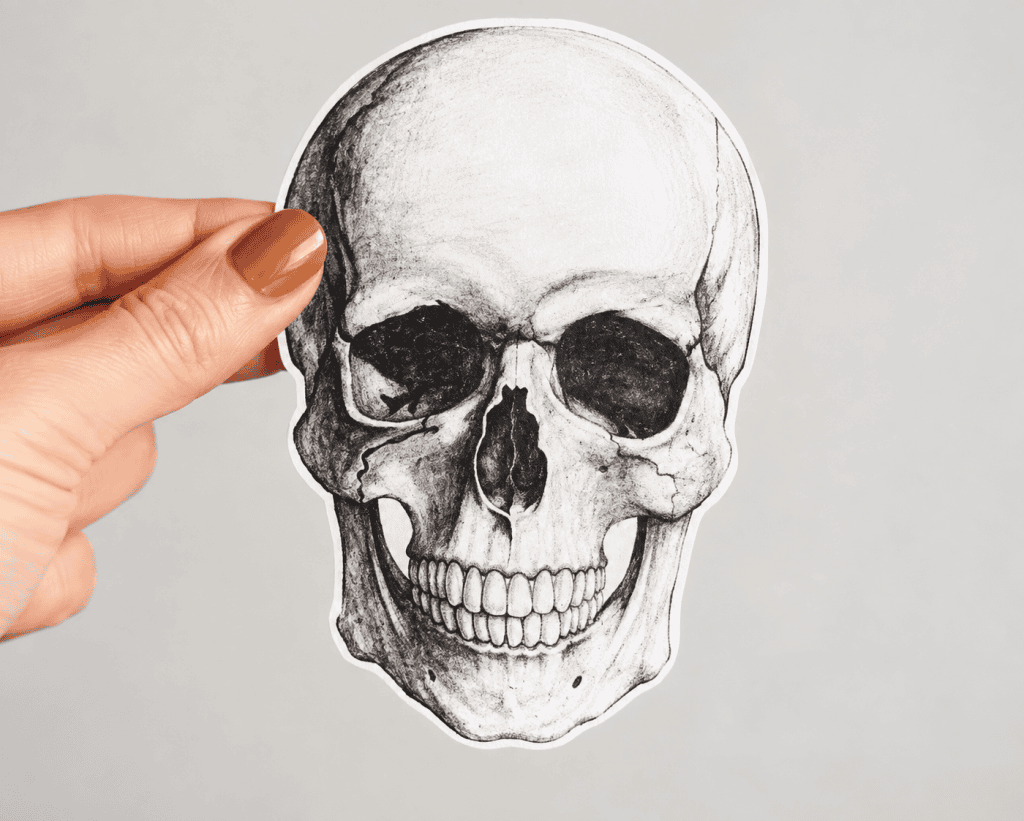
Next, carefully cut out your printed Halloween image. I found it much easier to cut through both the tissue paper and the regular printer paper at the same time. The printer paper gives the delicate tissue paper some extra stability, which helps prevent it from wrinkling, shifting, or tearing while you cut.
Cut fairly close around the outside of the image, removing as much excess tissue paper as possible. Once you’re finished cutting, carefully separate the tissue paper from the printer paper. You’ll be left with a thin printed image that’s ready to transfer onto the candle.
Step 3: Attach the Image to the Candle
Before using the hair dryer, you’ll want to secure the tissue paper image to the candle so it doesn’t shift around while you’re working.
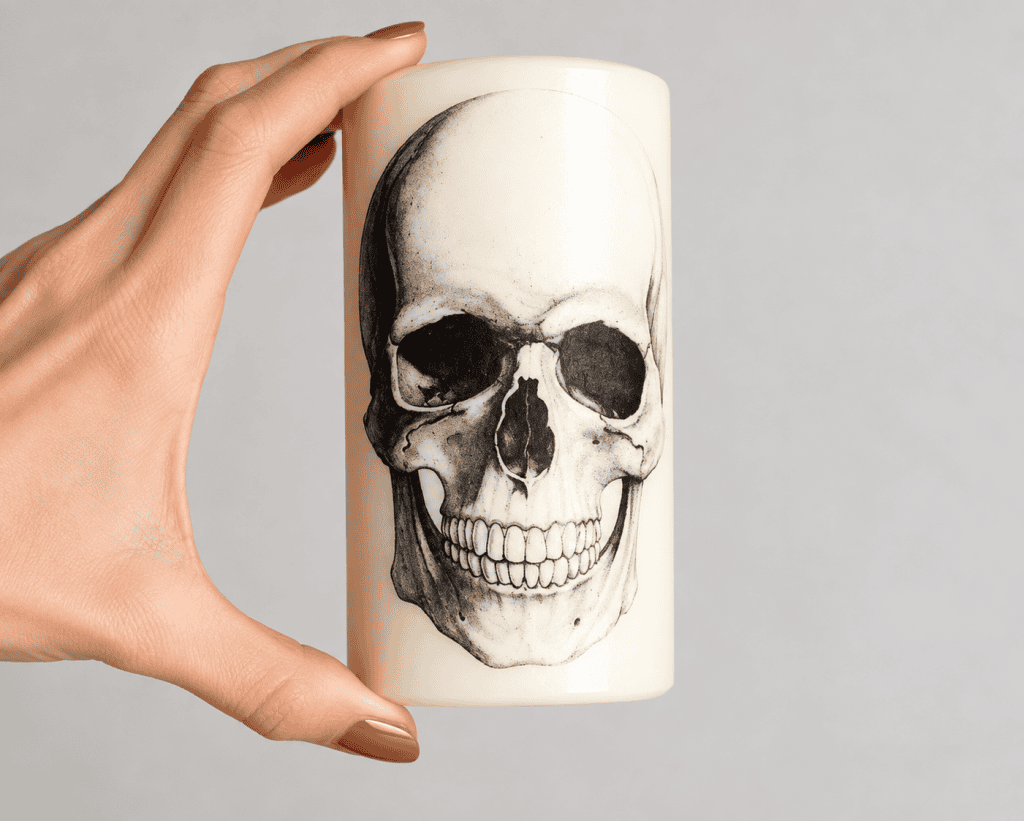
Apply a very small amount of glue around the edges of the tissue paper image. You only need enough to lightly hold it in place. Position the image on the candle where you’d like it to appear, then gently smooth it against the surface with your fingers.
Make sure the image is lying as flat as possible, without any large wrinkles or folded edges. The glue isn’t meant to permanently attach the image—it simply keeps the delicate tissue paper from moving when you use the hair dryer in the next step.

Step 4: Transfer the Image to the Candle
Now it’s time to transfer the printed image onto the candle. Using a hair dryer held a few inches away from the surface, slowly move the warm air back and forth over the tissue paper. Keep the hair dryer moving rather than concentrating the heat in one spot.
As the candle begins to warm, the outer layer of wax will soften slightly and absorb the tissue paper into the surface. This is the fun part—you’ll actually see the white areas of the tissue paper begin to disappear right before your eyes!
Continue heating the image gradually until the tissue paper is no longer visible and the printed design looks like it has become part of the candle itself. Allow the candle to cool completely before handling or displaying it.
Looking for More Easy Halloween DIY Projects?
If you enjoyed making these Easy DIY Printed Halloween Candles, there are plenty of other simple Halloween crafts you can make to give your home a handmade touch. From spooky decorations to cozy fall projects, these DIYs are perfect for decorating without spending a lot of time or money.
Many of these projects use basic craft supplies and can be customized to match your Halloween decorating style. Try classic black and orange for a traditional look, or stick with cream, brown, black, and other muted shades for more understated Halloween decor.
Try these easy Halloween DIY projects next:
Easy Macrame Ghost DIY – Cute & Spooky Halloween Wall Decor
Easy No-Sew Ghost Costume DIY (Quick Last-Minute Halloween Costume)
Beanie Baby Costume DIY – Easy No-Sew Halloween Costume
DIY Pottery Barn-Inspired Gus the Ghost Pillow: Easy Tutorial with Minimal Sewing
Easy Metallic Leaf Wreath DIY for a Cozy Fall Front Door
How to Layer Iron-On Vinyl with Cricut (Easy 2-Color T-Shirt Tutorial)
DIY Jack Skellington Pillow Pottery Barn Dupe
How to Paint Faux Terracotta Pumpkins
More Halloween Knitting and Crochet Patterns
If you love making your own Halloween decor, don’t stop with these DIY Printed Halloween Candles! I have plenty of Halloween knitting and crochet patterns for adding even more handmade touches to your home this spooky season.
From plush pumpkins and friendly ghosts to black cats, spiders, Halloween hats, and cozy seasonal decorations, there are projects for both knitters and crocheters. Many of the patterns are beginner-friendly and quick enough to finish before Halloween.
Use classic orange, black, and white yarn for a traditional Halloween look, or choose cream, rust, mustard, and brown for softer fall-inspired decor.
Try these Halloween knitting and crochet patterns next:
Easy Large Jack O’ Lantern Crochet Pattern (Plush Halloween Pumpkin)
15 Easy Knit and Crochet Halloween Patterns for Kids
Easy Gourd Knitting Pattern (Beginner-Friendly & Knit Flat on Straight Needles)
Peek-a-Boo Cat Pillow Crochet Pattern (Easy Halloween Décor)
Easy Kids Pumpkin Hat Knitting Pattern (Knit in the Round) – Sizes 1–7 Years
Easy Giant Plush Ghost Crochet Pattern (Beginner-Friendly Halloween Décor)
Easy Halloween Spiders Crochet Pattern (Beginner-Friendly Spooky Décor)
Flat Knit Striped Pumpkins Knitting Pattern (Easy Fall Decor on Straight Needles)
Easy DIY Printed Halloween Candles FAQ
How long does it take to make these DIY Halloween candles?
These Easy DIY Printed Halloween Candles take only about five minutes each once your images are printed and ready to use. They’re perfect when you want impressive Halloween decor without a time-consuming project.
Why do I need to attach the tissue paper to printer paper?
Tissue paper is too thin to safely run through most home printers on its own. Taping it securely to regular printer paper gives it enough structure to move through the printer without wrinkling or jamming.
What kind of images work best?
Black-and-white skulls, skeletons, vintage anatomy illustrations, bats, spiders, and other Halloween images work beautifully. High-contrast designs tend to show up especially well on light-colored candles.
Why does the tissue paper disappear?
The heat from the hair dryer slightly softens the candle’s surface. As the tissue paper adheres to the wax, the white areas become nearly transparent, leaving the printed design visible.
What candles work best for this project?
White or ivory pillar candles provide the best background for printed designs. Smooth-sided candles are also easier to work with than heavily textured ones.
Can I make a whole set?
Absolutely! Try different images and candle heights to create a coordinated Halloween display.
These Easy DIY Printed Halloween Candles are one of those projects that look much more complicated than they actually are. In just a few minutes, you can transform basic pillar candles into unique, vintage-inspired Halloween decor.
Group several together with pumpkins, antique books, dried flowers, and other fall decorations for a spooky display, or make just one or two for a subtle Halloween touch. They’re quick, inexpensive, customizable, and an easy way to give your Halloween decor a handmade look.
✨ I’d love to see what you’re making! ✨
If you’ve tried one of my knitting patterns, crochet projects, DIYs, or recipes, share your finished project on Instagram and tag me so I can see it 💛
There’s nothing better than seeing your creations come to life—from cozy knits to delicious recipes and everything in between. It truly makes my day!
Tag me @ginamicheleny so I can share your work and cheer you on!
Happy making!