Easy Macrame Ghost DIY – Cute & Spooky Halloween Wall Decor
Learn how to make an Easy Macrame Ghost DIY with this simple Halloween tutorial. Create cute, spooky wall decor that’s perfect for fall and Halloween.

Easy Macrame Ghost DIY for Halloween
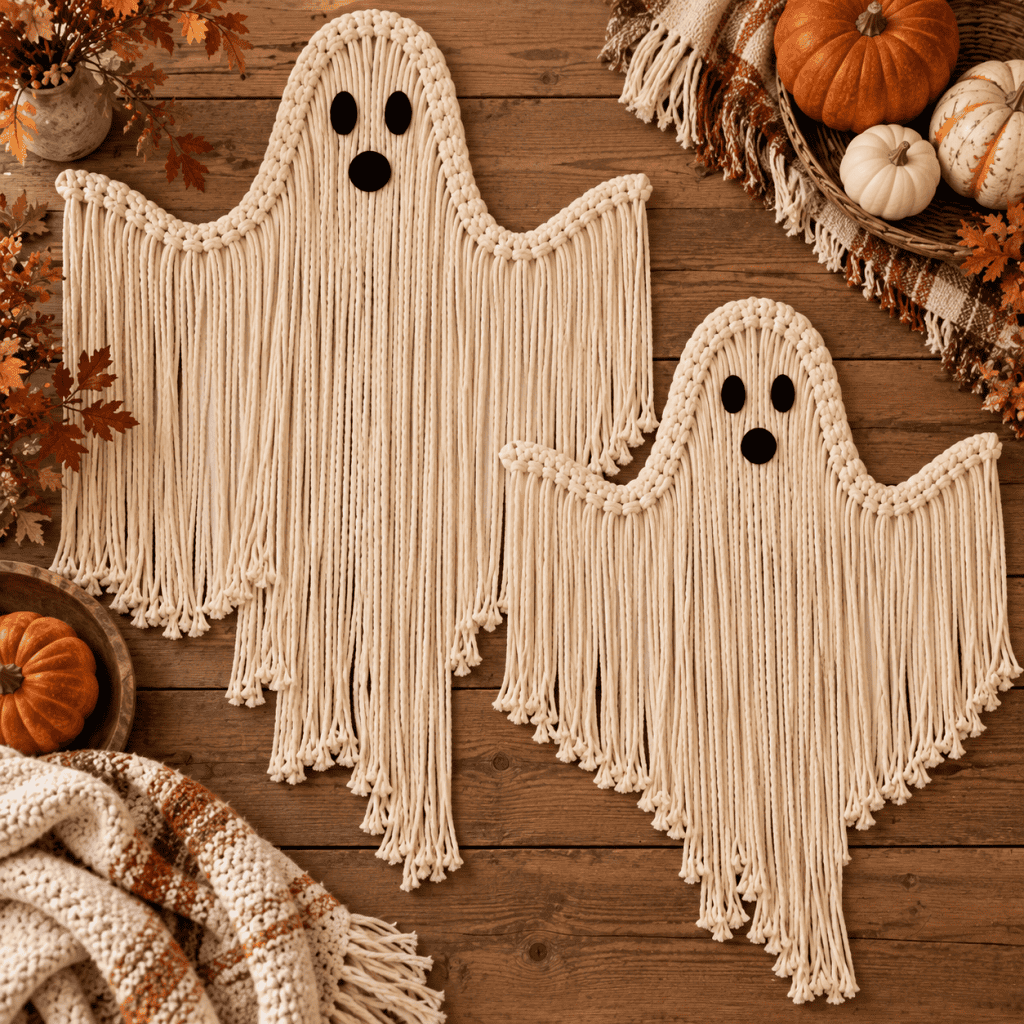
If you’re looking for a fun and easy way to add handmade Halloween decor to your home, this Easy Macrame Ghost DIY is the perfect project. These whimsical ghosts have plenty of texture and personality, but they’re still neutral enough to blend beautifully with the rest of your fall decorations. The soft cream macrame cord gives them a cozy, slightly boho look that works especially well with pumpkins, dried leaves, warm wood tones, and other natural autumn accents.
These macrame ghosts are also a great alternative to traditional orange-and-black Halloween decorations. Hang one on a wall, display a pair over a console table, or make several in different sizes to create your own little ghost family. They’re cute enough for everyday fall decorating while still adding a festive touch for Halloween.
A Simple Halloween Macrame Project
You don’t need to be an experienced macrame artist to make these adorable ghosts. This project uses simple materials and beginner-friendly techniques, so it’s a great introduction to DIY macrame Halloween decor. Once you make the first ghost, it’s easy to adjust the size, fringe length, and facial features to make each one look a little different.
Why you’ll love this Easy Macrame Ghost DIY:
Beginner-friendly and easy to make
Uses simple, inexpensive supplies
Adds lots of cozy texture to your Halloween decor
Looks great with neutral and natural fall decorations
Can be customized in different sizes
Perfect for making a pair or a whole group of ghosts
Lightweight and easy to hang on a wall
Easy to store and reuse every Halloween
This is also a fun project if you enjoy seasonal crafts but don’t want something that takes days to finish. The finished ghosts look much more detailed than the actual process requires, making this an easy way to create impressive handmade Halloween decorations.
Cute and Cozy DIY Halloween Decor
One of my favorite things about these DIY macrame ghosts is how easily they fit into a cozy fall home. Instead of looking overly spooky, the soft cotton cord and long fringe give them a relaxed, handmade feel. They’re especially pretty displayed against a simple wall where all that macrame texture can stand out.
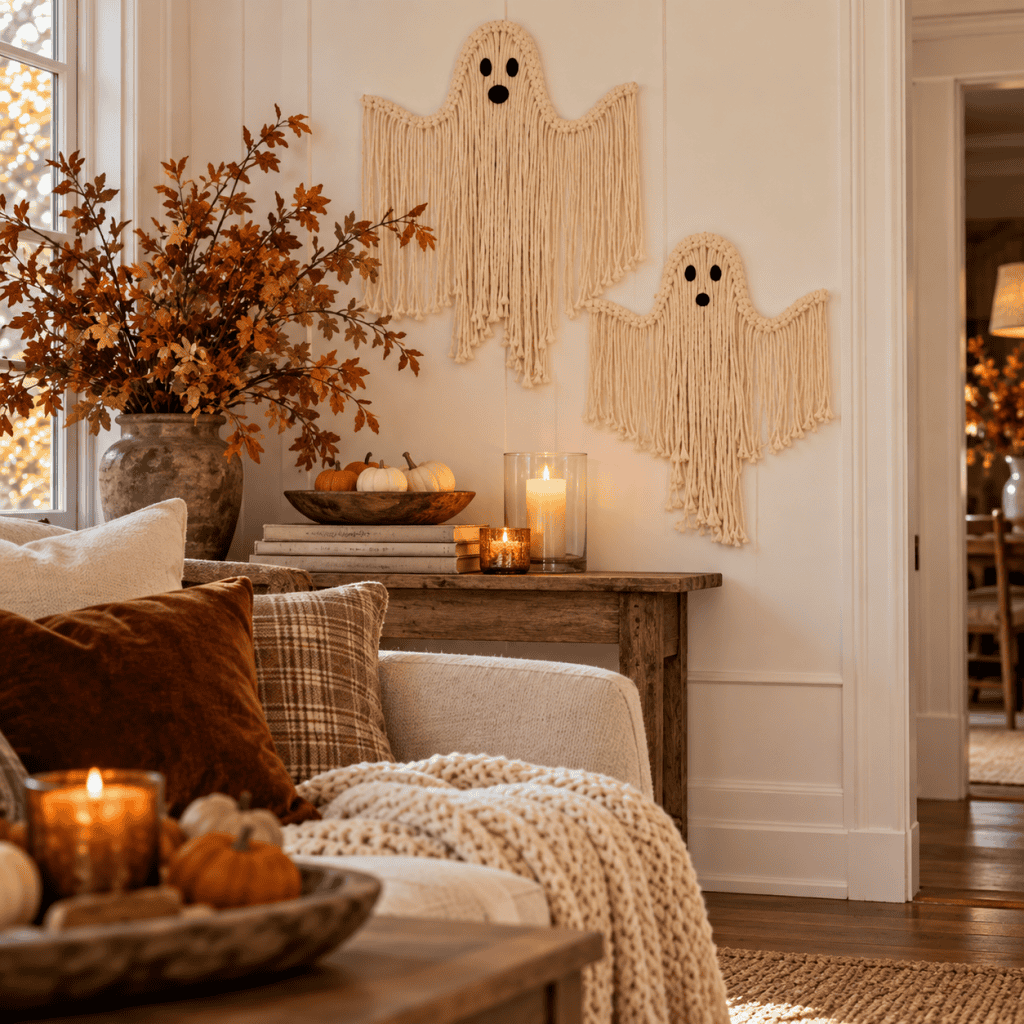
Try hanging your ghosts above a console table or bench and styling the area with pumpkins, candles, baskets, dried branches, and cozy textiles. You could also make one large ghost as a statement piece or combine two or three different sizes for a more playful display. Because the colors are so neutral, these macrame Halloween decorations work with farmhouse, boho, coastal, and traditional fall decor. Best of all, they’re a handmade decoration you can bring out again every October.
Looking for free knitting patterns? Browse this full collection of easy knitting patterns you can start today:
50 Free Knitting Patterns You’ll Actually Want to Make (Beginner-Friendly)
31 Free Hat Knitting Patterns for Everyone (Women, Men, Kids & Babies)
Fall Knitting Hub: Cozy Autumn Knitting Patterns for Beginners
Easy Scarf Knitting Patterns Hub: Cozy Beginner-Friendly Scarves You’ll Love to Make
Straight Needle Knitting Hub: Easy Flat Knitting Patterns for Beginners
Kids Knitting Pattern Hub: Easy & Fun Knitting Patterns for Babies, Toddlers & Kids
Easy Macrame Ghost DIY – Cute & Spooky Halloween Wall Decor
(As an Amazon associate, I earn from qualifying purchases)
Supplies needed:
5 mm natural colored macrame cord
Wire (you can use a wire hanger) Make sure the wire is heavy enough to support the weight of the macrame.
Scissors
Black felt with adhesive back

Create the Wire Ghost Shape
Cut a 24-inch length of wire. Using your hands, gently bend the wire into the shape of the top half of a ghost. Start by forming a rounded head in the center, then bend the wire outward on each side to create the shoulders and slightly raised arms. Don’t worry about making the shape perfectly symmetrical—a slightly uneven shape gives the finished macrame ghost more personality and a handmade look. Adjust the wire as needed until you’re happy with the overall shape.
Cut the Macrame Cord
Next, cut several strands of macrame cord approximately 40 inches long. The exact number of strands you’ll need will depend on the thickness of your cord and how full you want your ghost to look. For a thick, fluffy ghost with plenty of fringe, cut extra strands. You can always add more cord later if you notice any sparse areas.
Attach the Macrame Cord
Take one 40-inch strand of macrame cord and fold it in half, creating a loop at the center. Place this loop over the wire. Bring the two loose ends of the cord underneath the wire and pull them through the loop. Gently pull downward to tighten the cord securely around the wire.
Continue attaching the strands using this same method, placing them close together as you work your way around the ghost’s head, shoulders, and arms. Push the knots together so there aren’t any large gaps between the strands. Once the entire wire shape is covered, fluff and separate the macrame cord with your fingers to give the ghost a soft, full appearance.

Continue Adding the Macrame Cord
Keep adding new strands of macrame cord using the same technique, working your way around the entire wire frame. Slide each knot close to the one before it so the wire doesn’t show through. Continue until the wire is completely covered with macrame cord, including the head, shoulders, and arms.
As you work, occasionally fluff and separate the strands with your fingers. This will help you spot any thin areas that need an extra piece of cord. Don’t worry if the ends look uneven at this point—you’ll trim and shape the fringe later to give your macrame ghost its finished look.

Trim and Shape the Ghost
Once all of the macrame cords are securely attached and the wire frame is completely covered, it’s time to trim and shape your ghost. Lay the ghost flat and use a sharp pair of scissors to carefully trim the ends of the cord.
I trimmed the cords shorter underneath the arms and gradually left them longer as I worked toward the center of the body. Keeping the middle strands long creates that flowing, classic ghost shape and gives the bottom a soft, slightly tapered appearance.
Don’t worry about making every strand perfectly even. A little variation in length adds movement and texture to the finished ghost. Once you’re happy with the shape, fluff and separate the strands with your fingers and make any final trims as needed.

Add the Ghost’s Face
Cut two small circles from black adhesive felt for the eyes and one slightly larger circle for the mouth. You can keep the circles perfectly round or make them slightly uneven for a more playful, handmade look.
Remove the adhesive backing from each felt piece and press them firmly onto the macrame cord. Arrange the two eyes near the center of the head and position the mouth underneath. Press down for a few seconds to make sure the felt sticks securely to the cord.
Hang Your Macrame Ghost
To hang your finished ghost, simply place a small paneling nail in the wall and hook the top of the wire frame over the nail. The finished ghost is lightweight, so you don’t need any heavy-duty hanging hardware.
Fluff and arrange the macrame strands once the ghost is hanging, and trim any stray pieces if necessary. Your Easy Macrame Ghost DIY is finished and ready to add some cute, handmade Halloween charm to your home!.
More Easy Halloween DIYs
If you enjoyed making this Easy Macrame Ghost DIY, there are plenty of other simple Halloween projects you can use to give your home a fun, handmade touch. I love Halloween crafts that are easy enough to finish in an afternoon but still look cute enough to bring out year after year.
Try mixing macrame, yarn, fabric, felt, and inexpensive craft supplies to create decorations that coordinate with your existing fall decor. Neutral colors and natural textures are especially easy to style alongside pumpkins, candles, dried branches, and cozy autumn accents.
Here are a few more easy Halloween DIY ideas to try:
Easy No-Sew Ghost Costume DIY (Quick Last-Minute Halloween Costume)
Beanie Baby Costume DIY – Easy No-Sew Halloween Costume
DIY Pottery Barn-Inspired Gus the Ghost Pillow: Easy Tutorial with Minimal Sewing
Easy Metallic Leaf Wreath DIY for a Cozy Fall Front Door
DIY Jack Skellington Pillow Pottery Barn Dupe
How to Paint Faux Terracotta Pumpkins
Jack-O-Lantern Costume DIY- Easy to Sew!
Whether you prefer cute Halloween crafts or slightly spooky decorations, adding a few handmade pieces is an easy way to make your seasonal decor feel more personal.
More Easy Halloween Knitting & Crochet Patterns
If you enjoyed this Easy Macrame Ghost DIY, keep the spooky-season crafting going with some easy Halloween knitting and crochet patterns. Handmade ghosts, pumpkins, spiders, candy corn, and Halloween hats are fun ways to decorate your home or make something festive for kids. Many of these projects are beginner-friendly and small enough to finish quickly. Gina Michele
A few fun projects to try next include:
Peek-a-Boo Cat Pillow Crochet Pattern (Easy Halloween Décor)
Easy Halloween Spiders Crochet Pattern (Beginner-Friendly Spooky Décor)
Flat Knit Striped Pumpkins Knitting Pattern (Easy Fall Decor on Straight Needles)
Easy Plush Halloween Cat Crochet Pattern (Cute & Beginner-Friendly)
Baby Candy Corn Hat Knitting Pattern (Easy Knit in the Round)
Pumpkin Granny Square Throw Crochet Pattern (Cozy Fall Blanket)
Flat Knit Halloween Plush Spider Pattern (Easy & Beginner-Friendly)
Giant Crochet Pumpkin Pattern (Easy & Cozy Fall Decor)
For even more ideas, browse my Halloween Knitting Hub, where you’ll find spooky and cute knitting patterns for pumpkins, ghosts, hats, plush toys, and handmade Halloween decorations.
Easy Macrame Ghost DIY FAQ
Is this macrame ghost beginner-friendly?
Yes! This Easy Macrame Ghost DIY is a great project for beginners because you don’t need to know any complicated macrame knots. The cord is simply looped and secured around the wire frame, making it an easy introduction to working with macrame cord.
What kind of cord should I use?
Macrame cotton cord works best because it has a soft texture and hangs nicely. You can use different thicknesses depending on how chunky you want your ghost to look. Thicker cord will create a fuller ghost with fewer strands.
How long should I cut the macrame cord?
I cut my strands approximately 40 inches long. Since each strand is folded in half before attaching it to the wire, this gives you plenty of length for creating the flowing body of the ghost.
Can I make the ghost larger or smaller?
Absolutely. Simply adjust the length of the wire and macrame cord. A larger wire frame will create a statement-size ghost, while a smaller frame is perfect for making several ghosts to display together.
How do I make the ghost look fuller?
Add more strands of macrame cord and push the knots closely together along the wire. Once the frame is completely covered, use your fingers to separate and fluff the strands.
How should I display my macrame ghost?
Hang your ghost from a small paneling nail and style it with pumpkins, candles, fall branches, or other Halloween decorations. You can also make two or three different sizes for a cute grouping.
This Easy Macrame Ghost DIY is one of those Halloween crafts that looks impressive without requiring complicated supplies or techniques. I love the combination of the soft macrame texture and the simple ghost face—it’s spooky enough for Halloween while still fitting in beautifully with cozy fall decor.
Make one as a quick afternoon project or create several in different sizes for a whole family of ghosts. Either way, it’s an easy handmade Halloween decoration you can enjoy year after year.
✨ I’d love to see what you’re making! ✨
If you’ve tried one of my knitting patterns, crochet projects, DIYs, or recipes, share your finished project on Instagram and tag me so I can see it 💛
There’s nothing better than seeing your creations come to life—from cozy knits to delicious recipes and everything in between. It truly makes my day!
Tag me @ginamicheleny so I can share your work and cheer you on!
Happy making!